[1] Recipe #1, Spring pea dumplings (photo © Hannah Kaminsky | Bittersweet Blog.

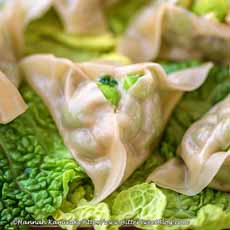
[2] Spring peas, also called English peas and green peas (photo © R.Khalil | Pexels).
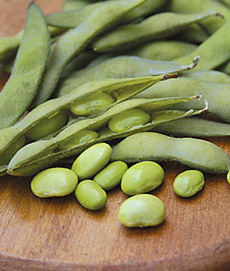
[3] Edamame, immature soybeans that are boiled or steamed (photo © Burpee).

[4] Savoy cabbage, the most elegant-looking of the cabbage varieties. It is named after the Savoy Region in France (photo © Monika Grabowska | Unsplash).

[5] Recipe #2, a tartine (open face sandwich) with spring peas and other spring ingredients from Chef Alain Ducasse (photo © All My Chefs).
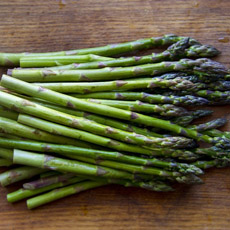
[6] Fresh asparagus for the tartine, recipe #2 (photo © Baldor Specialty Food).
[7]
[8] Baby arugula for the tartine (photo Baldor Specialty Food | Facebook).

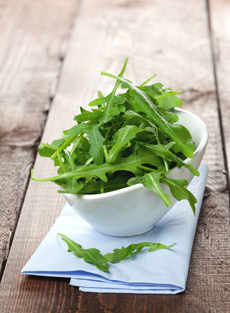
[9] If you can find a box of mixed-color cherry tomatoes, it will give your tartine that much more appeal (photo © Love Food Art | Pexels).
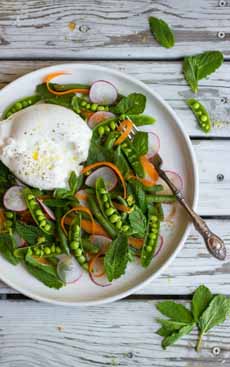
[10] Recipe #3: burrata salad—note that you can’t eat the shells of spring peas (photo © The Gourmet RD).
|
|
Spring pea season is fleeting. Enjoy as much of the tender green nuggets as you can: raw in salads or for snacking; or spring peas lightly steamed in recipes. (Spring peas are also known as English peas and garden peas.)
At breakfast—the meal least likely to include spring peas—you can use them to garnish eggs, avocado toast, or a bagel with cream cheese.
You can toss raw or cooked peas into plain Greek yogurt. Use them as a garnish, or mash them and stir them in as you would with preserves.
Moving on to snacks and appetizers: Here are three tasty recipes for appetizers, first courses, or snacking. For a special main course, check out this innovative approach to surf and turf: Squid With Bacon & Spring Peas.
The recipe for Spring Pea Or Edamame Potstickers follows.
The recipe for Spring Tartine is below.
The third recipe is below
> Here are more ways to use spring peas, and the history of peas.
RECIPE #1: SPRING PEA OR EDAMAME POTSTICKERS
Hannah Kaminsky adapted her easy edamame potstickers recipe (photo #1) to showcase spring peas. She mixes the legumes with hummus for extra protein, although you can skip the hummus and just fill the dumplings with peas).
Hannah notes:
“General folding advice still stands as a good guideline to follow when wrapping things up, but once you get those papery thin skins to stick, you’re pretty much golden.
If you’re less confident in your dumpling prowess, cut yourself a break and fold square dumpling wrappers in half instead. You’ll still get neat little triangles.”
If celebrate Purim, you can serve these as savory Haman’s Hats.
Ingredients For 15 Dumplings
1 cup shelled spring peas (photo #2) or edamame (photo #3)
1/3 cup edamame/pea hummus (mash them into regular hummus, to taste)
1 scallion, thinly sliced
1 clove garlic, finely minced
1/2 teaspoon fresh ginger, finely minced
1 teaspoon soy sauce, plus more for dipping
1 teaspoon toasted sesame oil
1/4 teaspoon ground cumin
Savoy cabbage (photo #4)
15 (3-inch) round wonton skins or gyoza wrappers*
Plus
Steaming basket or rack
Preparation
1. SET UP the steaming apparatus: Line a bamboo steamer or metal steam rack with leaves of savoy cabbage to prevent the dumplings from sticking to the bottom (and eat it afterward). Place the steamer in a large pot with water and heat the water to boiling; then reduce to simmer. Meanwhile…
2. MIX together the shelled edamame, hummus, scallion, garlic, ginger, soy sauce, sesame oil, and cumin, stirring thoroughly. Lay the dumpling wrappers on your work surface and place about 1 tablespoon of filling in the center of each. Run a lightly moistened finger around the entire perimeter and bring the sides together, forming a triangle. Tightly crimp the corners together with a firm pinch.
3. PLACE the dumplings on the cabbage leaves and cover the steamer or pot. Steam for 2 to 4 minutes, until the wrappers are translucent. Serve immediately, with additional soy sauce for dipping if desired.
________________
*You can typically find these either in the produce section near the tofu, or in the freezer aisle with other Asian ingredients.
________________
RECIPE #2: SPRING TARTINE
This recipe, courtesy of All My Chefs, is from the great Alain Ducasse.
It requires no particular cooking technique…or even cooking, except for blanching the asparagus and green beans. Otherwise, you just slice and assemble.
Serve them as a snack, a first course, or with a glass of wine.
Here’s more about tartines, French for open-face sandwiches.
This recipe was originally published in “Nature By Alain Ducasse” (Éditions Alain Ducasse).
Ingredients For 4 Servings
16 small green asparagus
A good handful† peas
About 10 radishes, washed and peeled
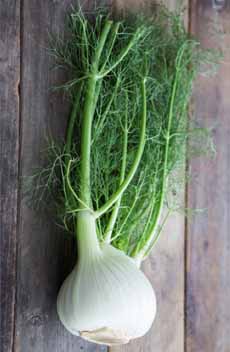
1/4 fennel bulb, rinsed
About 20 cherry tomatoes, rinsed and halved
A handful wild arugula, rinsed, patted dry, stalks removed (you can save them for salads)
4 slices multigrain or whole wheat bread
5-1/2 ounces (100g) Saint-Moret** or similar cream cheese
1-1/2 ounces (40g) grated parmesan cheese
Sea salt or flake salt
Freshly-ground black pepper
Preparation
1. BRING a saucepan of salted water to a boil, and prepare a bowl with water and ice cubes.
2. CUT the tips of the asparagus into approximately 2-inch (5-6 cm) pieces. Rinse and immerse in the boiling water with the peas.
3. DRAIN and immediately plunge them into the ice water to keep their color. Leave for 2 minutes, then drain with a slotted spoon and lay on a dry tea towel. (TIP: We put the vegetables into a strainer. It’s easy to lift the strainer to drain, then plunge it into the ice bath.)
4. SLICE thee radishes into fine rounds (about 3 mm) with a mandoline (we used a knife). Slice the fennel into thin slivers of the same size.
5. ASSEMBLE: Spread the bread with cream cheese and arrange the vegetables on top. Sprinkle with parmesan, a bit of crunchy salt and some pepper.
________________
**Saint-Môret is the leading natural fresh cheese in France. While it has a different flavor and texture from American cream cheese, it is the closest comparison. We actually used spreadable goat cheese: We love the extra tang.
________________
RECIPE #3: SPRING PEAS & BURRATA SALAD
We adapted this recipe from Julie Andrews, The Gourmet RD. It takes just 10 minutes to prep. We could eat it every day.
Her recipe uses sugar snap peas. We added spring peas as well.
You can eat the pods (shells) of sugar snap peas, but it depends on the age of the pea. Older sugar snap peas tend to be more fibrous, making the pod hard to chew. Eat one, then decide.
Unlike sugar snap peas or snow peas, the fibrous pods of English peas cannot be eaten—although they can be saved and used in a vegetable stock (freeze until needed).
TIPS:
Shell spring peas immediately before cooking. Break off the stem and pull the fibrous string down the length of the pod.
If you can’t find burrata (we get ours at Trader Joe’s), use a mozzarella ball. And…we serve 1/2 ball with each salad.
If you have fresh tarragon on hand, toss in some leaves.
As a change, we like to substitute balsamic vinegar for the honey.
Ingredients For 4 First Courses
1 medium lemon, zested and juiced
1 tablespoon honey
3 tablespoons extra-virgin olive oil
Salt and pepper
1/4 cups fresh basil leaves, chopped
1/4 cups fresh mint, chopped
1 cup sugar snap peas, trimmed, strings removed
1 cup green beans, trimmed
1 cup carrots (thinly sliced
2 cups baby arugula
1 ball burrata (substitute fresh mozzarella)
1/2 cups pistachios (roughly chopped
For serving: toasted sourdough bread
Preparation
1. WHISK together fresh lemon zest and juice, honey, olive oil, and a dash of salt and pepper in a large bowl. Taste and adjust the seasoning, as necessary.
2. ADD the peas, green beans, carrots, arugula, basil, and mint to the bowl, and toss with the dressing.
3. QUARTER or halve the ball of burrata and arrange it on a platter. Top with salad, sprinkle with additional coarse salt and ground black pepper, and garnish with pistachios.
MORE BURRATA
> More burrata salad recipes.
> Dessert burrata recipe.
> The history of burrata.
|