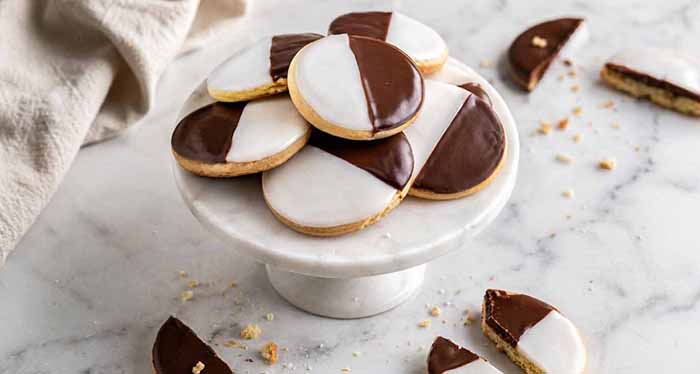
Black And White Cookie Recipe & History For Black & White Cookie Day
|
|
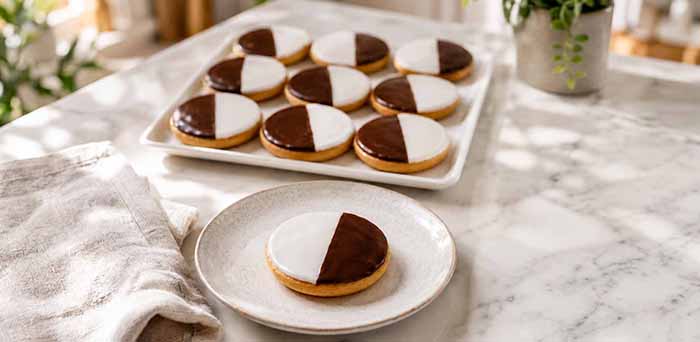
Updated September 2026 Oh, what a great reason to eat black and white cookies‡: September 14th is National Black And White Cookie Day (also called half-moon cookies, but see (see Section 4). One of our favorite cookies since childhood, these large cake-like cookies are iced, half in vanilla fondant or boiled icing, half in chocolate icing. Today, most bakers use boiled icing; it’s easier and less expensive than fondant. The cake is made with vanilla extract and ideally, a teeny hint of almond extract in it. The icing should have just enough sugar, not too much.
A good black and white cookie is fresh, so that the yellow cake is not hard* (it dries out easily). A tip: If you’re buying them in a store where you help yourself, place a finger on the underside and press. It should be springy. Below: > The recipe for black and white cookies. > Pick your colors—any colors! > The history of black and white cookie. > Half-moon cookies vs. black and white cookies. Elsewhere on The Nibble: > The 10 basic types of cookies. > The different types of cookies, a photo glossary. > The year’s 44 cookie holidays. Wouldn’t this be a fun tea party idea? Or an ice-your-own party, with different colors of icing? Ingredients For the Cookies
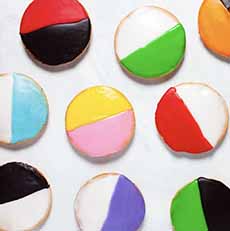
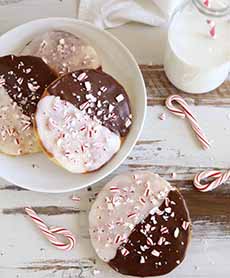
Make The Cookies 1. PREHEAT the oven to 350°F (175°C). Line two baking sheets with parchment paper. 2. COMBINE the dry ingredients in a medium bowl. Whisk together the flour, baking powder, baking soda, and salt. Set aside. 3. CREAM the butter and sugar in a large bowl or the bowl of a stand mixer with a paddle attachment. Beat until the mixture is light and fluffy, about 2-3 minutes. (This step is crucial for a tender, cake-like cookie.) 4. ADD the eggs one at a time, beating well after each addition. Mix in the vanilla and lemon extracts. 5. REDUCE the mixer speed to low. Add half of the flour mixture to the butter mixture and mix until just combined. Add the sour cream and blend, then add the remaining flour mixture and mix until no streaks of flour remain. Do not overmix or you’ll get a tough cookie (no pun intended). The dough will be thick. 6. DROP dollops of the dough onto the prepared baking sheets, using a 1/4-cup measure or a large cookie scoop. Leave at least 3-4 inches between drops as they will spread. Gently flatten the mounds of dough into thick disks (about 3 inches in diameter) with a spatula or with wet fingers. 7. BAKE one sheet at a time on the center rack for 15-18 minutes, or until the edges are lightly golden and the centers spring back when gently touched. Do not overbake. 8. LET the cookies cool on the baking sheet for a few minutes before transferring them to a wire rack to cool completely. The bottoms of the cookies will be flat and they become the top for the icing. Make The Icing 1. MAKE the vanilla icing. In a medium bowl, whisk together the sifted confectioners’ sugar, 2 tablespoons of milk, light corn syrup, and vanilla extract until smooth. The icing should be thick but spreadable. (If it’s too thick, add more milk, one teaspoon at a time. If it’s too thin, add more powdered sugar.) 2. DIVIDE the icing in half into two separate bowls. Take one of the completely cooled cookies, flip it over so the flat side is up, and use a small offset spatula or butter knife to spread a thin, smooth layer of the white icing over one half of the cookie. Place the cookie on a wire rack and repeat with the remaining cookies. Allow the white icing to set for at least 30 minutes, or until a skin forms. 3. MAKE the Chocolate Icing: To the second bowl of icing, add the cocoa powder and 1-2 tablespoons of milk. Whisk until smooth, shiny, and the same spreadable consistency as the vanilla icing. Add more milk or powdered sugar as needed to adjust the thickness. Finish icing: Spread the chocolate icing over the un-iced half of each cookie. Allow the icing to set completely for a couple of hours before serving or storing. It’s been a bit of work, but you’re now ready to enjoy the iconic New York Black and White Cookies. A black-and-white isn’t always iced with chocolate and vanilla. Sometimes colored icing is substituted for the chocolate. Examples:
You can also use the icing to celebrate baby reveals, team colors, and wedding colors, you-name-it (photo #6). Or if your crowd comprises fashionistas, how about this year’s fashion trend? The fashion and design industries talk about “annual colors,” which usually refers to official “Color of the Year” announcements from forecasting authorities like the Pantone Color Institute or major trend agencies like WGSN/Coloro, as well as seasonal runway trends. See the chart below the photo for inspiration. |
|
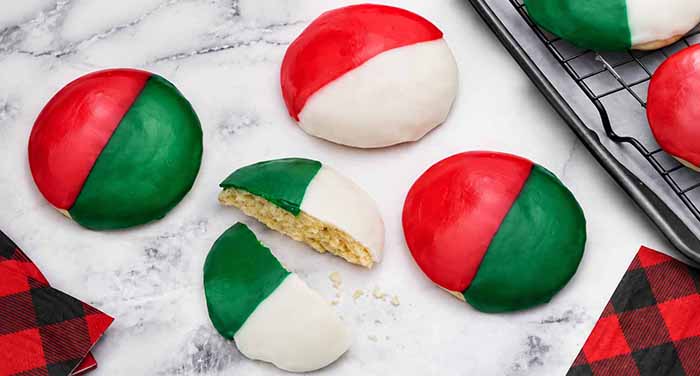 [9] Christmas black-and whites (or should we call them red-and-greens?) Here’s the recipe (photo © Go Bold With Butter). 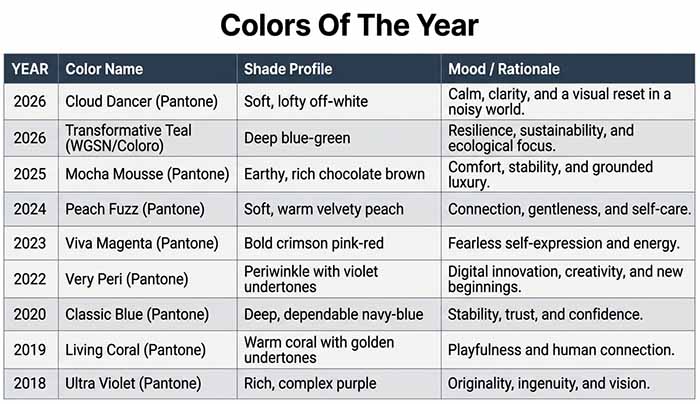 [10] Colors Of The Year Chart by Gemini. 3. BLACK & WHITE COOKIE HISTORY The black and white cookie, a New York City favorite for generations, has an uncertain origin, but appears to have emerged in New York City in the early 1900s. The earliest printed reference we’ve found is a testimony from a third-generation baker at Glaser’s Bakery in Yorkville, a German neighborhood on the Upper East Side, who noted that the bakery had made black-and-white cookies since it opened in 1902 (source). Glaser’s black-and-whites were a dry but soft, cakey base made with buttermilk or sour cream. They were topped with fondant—chocolate on one side, vanilla on the other. Glaser’s is credited with popularizing (if not inventing) the black and white cookie. Is it possible that the bakery founder, a Bavarian immigrant named John Herbert Glaser, brought the idea with him from Germany? Well…in Germany, black and white cookies are called Amerikaner (American) cookies [source]. Or is it the other way around? According to one source, Amerikaners came to Germany from the U.S., hence the name.
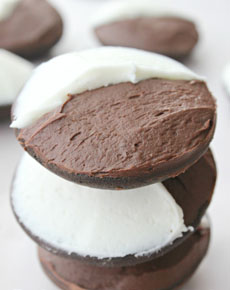
(continue below photo) The cookie became especially popular in Jewish bakeries and delis throughout New York during the mid-20th century. Alas, Glaser’s Bakery, long an institution on the Upper East Side of Manhattan, closed its doors after 116 years (on July 1, 2018). The third-generation baker, Herb Glaser, was ready to retire. The cookie gained national fame, especially after being featured in the 1994 “Seinfeld” episode, “The Dinner Party,” in which Jerry holds up a black and white cookie and says, “Look to the cookie!” as a metaphor for racial harmony. After this moment, black and whites began to appear in bakeries and supermarkets across the country. The half-moon cookies look just like black and white cookies. In our youth, black and whites were also called half-moon cookies. In Upstate New York and parts of the Midwest, half-moon cookies are black and white in color, but they usually have fluffy frosting, not smooth fondant, and a domed, more cakey base (photo #9). The first print reference we found to a half- moon cookies is to Hemstrought’s Bakery in Utica, New York, which started baking half-moons around 1925. Did someone see the black and white in New York City and bring the idea to Utica, some 240 miles away? Possibly? Probably?
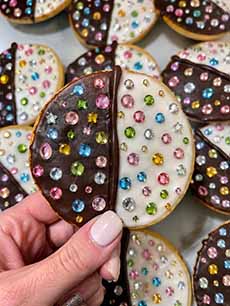
*You may see the cake referred to as dry-style. This means a tight crumb, with extra flour added—not hard cake. †A drop cake is an old term for a small cake made by dropping thick batter from a spoon into hot, deep fat; or baked in the oven on a well-buttered pan. Here’s a recipe for a deep fat fried drop cake. ‡Why the different hyphenations? Black-and-white cookie is typically hyphenated when used as a compound modifier before a noun (e.g., black-and-white cookie recipe), but when referring to the treat itself as a standalone noun, standard usage varies by style guide. Unhyphenated is the most common for food writing. Major culinary publications and dictionaries generally spell it as black and white cookie (or simply black and white) when using it as a noun phrase. On the other hand, half-moon is a standard dictionary term that carries a hyphen regardless of how it is used, whether it is the subject of the sentence or an adjective. Why ask why? ‡‡Edible rhinestones and other jewels: You can find these online as “edible isomalt gems,” “edible sugar diamonds,” “edible jewel candy,” and “edible rhinestone cake decorations.” For cookies like the Dana’s Bakery image, choose small, flat-backed isomalt gems or sugar “diamonds.” Attach them after baking, onto fully set icing, with a small dab of royal icing, thick glaze, or edible glue. Do not bake them: heat can melt or dull them. Be sure the product is explicitly labeled “edible” or “food grade.” Craft-store rhinestones and many “cake bling” decorations are decorative only, even if they are sold near baking supplies. Two sources are BakeDeco’s edible-jewels collection (which includes hard, glasslike isomalt gems in clear and colored faceted styles) and Etsy’s edible-gems listings (especially useful for custom colors, sizes, and handmade-looking gems). It’s easy to find edible pearls in call colors in most cake-decorating departments. CHECK OUT WHAT’S HAPPENING ON OUR HOME PAGE, THENIBBLE.COM. |
||