|
On July 16, 2018, the city of Buffalo, New York celebrated the first National Blue Cheese Dressing Day, honoring a “special sauce” that’s combined with chicken wings, celery and hot sauce to create Buffalo Wings.
If you’re a Buffalo Wings fan, also note that:
National Blue Cheese Day is October 18th.
National Hot Sauce Day is November 5th.
National Chicken Wing Day is On July 29th (there is currently no National Buffalo Wings Day).
There’s a great blue cheese dressing recipe below.
Blue cheese dressing had a distinguished life before the creation of Buffalo Wings in 1964.
The history of blue cheese dates to the 7th century to a cave outside the village of Roquefort in France. It took until the 19th century for creamy blue cheese dressing to appear. There’s lots about both below.
Below:
> The history of blue cheese and blue cheese dressing.
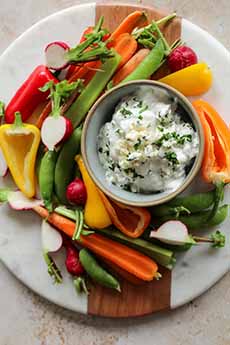
> Point Reyes Farmstead’s famous blue cheese dressing and dip recipe.
> More uses for blue cheese dressing.
Elsewhere on The Nibble:
> The history of cheese: a photo glossary.
> The history of cheese.
> Great American-crafted blue cheeses.
> More about the blues.
> The year’s 30 cheese holidays.
A BRIEF HISTORY OF BLUE CHEESE
Blue cheeses aren’t blue, of course—they’re dotted with veins that are dark blue, blue-green, green or bluish-black.
The veins are Penicillium molds—cousins of the antibiotic. The molds are also relatives of the bloomy mold that covers Bries and Camemberts.
Blue cheese was an accidental discovery.
The documented history of blue cheese begins in the 7th century to a cave outside the village of Roquefort in France.
The legend has is that a distracted young man forgot his lunch of bread and sheep’s milk cheese in the cave (to romantics reading this, the details are that the shepherd saw a beautiful girl).
When he returned months later, the mold (Penicillium roqueforti) had transformed his cheese into what we now known as Roquefort.
Whatever the legend, blue cheese is believed to have been discovered by accident because cheeses were stored at natural temperatures and in the moisture-controlled caves, which are favorable environments for many varieties of harmless mold.
Not everyone could access a cave. But fortunately, blue mold is abundant in the air. It grows rapidly and in proper conditions, it out-competes most other molds in the air [source].
Give it a humid, damp environment with plenty of oxygen—including barns and cellars, where cheese was often stored—and you have the ideal environment for blue mold to grow.
Once cheese makers realized what was happening, they made pinholes in the cheeses to help the mold penetrate more easily. The practice continues today.
Of the three best-known blues, Gorgonzola is known to have been created around 879 C.E.
Stilton is a relatively new addition, becoming popular sometime in the early 1700s. Subsequently, numerous varieties of blue cheese were created, and still are.
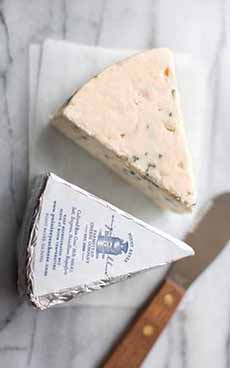
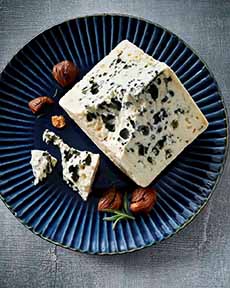
In the 20th century alone, Cambozola and Danablu were created to fill the demand for Roquefort-style cheeses that were more affordable. The double cream blue in photo #7 debuted in 1969.
Great American cheese makers like Point Reyes Farmstead and Rogue Creamery created their cheeses in the late 20th and early 21st centuries.
And cheese makers in the U.S. and Europe continue to work on blue cheese recipes to please blue cheese lovers and entice new ones.
What About Blue Cheese Dressing?
Creamy salad dressings first started to appear in recognizable form in the late 1800s, the end of the 19th century.
Before then, salad dressings were usually simple oil-and-vinegar mixtures, like vinaigrettes.
In the 1700s and 1800s, cooks were already making richer “composed” dressings incorporating ingredients like cream, egg yolks, and mustard into oil. Alas, no one can determine when the first cook crumbled or mashed blue cheese into the dressing or sauce.
The turning point was the rise of mayonnaise-based dressings in the 19th century, especially in French, and later, American cooking (the history of mayonnaise).
By the early 1900s, creamy dressings—mayonnaise dressings, boiled dressing, Thousand Island dressing, and later ranch-style (buttermilk) dressings became popular in the U.S.
These days, most Americans buy store-bought dressings. The most popular creamy dressings, in order of sales, are Ranch, Caesar, Thousand Island, Blue Cheese, Creamy French/Catalina, Creamy Poppyseed, and Green Goddess.
POINT REYES FARM’S BLUE CHEESE DRESSING & DIP
One of our favorite blue cheeses is Original Blue from Point Reyes Farmstead Cheese in Marin County, California.
Some 15 years ago, they created a blue cheese dressing with it, and it was magnificent.
Alas, it proved impractical to produce over the long term, and it was discontinued. But thankfully, they made the recipe available.
You can substitute a different blue cheese, but as with all cooking, the better the ingredients, the better the finished result.
Even if you don’t use it in dressing, definitely enjoy Original Blue on your cheese plate.
Ingredients For Approximately 2-1/2 Cups
1 cup crumbled Point Reyes Original Blue (about 4 ounces)
1 cup mayonnaise
1/2 cup buttermilk
1 shallot, peeled
1 tablespoon freshly grated lemon zest
1/2 teaspoon kosher salt
2 tablespoons minced fresh flat-leaf parsley
freshly ground black pepper
|