THE NIBBLE BLOG: Products, Recipes & Trends In Specialty Foods


Also visit our main website, TheNibble.com.

Macadamia Nut Fudge Recipe For National Macadamia Nut Day

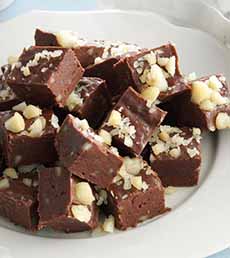
Macadamia Nut Fudge Recipe
[1] Easy-to-make chocolate macadamia fudge (photo © Taste of Home).

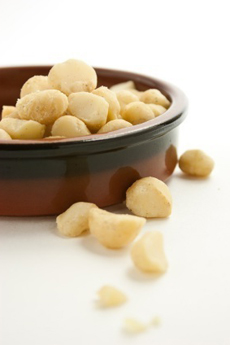
Macadamia Nuts In Bowl
[2] Macadamia nuts shelled.

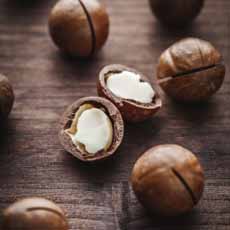
Macadamia Nuts In Shell
[3] Macadamia nuts in the shell.

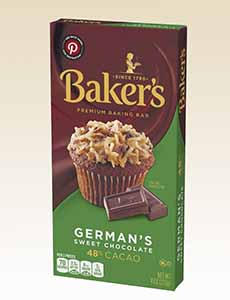
Bar Of Baker's German's Chocolate
[4] Baker’s German’s Sweet Chocolate. This sweeter variety of baking chocolate was created in 1852 by Sam German, an Englishman who worked in the U.S. for Walter Baker & Company. The sweet chocolate gave its name to German Chocolate Cake. German’s Sweet Chocolate has nothing to do with Germany (photo © Kraft Heinz Foods).


We just whipped up an easy batch of macadamia nut fudge for National Macadamia Nut Day, September 4th. The recipe is from Vicki Fioranelli of Cleveland, Mississippi, with thanks to Taste Of Home which shared the recipe with us.

> The history of macadamia nuts.

> The history of fudge.
 
 
RECIPE: EASY MACADAMIA NUT FUDGE RECIPE

 
Ingredients

  • 2 teaspoons plus 1/2 cup butter, divided
  • 4-1/2 cups sugar
  • 1 can (12 ounces) evaporated milk
  • 3 cups chopped macadamia nuts, divided
  • 12 ounces German sweet chocolate, chopped
  • 1 package (12 ounces) semisweet chocolate chips
  • 1 jar (7 ounces) marshmallow creme
  • 2 teaspoons vanilla extract
  • Optional: 1/2 teaspoon salt*
  •  
    Preparation

    1. LINE two 9-inch-square pans with foil; drape some of the foil over two opposite sides to use as “handles” later. Butter the foil with 2 teaspoons of butter. Set aside.

    2. COMBINE the sugar, milk, and remaining butter in a large, heavy saucepan. Bring to a gentle boil. Cook for 5 minutes, stirring constantly.

    3. REMOVE from the heat; stir in 2 cups of the nuts, the chopped chocolate, chocolate chips, marshmallow creme, vanilla extract, and, if desired, the salt.

    4. POUR the fudge into the prepared pans. Sprinkle the remaining nuts over the top and press in lightly. Refrigerate until firm.

    5. TO REMOVE: Using the foil, lift the fudge out of the pans. Discard the foil. Cut the fudge into 1-inch squares. Store in an airtight container.

    Nutrition Facts For 1 Piece: 72 calories, 4g fat (1g saturated fat), 2mg cholesterol, 14mg sodium, 10g carbohydrate (9g sugars, 0 fiber), 1g protein.
     
     
    20 MORE MACADAMIA NUT RECIPES

    Savory Recipes

  • Cheesecake Factory Luau Salad
  • Dukkah Australian Spice Blend For Dip
  • Fish Fillets With Macadamia Butter
  • Fish Teriyaki Bowl
  • Hawaiian Salsa
  • Macadamia Cilantro Pesto
  • Macadamia-Crusted Fish
  • Macadamia Pesto Mix & Match
  • Pineapple Mango Chicken With Macadamia Rice
  • Poached Pears On Frisée With Macadamia Crusted Buttermilk Blue Affinée
  •  
     
    Sweet Recipes

  • Brown Sugar Macadamia Chocolate Chunk Cookies
  • Chocolate Caramel Shortbread With Sea Salt
  • Chocolate-Covered Nuts
  • Chunky Oatmeal Macadamia Chocolate Chip Cookies With Coconut
  • Cranberry-Macadamia Bars
  • Grilled Pineapple Ice Cream Sundae
  • Hummingbird Coffee Cake
  • Island Sea Turtles
  • Piña Colada Mousse
  • Piña Colada Pizza
  •  
    ________________

    *Salt accentuates sweetness and suppresses bitterness. Just a touch brings out the flavor of chocolate and other foods.


    CHECK OUT WHAT’S HAPPENING ON OUR HOME PAGE, THENIBBLE.COM.


    Comments off

    Vegan Bacon Recipe, Made From Shiitake Mushrooms

    We love bacon, but not the nitrates and nitrates*, salts commonly used to cure meat. So we tried vegan bacon, which doesn’t include either.

    We’ve enjoyed some tasty vegan bacon like Hooray Bacon, which is based on shiitake mushrooms.

    But our colleague Hannah Kaminsky created her own recipe for shiitake-based bacon and has shared it with us.

    “Crispy, caramelized shiitake caps retain a hearty, chewy bite after slowly roasting the oven,” she says. “Infused with richly savory, smoky flavors, shiitake mushrooms make even better bacon than meat.”

    “Unlike conventional options, there’s no cholesterol, very little fat, plenty of fiber, and zero cruelty.”

    The first Saturday in September is International Bacon Day, and we spent just 10 minutes prepping the ingredients.

    Then comes the soak: The dehydrated shiitakes soak in the broth for 8 hours to 24 hours or longer (the longer the soak, the better the flavor).

    So if you want shiitake bacon and eggs or a lunch of SBLT (shiitake bacon, lettuce, and tomato) or a “bacon cheeseburger,” start the night before.

    > The different types of mushrooms.

    > The history of mushrooms.
     
     
    RECIPE: VEGAN SHIITAKE MUSHROOM BACON

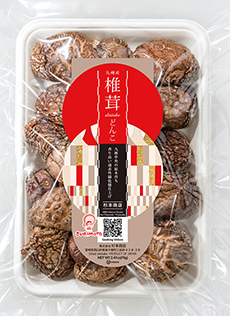
    Hannah prefers the Sugimoto brand of dried shiitake mushrooms, which are naturally grown in Japan’s forests (you can see a video on the website). You can find the brand in Asian markets or online.
     
    Ingredients

  • 2 cups water
  • 1/4 cup soy sauce
  • 2 tablespoons olive oil
  • 1 tablespoon liquid smoke
  • 1 tablespoon maple syrup
  • 1/2 teaspoon smoked paprika
  • 1/4 teaspoon instant coffee powder
  • 1/4 teaspoon freshly ground black pepper
  • 1 (2.47-Ounce) package dried Sugimoto koshin† shiitake mushrooms (or substitute)
  •  
    Preparation

    1. WHISK together the water, soy sauce, olive oil, liquid smoke, maple syrup, paprika, instant coffee, and black pepper in a medium bowl. Add the dried shiitakes and stir thoroughly to combine.

    2. TAMP down a piece of plastic wrap directly on the surface, to cover and keep all the mushrooms submerged in the liquid. Refrigerate and let them soak for at least 8 hours. Longer is better; 24 hours would be ideal.

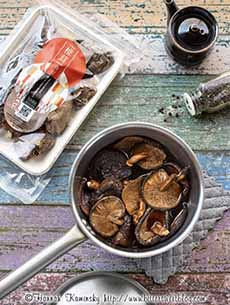
    3. REMOVE the plastic and transfer the contents—mushrooms and liquid together—to a small saucepan (photo #3). Warm over medium heat until just boiling. Let rest until cool. Once the mushrooms are fully hydrated and cool enough to handle…

    4. PREHEAT the oven to 300°F and line a sheet pan with parchment paper. Remove the shiitakes from the brine, remove the stems and save them for another recipe. You can also save the brine as a poaching liquid. Or heat it as hot broth.

    5. SLICE the caps into 1-cm wide strips. Spread them into as even a layer as possible on the baking sheet, without any pieces overlapping. Bake for about 1 hour and 15 minutes, carefully flipping the strips every 15 minutes or so to keep the entire batch cooking evenly.

    6. COOK until the mushrooms are dry to the touch and highly aromatic. Straight out of the oven, the mushrooms will still be slightly soft to the touch but will crisp up nicely once cool. Let cool completely.

    7. STORE at room temperature in an airtight container, for up to two weeks.
     
     
    HOW TO USE SHIITAKE BACON

    You can keep them in short strips, roughly chop them into bacon bits, or grind them into a fine powder to use as a savory sprinkle. Just a few of Hannah’s favorite ways to use shiitake bacon include:

  • Avocado toast (photo #1)
  • Baked potatoes
  • Bloody Marys
  • BLT and other sandwiches
  • Broccoli and cheese soup
  • Burgers
  • Charcuterie boards
  • Cheese balls
  • Eggs and tofu scrambles
  • Mac and cheese
  • Nibbling
  • Pizza
  • Popcorn
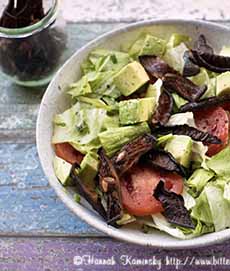
  • Salads (photo #2)
  •  

    Vegan Shiitake Bacon On Avocado Toast
    [1] (recipe and photos #1 through #4 © Hannah Kaminsky | Bittersweet Blog).

    Vegan Shiitake Bacon On A Salad
    [2] Toss on a salad, top a burger or sandwich..

    Rehydrated Shiitake Mushrooms
    [3] The dried mushrooms are reconstituted in a flavorful broth that imparts the taste of bacon.

    Vegan Shiitake Bacon, Baked
    [4] Right out of the oven.

    Sugimoto Brand Dried Shiitake Mushrooms
    [5] Sugimoto brand dried shiitake mushrooms. You can find them on Amazon (photo © Sugimoto).

     
    ________________

    *While nitrates and nitrites are not themselves carcinogenic, they have the potential to react with other compounds to form carcinogens, during the processing of food [source].

    †This particular shiitake mushroom is called “koshin” and is picked after the cap of the mushroom blooms into the umbrella.


    CHECK OUT WHAT’S HAPPENING ON OUR HOME PAGE, THENIBBLE.COM.


    Comments off

    Easy Heirloom Tomato & Ricotta Pizza Recipe

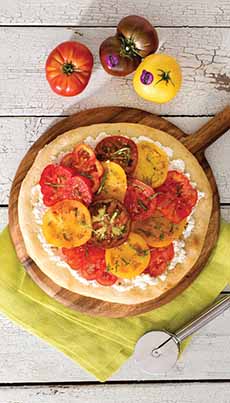
    Heirloom Tomato&  Ricotta Pizza Recipe
    [1] Heirloom tomato and ricotta pizza. The recipe is below (photo © Southern Selects).

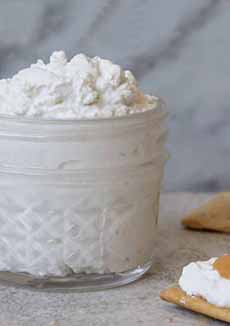
    A Crock Of Fresh Ricotta Cheese
    [2] Fresh ricotta (photo © Murray’s Cheese).

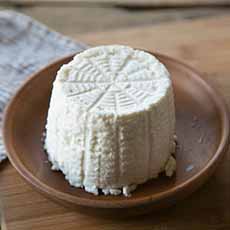
    Ricotta Salata In Truncated Cone Form
    [3] Fresh ricotta can be molded into a cake for a nice presentation (photo © Good Eggs ).

    A Slice Of Ricotta Salata Cut From A Wheel
    [4] A slice of ricotta salata cut from a wheel (photo © iGourmet).

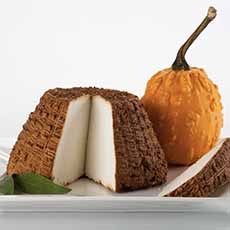
    Ricotta Affumicata, Smoked Ricotta
    [5] Ricotta affumicata, smoked. It is molded into a truncated cone shape (photos #5 and #6 © Abbbasciano).

    Ricotta Affumicata, Smoked Ricotta
    [6] The ricotta affumicato cheeses in the smoker.


    Before summer’s heirloom tomatoes fade into memory until next year, here’s an easy pizza recipe from Southern Selects, growers of fine produce.

    This is a partially cooked pizza: Only the crust is baked. The other ingredients are layered on top of the cooked crust in their fresh state (photo #1).

    It may be different, but it’s delicious.

    > The history of pizza.

    > The history of tomatoes.

    > The history of ricotta cheese is below.
     
     
    RECIPE: HEIRLOOM TOMATO PIZZA WITH RICOTTA CHEESE

    If you’re not a fan of ricotta, you can substitute fresh goat cheese, diced from the log.
     
    Ingredients

  • 3 large heirloom tomatoes, thinly sliced
  • 1 cup ricotta cheese
  • 1 package fresh ready-made pizza dough
  • 2 tablespoon olive oil
  • ½ teaspoon garlic powder
  • 1 teaspoon fresh or dry oregano
  • 1 tablespoon fresh basil, chopped (we used much more)
  • Salt and pepper to taste
  • To roll the crust: whole wheat flour (substitute another flour)
  • Optional for serving: peppermill, oregano, chile flakes
  •  
    Preparation

    1. PREHEAT the oven to 400°F. Sprinkle whole wheat flour onto the countertop and roll out the dough into a round circle, about 1 inch thick.

    2. PLACE the dough on a pizza pan and use a fork to poke holes in the crust all over. Bake for 15 minutes or until the crust is golden. Remove it from the oven and allow it to cool for 10 minutes.

    3. WHISK together in a small bowl the ricotta, garlic powder, oregano, salt, and pepper. Spread the cheese mixture onto the dough and place the tomato slices on top. Sprinkle with basil and serve, with more oregano and a peppermill or chile flakes, as desired.
     
     
    THE HISTORY OF RICOTTA CHEESE

    Ricotta cheese is so old that, like yogurt, it predates written history.

    Ricotta is made from the whey leftover from regular cheesemaking. The whey is re-cooked into the fresh cheese we know as ricotta (which is the Italian word for “re-cooked”).

    Some scholars believe that the practice of reusing leftover whey started with cheesemaking itself. No one could afford to waste any drop of food.

    The Neolithic* humans who invented agriculture at the end of the Stone Age were skilled farmers.

    The men tilled the fields and saw to the herds. The women were responsible for dairying, cooking, and making cheese and beer.

    It is likely that some Neolithic woman in the Fertile Crescent discovered that cooking the whey leftover from cheese-making yielded…more cheese.

    When the whey is boiled again, the remaining keratin proteins in it create solids that float to the top, clumping together in a form that can be skimmed off (photo #1).

    The Neolithic period was followed by the Bronze Age. Archaeological evidence dates the production of ricotta on the Italian peninsula to the second millennium B.C.E.

    Most scholars agree that ricotta came to Italy by way of Sicily, and was likely first made from sheep’s milk (sheep were the mainstay of the island).

    Over time, the “recipe” for ricotta spread north to the rest of Italy. Its sweet, milky, fresh flavor and soft, creamy consistency was delicious and versatile for cooking or enjoying in its plain state.

    In addition to sheep’s milk, ricotta was made from the milk of cows, goats, and water buffaloes, depending on the region.

    By the height of the Holy Roman Empire, ricotta was widespread throughout Rome and beyond, in the form in which you find it today. The process is the same—boiling the whey and skimming the curds [source].

    However, the fresh ricotta was very perishable. Over time, cheesemakers learned how to turn fresh ricotta into two variations with longer staying power: ricotta salata and ricotta affumicata.

  • Ricotta salata is salted (salata means salted in Italian). The fresh ricotta is lightly salted, packed into round molds, and then aged for 60 to 90 days. It turns into a crumbly solid form (photo #4), while still retaining its milky flavors (saltiness replaces the sweetness of the fresh cheese).
  • Ricotta affumicata (affumicata means smoked) is lightly salted and packed into molds of truncated cone shape (photos #5 and #6). The curds are aged, and then smoked and matured for about a month.
  •  
    It’s not easy to find ricotta affumicata in the U.S. We couldn’t even find it on Amazon!

    But if you happen to be in Italy, and can bring some back, your cheese-loving friends would be delighted to join you and the affumicata in a tasting experience along with fresh ricotta and ricotta salata.

     
    ________________

    *The Stone Age was a broad prehistoric period during which man used stone to make tools with an edge, a point, or a percussion surface. The Neolithic period, or New Stone Age, is the final part of the Stone Age. It spanned 10,000 B.C.E. to 4,500 B.C.E. The last great ice age ended, and the nomadic hunter-gatherers settled down to raise their food via farming. The earliest farmers lived in the Fertile Crescent, a region that included modern-day western Iran, Iraq, Israel, Jordan, Palestine, southeastern Turkey, and Syria. Here’s more about it. The Neolithic was followed by the Bronze Age, which saw the development of metal tools.


    CHECK OUT WHAT’S HAPPENING ON OUR HOME PAGE, THENIBBLE.COM.


    Comments off


    © Copyright 2005-2026 Lifestyle Direct, Inc. All rights reserved. All images are copyrighted to their respective owners.