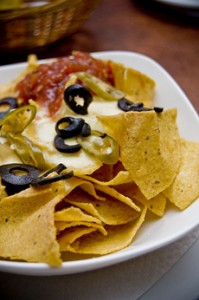
[1] Classic nachos (photo by Chee Hong | Wikipedia).
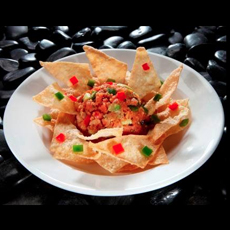
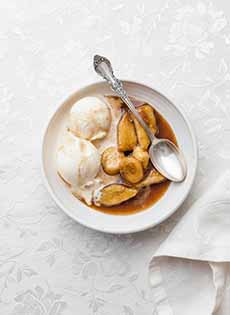
[2] International style: Japanese nachos, made with rice chips and spicy tuna (photo © RA Sushi).
|
|
Today is National Nacho Day, and our tip is: Go where no Mexican nacho has gone.
The appeal of Tex-Mex nachos—crunchy, creamy, spicy—cannot be denied.
But how about fusion nachos, with culinary accents (crunchy, creamy, spicy) from the world’s favorite cuisines? Below you’ll find 13 types of chips in addition to classic tortilla chips, plus recipes for 15 different “international” nachos beyond Mexican. But first…
THE HISTORY OF NACHOS
Nachos are an example of necessity being the mother of invention.
As the story goes, in 1943 a group of Army wives from Fort Duncan, in Eagle Pass, Texas, had gone just across the border to Piedras Negros, Mexico, on a shopping trip.
By the time they arrived at the Victory Club restaurant for a meal, the kitchen was closed.
But the accommodating maître d’hôtel, Ignacio “Nacho” Anaya (Nacho is a nickname for Ignacio), threw together a snack for the ladies from what was available in the kitchen: tortillas and cheese.
He cut the tortillas into triangles and fried them, added shredded Cheddar cheese, quickly heated them to melt the cheese, and garnished the dish with sliced jalapeño chiles.
When asked what the tasty dish was called, he answered, “Nacho’s especiales,” Nacho’s Special. (Food trivia: In Mexico, nachos are called totopos, the local word for tortilla chips).
The dish quickly spread throughout Texas and the Southwest. The first known appearance of the word “nachos” in English dates to 1950, from the book. A Taste of Texas. [Source]
|
WHAT’S IN TEX-MEX NACHOS?
In the beginning, nachos were a simple dish as Ignacio made them: tortilla chips, shredded melted cheese, and jalapeños.
But as time marched on, so did nachos, leading to “loaded” Tex-Mex nacho options with:
Beans: black beans, pinto beans, refried beans, chili con carne, chile con queso.
Condiments: garlic, hot sauce, lime, olives, pickles.
Meat: carne asada, chicken, chorizo, ground beef, sliced steak.
Salsa and dressings: cooked salsa, guacamole, pico de gallo, ranch dressing, salsa fresca, sour cream (see the different types of salsa).
Vegetables: chive, cilantro, diced tomato, elote (grilled corn), jalapeño, lettuce, onion, scallion.
And while these ingredients offer a huge number of combinations, why not look outside Central American ingredients to international combinations. First…
PICK A BASE CHIP
Step away from tortilla chips (a.k.a. taco chips) or other corn chips. There are lots of different chips to be had, representing all corners of the world. Pick your base, and it will inspire the toppings.
Bagel chips
Bean chips
Cassava/yucca chips
Flavored tortilla chips (taco chips)
Kale chips
Lentil chips
Pasta chips
Pita chips
Plantain chips
Potato or sweet potato chips
Rice chips
Soy crisps
Vegetable chips (e.g. beet, lotus root, yucca)
|
INTERNATIONAL NACHOS
Top the base chip with the main ingredients and cheese, melt the shredded cheese under the broiler or with a kitchen torch, and top with the sauces and garnishes.
American Nachos: potato chips, popcorn, sliced hot dogs, dill pickles or relish, shredded American cheese, onion dip.
Barbecue Nachos: tortilla chips, barbecued pork, melted cheese, barbecue sauce, and sliced jalapeños.
California Nachos: vegetable chips, kale chips, guacamole, shredded Monterey Jack cheese, sprouts.
French Nachos: French fries, goat cheese, crème fraîche, frizzled onions.
German Nachos: potato chips, munster cheese, sliced sausage, caramelized onions (or sauerkraut, if you want a pucker).
Greek Nachos: pita chips, mini lamb meatballs, crumbled feta cheese, shredded saganaki (melting cheese; substitute mozzarella), sliced pepperoncini, tzatziki, kalamata olives.
Hawaiian Nachos: plantain chips or sweet potato chips, kalua pork (smoky; made from a whole, slow-roasted pig), melted cheese, barbecue sauce, diced pineapple.
Healthy Nachos: vegetable chips, roasted vegetables or jarred pimentos, fat-free plain Greek yogurt, salsa fresca.
Indian Nachos: lentil chips, shawarma (spit-grilled meat) with Indian spices, raita, green peas.
Irish Nachos: Fried potato slices topped with corned beef, shredded Irish cheddar, cooked bacon, lettuce, chopped tomatoes and scallions.
|
|
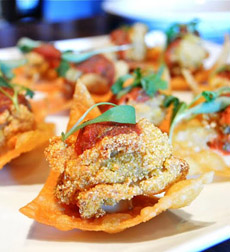
[3] “Pacific” nachos with oysters (photo © Zagat).
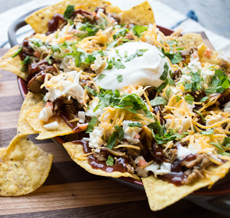
[4] Barbecue pork nachos (photo © Superman Cooks).
|
|
Italian Nachos: pasta chips, Italian sausage or pepperoni, sweet peppers, marinara sauce and shredded mozzarella and chili flakes.
Japanese Nachos: rice chips, cooked or raw fish/seafood, wasabi-accented plain yogurt or sour cream, shichimi togarashi (Japanese seven-spice blend).
Jewish Nachos: bagel chips, chopped herring, sour cream, dill.
Middle Eastern Nachos: pita chips, grilled meat or vegetables, hummus, plain yogurt.
Pacific Nachos: Crispy wontons, cornmeal-crusted fried oysters (substitute any seafood), shredded Swiss, cocktail sauce or tartar sauce.
MORE TAKES ON NACHOS
Beyond the chip, here are other spins on nachos:
Baked potato nachos recipe
Nacho stuffed shells recipe
Naked nachos recipe
CHECK OUT WHAT’S HAPPENING ON OUR HOME PAGE, THENIBBLE.COM.
|
|