THE NIBBLE BLOG: Products, Recipes & Trends In Specialty Foods


Also visit our main website, TheNibble.com.

RECIPE: Toffee With Pumpkin Seeds

You may be all set for Halloween, but think ahead to the Thanksgiving crush: hostess gifts, party favors, little extras for your colleagues or friends.

We like this seasonal recipe by Kirstin Jackson of It’s Not You, It’s Brie. It was shared with us by Go Bold With Butter.

In this recipe, shelled and salted pepitas (pumpkin seeds) and bits of rosemary are encased in the toffee: a sophisticated rendition of the sweet treat.

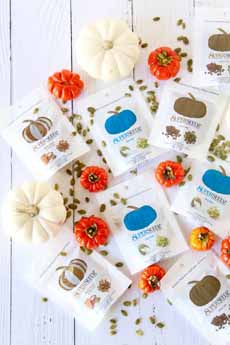
THE NIBBLE is a fan of SuperSeedz, gourmet pumpkin seeds, shelled and flavored.

Among the nine flavors, these flavors pair especially well with toffee: Cinnamon & Sugar, Coco Joe, Maple Sugar & Sea Salt, Sea Salt and Super Spicy. Learn more and
get them here.
 
 
RECIPE: PUMPKIN SEED & ROSEMARY TOFFEE

Advises Kirstin: “Read through the recipe, have all ingredients, utensils, and candy thermometer ready to go. You’ll be surprised how quickly you’ll need them once things get bubbling.”

Ingredients

  • 1½ cup salted pepitas, divided
  • 1 stick (1/2 cup), plus 1 teaspoon unsalted butter
  • Additional 1 tablespoon butter for greasing pan
  • 1-3/4 cup white sugar
  • 3 tablespoons water
  • 1 teaspoon molasses
  • 1/4 teaspoon baking soda
  • 1 teaspoon vanilla extract
  • 1 teaspoon minced fresh rosemary
  •  
    Preparation

    1. LINE a sheet pan with a silicone baking mat or parchment paper greased with 1 tablespoon butter. Scatter 2/3 of the pepitas over the bottom of the pan.

    2. PLACE the butter, sugar, water and molasses in a heavy bottomed, medium-sized saucepan and turn heat to medium. Being careful not to over-stir—so the candy won’t form large sugar crystals—stir occasionally to combine the mixture, once the butter melts. Bring to 295°F on a candy thermometer. Once the caramel hits 295°F…

    3. IMMEDIATELY ADD the baking soda, vanilla and chopped rosemary and stir very quickly to thoroughly combine. Next, very quickly pour the caramel over the pepitas on the sheet pan. Use an offset spatula greased with the remaining 1 teaspoon butter to quickly spread the toffee over the seeds. Once cool enough to touch…

    4. POUR the remaining pepitas over the toffee and press them into the candy’s surface. Let cool, then break apart before serving.

      Pumpkin Seed Toffee
    [1] Toffee with pumpkin seeds and rosemary (photo courtesy Kirstin Jackson | It’s Not You, It’s Brie).

    Superseedz
    [2] A trio of Superseedz flavors (photo courtesy Superseedz).

    Pumpkin Seeds
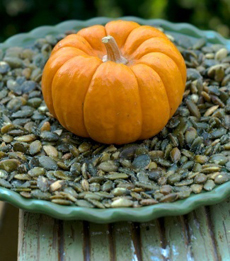
    [3] Pepitas (photo Fun With Foods | IST).

     
    THE DIFFERENCE BETWEEN PUMPKIN SEEDS & PEPITAS

    “Pepitas” means “little seeds of squash” in Spanish. Pepitas and pumpkin seeds are almost the same thing.

    The difference is that pepitas grow shell-less in particular pumpkin and squash varieties.

    Both are very nutritious, containing omega-3 and omega-6 fatty acids, fiber, and a variety of antioxidants. Here are 11 health benefits of pumpkin seeds.


    Comments off

    RECIPE: Maple Pound Cake

    Maple Pound Cake
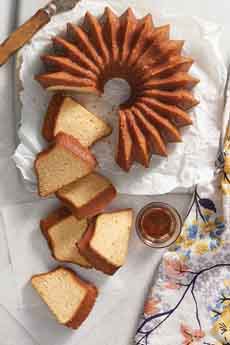
    [1] Making this pound cake in a bundt pan provides eye appeal (photo courtesy King Arthur Flour).


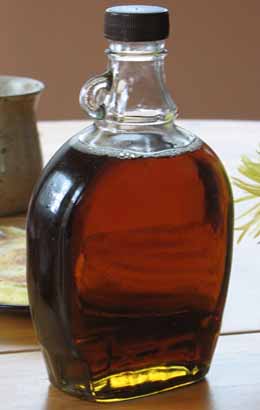
    [2] Always buy pure maple syrup. The “pancake syrup” sold in grocery stores is corn syrup with artificial maple flavoring. Here’s an explanation of the differences (photo Miguel Andrade | Wikipedia).


    While maple-flavored foods can be served year-round, they have fallen into the fourth-quarter slot, a time period that highlights everything made with maple and pumpkin.

    Going with the tradition, we decided to feature this maple pound cake for fall. If we had featured it in July, would you have been interested?

    This pound cake can be dressed up for dessert. We like creme anglaise as a dessert sauce (recipe), or a scoop of vanilla or maple walnut ice cream.

    Most often we enjoy it plain, as a snack or a brunch cake.

    Prep time is 25 minutes, bake time is 45 to 50 minutes.
     
     
    RECIPE: MAPLE POUND CAKE

    Ingredients For The Cake

  • 2 cups unbleached cake flour
  • 1 teaspoon baking powder
  • 1/4 teaspoon baking soda
  • 1 teaspoon salt
  • 3/4 cup (12 tablespoons) unsalted butter, softened
  • 2/3 cup light brown sugar, packed
  • 2 large eggs
  • 1/2 cup maple syrup
  • 1 cup sour cream
  • 1 teaspoon vanilla extract
  • 1/4 teaspoon maple flavor; optional, for enhanced maple flavor
  •  
    For The Glaze

  • 2 tablespoons unsalted butter
  • 1/4 cup maple syrup
  • 1/4 cup dark rum or water
  •  
    Preparation

    1. PREHEAT the oven to 350°F. Lightly grease a 9- or 10-cup bundt-style pan.

    2. COMBINE the flour, baking powder, baking soda and salt in a medium bowl.

    3. BEAT together the butter and brown sugar in a separate bowl, until light and fluffy. Add the eggs one at a time, beating for a minute or two and scraping the sides and bottom of the bowl between additions. Mix in the maple syrup.

    4. ADD half the flour mixture, followed by the sour cream, vanilla and maple flavor, and finally the remaining flour mixture. Mix until just combined, scraping the sides and bottom of the bowl between each addition.

     
    5. SCOOP the batter into the prepared pan and bake for 45 to 50 minutes, until a cake tester or toothpick inserted in the center comes out clean. Allow the cake to cool for 10 minutes in the pan, then turn it out onto a serving plate. While the cake is cooling…

    6. MAKE the glaze. Combine the ingredients in a medium saucepan. Bring the glaze to a rapid boil, then reduce to a simmer and cook for about 5 to 8 minutes, until it thickens to a syrupy consistency. Remove the pan from the heat.

    7. BRUSH the hot glaze over the warm cake. Allow the cake to cool completely before serving.

    8. STORE unsliced at room temperature for several days; freeze for longer storage.
     
     
    MAPLE SYRUP HISTORY

    Maple trees are indigenous to the U.S. In cold climates, the trees store starch in their trunks and roots before winter; the starch is then converted to a form of sugar, that rises in the sap in late winter and early spring.

    Early Native Americans, like the Algonquians of the Northeast, discovered the sweet sap inside maple trees, and processed it into syrup.

    At the beginning of the spring thaw, they made V-shaped incisions in tree trunks using stone tools, and inserted reeds or concave pieces of bark to run the sap into buckets.

    The first stage of concentrating the sap was by dropping hot cooking stones into the buckets to remove some of the water, or by leaving them outside overnight and removing the layer of ice that formed on top. Sugar bushes—stands in the forest—provided working spaces.

    Over time, processing improvements were developed. By the time European settlers arrived, the technique was to boil the sap over an open fire for a long time, until it concentrated into syrup.

    The Native Americans taught the Europeans how to make the syrup. The settlers improved the process by using augers to drill tapholes in the trunks, and by making wooden spouts to drain the sap into buckets.

    During the 17th and 18th centuries, Europeans used the maple syrup as a source of sugar, in both liquid and crystallized forms. It was local and free for the making, while cane sugar had to be imported from the West Indies.

    Today, maple syrup harvesters use plastic tubing (photo) to transfer the sap from the tree to the sugar shack, the building where it’s boiled into syrup.

    Here’s more on the production of maple syrup.


    Comments off

    TIP OF THE DAY: The New Deviled Egg Isn’t Deviled

    We love this idea from food photographer and creative cook Melina Hammer, via Handsome Brook Farm.

    Handsome Brook Farm is a pioneer in organic pasture-raised eggs, with distribution on the East Coast. We can assure you that in blind tastes tests two years apart, organic eggs were the clear winner over other eggs.

    Which brings us back to Melina Hammer’s inspiration for today’s tip. When we saw her egg garnishes (photo #1), we said: Wow, what a better idea than deviled eggs. Who needs mayo calories when you can add flavor like this?

    For holiday entertaining, summer picnics, anytime: Exercise your creative egg garnishing skills.
     
     
    35 GARNISHES FOR YOUR EGGS

    While you can use a single garnish, combine them for a visual, textural and taste sensation.

    You’ll have to cut some items to size. Don’t be afraid to slice and dice.

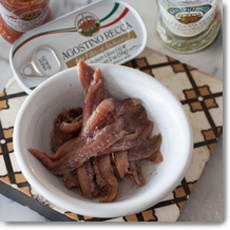
  • Anchovy (photo #2)
  • Avocado Slice/Guacamole
  • Baby Arugula
  • Bacon/Canadian Bacon
  • Bean Dip/Other Dip
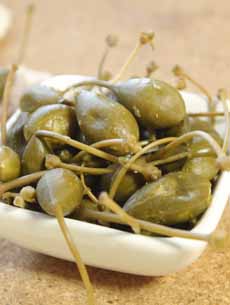
  • Capers/Caperberry (photo #3)
  • Caviar: Salmon, Tobiko, Etc. (Affordable Caviars)
  • Chili Paste
  • Chow-Chow, Corn Relish, Pickle Relish
  • Chutney (photo #4)
  • Crème Fraîche or Sour Cream
  • Dijon Mustard/Flavored Dijon (Types Of Mustard)
  • Flaked Canned Tuna Or Salmon
  • Flavored Mayonnaise
  • Gherkins, Thinly Sliced
  • Herbs: Chives, Cilantro, Dill, Parsley
  • Honey/Spicy Honey
  • Hummus
  • Marinated Grape Tomato Half
  • Mesclun, Lightly Dressed
  • Microgreens
  • Minced chives
  • Mostarda
  • Pâté Cube
  • Pesto
  • Pickled Jalapeño
  • Pickled Onions
  • Pickled Mushroom
  • Pico De Gallo Salsa
  • Radishes, Thinly Sliced
  • Roasted Red Pepper Strips
  • Small Shrimp Or Crabmeat
  • Sliced Olives
  • Smoked Salmon
  • Tapenade
  •  
     
    ABOUT THE BOILED EGGS

    Melina calls her 6-minute eggs custard eggs, after the creamy consistency of the centers (photo #1). We like them too.

    Boil a couple and see how you like the consistency.

      Decorated Hard Boiled Eggs
    [1] Garnished hard-boiled eggs from food photographer Melina Hammer.

    Dish Of Anchovies
    [2] Anchovy fillets are a good contrast with the bland eggs. Roll them or cut them to size (photo courtesy Vital Choice).

    Caperberries
    [3] A single caperberry is more weildly than multiple small capers (photo Elvira Kalviste | THE NIBBLE).

    Tomato Chutney
    [4] Tomato chutney. You can use sweet or savory chutney to garnish (photo courtesy Food TV).


    Comments off


    © Copyright 2005-2026 Lifestyle Direct, Inc. All rights reserved. All images are copyrighted to their respective owners.