THE NIBBLE BLOG: Products, Recipes & Trends In Specialty Foods


Also visit our main website, TheNibble.com.

RECIPE: Mojito Mashed Sweet Potatoes

/home/content/p3pnexwpnas01_data02/07/2891007/html/wp content/uploads/mojito sweet potatoes ingridhoffmann 230s
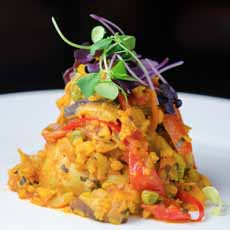
Mashed sweet potatoes with a “Mojito” touch. Photo courtesy Chef Ingrid Hoffmann | Facebook.
 

Chef Ingrid Hoffmann calls these “Mojito” mashed sweet potatoes because they have fresh mint and lime juice. Find more dellicious recipes on her website, IngridHoffmann.com.

Ingredients For 4 Servings

  • 2 large sweet potatoes, washed but unpeeled (about 1½ pounds)
  • 1 tablespoon olive oil
  • 2 tablespoons fresh mint leaves, coarsely chopped
  • 2 tablespoons fresh lime juice
  • ½ teaspoon kosher salt
  • ¼ teaspoon freshly ground black pepper
  • Garnish: fresh mint sprigs
  •  
    Preparation

    1. PLACE the whole sweet potatoes in a large saucepan and add enough cold water to cover. Bring to a boil over high heat. Reduce the heat to medium low and simmer until tender, 30 to 35 minutes.

     
    2. DRAIN and rinse the potatoes under cold water until they are easy to handle. Meanwhile…

    3. WARM the oil in a small saucepan over high heat, about 1 minute. Alternatively, microwave the oil in a microwavable bowl on high until the oil is warm, about 30 seconds. Add the mint leaves and crush with a pestle or the handle of a wooden spoon. Set aside.

    4. PEEL the sweet potatoes and return them to the saucepan. Add the mint mixture, lime juice, salt and pepper. Mash with a potato masher until smooth and creamy. Transfer to a serving bowl, garnish with the mint sprigs, and serve hot.


    Comments off

    TIP OF THE DAY: Make Leaf-Shaped Veggies For Thanksgiving

    You can be very artistic with vegetables. It just takes a bit of planning. While it takes some dexterity to make this “rose tart”, here is a simple alternative.

    It comes from one of our favorite creative cooks, Vicky of Stasty.com. She cuts up vegetables with a leaf cookie cutter before roasting them. She then tosses the cooked veggies in a mustard and maple syrup vinaigrette.

    Cookie cutters make vegetables fun any time of the year. You can make stars for Christmas, hearts for Valentine’s Day, bunnies for Easter and so on. Check the size of you cutter to be sure it isn’t larger than the beets and potatoes. You may need to use two sizes: medium and small. Here’s a good set of leaf cookie cutters from Wilton: three different leaves, each in small, medium and large.

    After you’ve cut out the shapes, keep the vegetable scraps to make stock; or chop them and steam them lightly to use in scrambled eggs, omelets, grain salads, etc. Stick them in the freezer if you’re too busy to think about it now.

    RECIPE: LEAF-SHAPED ROASTED VEGETABLES
    Ingredients For 4 Servings

    For The Vegetables

  • 9 ounces/250g uncooked red beets, skinned and trimmed
  • 18 ounces/500g butternut squash, peeled
  •    
    leaf-shape-vegetables-close-230
    Volunteer to make the vegetables; then cut them with a leaf-shaped cookie cutter. Photo © Stasty.com.
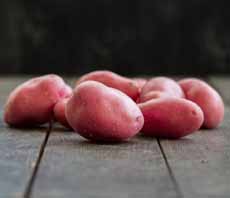
  • 14 ounces/400g Yukon Gold, Purple Peruvian or other all-purpose* potatoes, washed and peeled
  • A few sprigs of fresh thyme and rosemary
  • 3-4 tablespoons olive oil
  • 1/2 teaspoon paprika
  • Salt and pepper
  •  
    *Yukon Gold, Yellow Finn and/or Purple Peruvian potatoes will give you the color you want. You can substitute other all-purpose potatoes such as Katahdin or Kennebec (a leading chipping potato). Check out the different types of potatoes in our Potato Glossary.
     
    For The Dressing

  • 2 tablespoons sherry vinegar or substitute†
  • 6 tablespoons of olive oil
  • 2 teaspoons of grain mustard
  • Salt and pepper
  • 1 tablespoon of maple syrup (or to taste)
  • Garnish: 1 heaping tablespoon capers
  • Garnish: a few sprigs of fresh thyme and rosemary
  •  
    †Substitutes in order of preference: rice wine vinegar, champagne vinegar, white wine vinegar, red wine vinegar. See the different types of vinegar.


    leaf-shape-vegetables-vicky-stasty-2-230
    Headed for the oven. Photo © Stasty.com.

      Preparation

    1. LINE two baking pans with parchment paper. Preheat the oven to 400°F/200°C.

    2. SLICE the potatoes and butternut squash into 1/8-inch thin slices, using a very sharp knife or a mandolin on its thickest setting. If cutting with a knife, ensure the slices as even as possible.

    3. SLICE the beets the same way. Use a separate chopping board or cut the beets last, or they will bleed into the other vegetables.

    4. USE a leaf cookie cutter to cut out the leaves. For more visual interest, use different shape leaves (maple and oak, for example). Once again, keep the beets on a separate chopping board so they don’t bleed on the potatoes and squash. TIP FROM VICKY: Raw root vegetables are a lot tougher to cut than cookie dough, so protect your palms by placing a small towel underneath your hand when you press down on the cutter.

    OPTIONAL: You can make the leaves even more decorative by scoring some veins with a knife. This is labor intensive and a task ideally delegated to a helper.

     
    5. PLACE the potato and squash in a bowl and toss in most of the oil, paprika salt, pepper and some herbs. Move the oiled squash and potatoes to one of the lined baking sheets. Place the beets in the same bowl, toss them in the remaining oil, paprika, salt, pepper and herbs, and add them to the other baking sheet.

    6. PLACE both baking sheets in the oven. Cook the smaller leaves for 20 minutes and the larger leaves for 30-40 minutes. While the vegetables are cooking…

    7. MAKE the dressing: Whisk together the vinegar, olive oil and mustard in a bowl. Taste and season with salt and pepper. Next, whisk in the maple syrup.

    8. PLACE the cooked vegetables on a warm serving dish. Pour on most of the dressing, reserving some in a jug for those who’d like more. Scatter the capers on top. Garnish with fresh thyme and rosemary sprigs before serving.


    Comments off

    RECIPE: No Bake Pumpkin Cheesecake

    Well, it’s almost no bake: The crust gets baked for 10 minutes. But after that, all you do is mix, fill and refrigerate thanks to this easy recipe from Kenwood.

    If the kids want to make a contribution, this is something they can do without worrying about baking times (or having to stick around, waiting for the baking to finish).

    Prep time is 20 minutes, chill time is 4 hours or overnight.

    RECIPE: NO BAKE PUMPKIN CHEESECAKE

    Ingredients

    For The Crust

  • 10 to 12 graham crackers to make approx 1.5 cups
  • ½ cup of unsalted butter, softened
  •  
    For The Cheesecake Filling

  • 1 package (8 ounces) cream cheese, room temperature
  • 1 can (15 ounces) pumpkin pie filling*
  • 1 teaspoon cinnamon
  • 1 cup sugar
  • 1¼ cups heavy cream
  • Optional: whipped cream for garnish
  •   no-bake-pumpkin-cheesecake-kenwoodworld-230ps
    The crust bakes for 10 minutes. Then, chill and serve. Photo courtesy Kenwood.
     

    *Note that pumpkin pie filling is already seasoned with cinnamon, cloves and nutmeg. Do not confuse it with unseasoned can pumpkin.

    Preparation

    1. HEAT the oven to 375°F. Using a food processor with the chopping blade, combine the softened butter with the graham crackers to create a graham crust. Stir until the crumbs are evenly coated and look wet. The crumbs should hold together in a clump if you press them in your fist; if not, add water a tablespoon at a time until this happens.

    2. POUR the crumbs into a 9-inch pie pan and press them evenly along the bottoms and sides. Pre-bake the crust for 8 to 10 minutes until dry and fragrant. Cool completely before proceeding with the recipe.

    3. MIX the cream cheese in the mixing bowl of the food processor on medium speed until it is a bit fluffy. Slowly add in the pumpkin pie filling and mix on low until blended. Mix in the cinnamon and sugar until mixture is completely smooth.

    4. REMOVE the filling and place in another bowl. Add the whipping cream to the mixing bowl and beat until stiff. Slowly fold in cream cheese mixture until just blended (it won’t be pretty so don’t think you’re doing something wrong).

    5. POUR into the pie crust. Let the cheesecake chill in for 4 hours or overnight. To serve, garnish with a optional dollop of whipped cream.
      

    Comments off

    FOOD FUN: Fall Leaf Cookies

    /home/content/p3pnexwpnas01_data02/07/2891007/html/wp content/uploads/leaf cookies craftsmanandwolves 230
    Make shortbread leaves in the colors of fall. Photo courtesy Craftsman and Wolves | San Francisco.
     

    If you want to bring something homemade to your Thanksgiving hosts—but they don’t need another pie—bake leaf-shaped shortbread cookies in fall colors.

    These were made by the wonderful San Francisco Bakery, Craftsman and Wolves. Click on the links for recipes from The Nibble, Epicurious and Martha Stewart.

  • Autumn Spice Shortbread (add some food color for an orange-colored dough)
  • Chocolate Shortbread
  • Golden Shortbread
  • Matcha Shortbread
  •  

    You could also make almond shortbread, ginger shortbread with crystallized ginger, lemon or orange shortbread.

    All you need are your favorite shortbread recipe or one of ours, a leaf cookie cutter and some optional sanding sugar.

    With a set of assorted leaf cookie cutters, you can use a different shape for each flavor.


    Comments off

    TIP OF THE DAY: Homemade Cranberry Vodka

    Should you change your vodka for the holidays?

    Some vodka producers make seasonal flavors. Pinnacle Vodka, for example, has a portfolio of holiday flavors that include Caramel Apple, Pecan Pie, Pumpkin Pie and Peppermint Bark.

    Finlandia, Skyy and Smirnoff make cranberry vodka. Maybe you’ll be luckier than we’ve been in finding it. So here’s another option:

    Infuse your own cranberry vodka with real cranberries, instead of the extracts used to make commercial flavored vodka. Serve it—or bring it as a house gift—on Thanksgiving, Christmas and in-between.

    Generally when making infused vodka, the flavors should blend for four weeks or longer; but this recipe lets you do it in just 3 days.
     
    TIPS

  • Pass by the cheap stuff and use quality vodka. For $10 to $15, you can buy Denaka, Luksusowa, New Amsterdam, Pinnacle, Sobieski, Smirnoff or Svedka.
  • Why not spring for pricier vodka? If you’re making the vodka as a gift and want to impress, use the recipient’s favorite brand or other prestigious label. It won’t necessarily make better-tasting cranberry vodka, but will please the status-oriented.
  •    
    Cranberry Vodka Cocktail

    An easy holiday cocktail: cranberry vodka and ginger ale on the rocks. Photo courtesy SarahsJoy.com.

  • Create a hang tag for the neck of the bottle, with the name of the product (straight or fanciful), year made, and any other information.
  • If you’d rather showcase your vodka in a clear wine bottle, you can hand-paint a label and add decorations. The bottles run about $3 apiece.
     
    RECIPE: HOMEMADE CRANBERRY VODKA

    Ingredients

  • 2 cups sugar
  • 1 cup water
  • 2 cups fresh or frozen and thawed cranberries
  • 1 fifth good quality vodka
  •  

    Bowl Of Fresh Cranberries
    Just add vodka. In three days you’ll have
    cranberry vodka. Photo courtesy Good Eggs |
    San Francisco.
      Preparation

    1. COMBINE the sugar and water in a medium saucepan over medium-high heat. Bring the mixture to a boil, tilting and swirling the pan occasionally. Lower the heat and continue to cook, swirling occasionally, until the sugar is completely dissolved and the mixture is slightly thickened (about 5 minutes).

    2. REMOVE the pan from the heat. Stir in the cranberries and set the pan aside for 2 hours.

    3. TRANSFER the cranberry mixture to a large covered bowl, jar or canister and add the vodka. Retain the bottle to refill with the finished product. Cover and refrigerate for at least 2 days, stirring occasionally. If you don’t have room in the fridge, keep it in a cool, dark place.

    4. STRAIN the vodka into a large pitcher, reserving the cranberries. You can use them to garnish drinks.

     
    5. USING a funnel, pour the vodka back into the original bottle. Place the bottle in the freezer until ready to serve. Keep the reserved cranberries in the freezer, but defrost them prior to serving (they defrost quickly).
     
    To Serve

    Serve cranberry vodka:

  • Shots
  • Straight up or on the rocks
  • As Cranberry Martinis, with just a splash of vermouth
  • In other cocktails or punch
  •  
    Top with a few cranberries to garnish.


    Comments off

    The Nibble Webzine Of Food Adventures


    © Copyright 2005-2026 Lifestyle Direct, Inc. All rights reserved. All images are copyrighted to their respective owners.