|


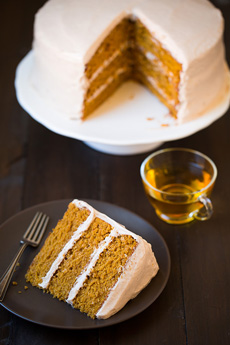
TOP PHOTO: This pumpkin layer cake adds
raspberries for a festive effect. You can
instead add dried cherries, cranberries or
raisins, pomegranate arils, chopped
crystallized ginger, or a combination.
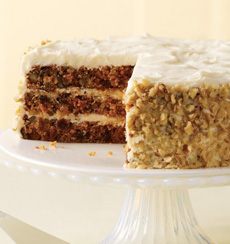
BOTTOM PHOTO: Food fun in the form of a
deconstructed layer cake, with streusel
crumble topped with ice cream, and
decorated with meringue cookies and a
ribbon of pumpkin pie filling (you can
substitute caramel sauce). Photo courtesy
Caviar Russe | NYC. |
|
Preparation
1. PREHEAT the oven to 350°F. Butter three 9-inch round cake pans and line the bottoms with parchment paper. Butter the parchment and set the pans aside.
2. WHISK together the flour, baking powder, baking soda, salt, cinnamon, nutmeg and ginger in a mixing bowl. Whisking for 20 seconds and set aside.
3. USE the bowl of an electric stand mixer fitted with the paddle attachment, and whip together the butter, granulated sugar, brown sugar and 3 tablespoons of the vegetable oil, until pale and fluffy. Occasionally scrape down the sides and bottom of the bowl, throughout the mixing process. Mix in the remaining 1/4 cup + 1 tablespoon vegetable oil. Blend in the eggs one at a time, adding the vanilla with the last egg.
4. WHISK together the pumpkin and milk in a bowl or large liquid measuring cup. Working in three separate batches, beginning and ending with the flour mixture, add 1/3 of the flour mixture alternating with half of the pumpkin mixture and mixing just until combined after each addition.
5. DIVIDE the batter among the three prepared cake pans and smooth the tops with a spatula. Bake until a toothpick inserted into the center of cake comes out clean, about 30-35 minutes. Cool the layers in the pans for 15 minutes, then run a knife around edge to loosen. Invert the layers onto wire racks to cool completely.
6. PREPARE the frosting while the cake cools. In the bowl of an electric stand mixer fitted with the paddle attachment, whip together the cream cheese and butter until smooth and fluffy. Add the cinnamon, vanilla and powdered sugar and mix on low speed until combined. Then increase the speed to medium and whip until pale and fluffy.
7. FILL the cake layers with frosting and then frost the top and sides. If you prefer the look of the three-tiered cake with raspberries, at the top of this section, you can save a bit of time with an unfrosted top and sides. If the frosting is runny, cover and refrigerate just until it no longer is runny before spreading on cake.
8. STORE the cake in an airtight container such as a cake carrier, in the refrigerator; chill for 20 minutes or as long as you want to store the cake. Let it rest at room temperature to eliminate the chill before serving. Chilling the cake firms the frosting and allows for cleaner slices.
|