|

[1] A southern classic: pimento cheese (photo © Taste Of Home).
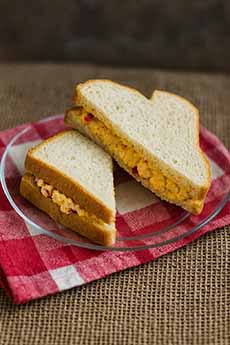
[2] Enjoy it on a sandwich (which in the South means white bread)… (photo © Schermers Pecans).
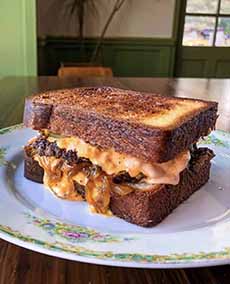
[3] …or a grilled cheese sandwich (photo © Spread & Co.)…
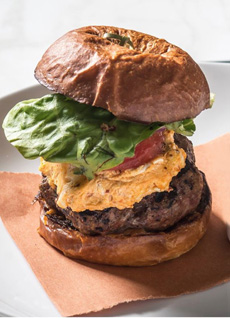
[4] …or on a cheeseburger. Or on a hot dog (photo #14) (photo © Gardenia | New York City).
[5] The pimento chile. Depending on where it’s grown, it can be mild or almost as spicy as a jalapeno (photo © Migardener).
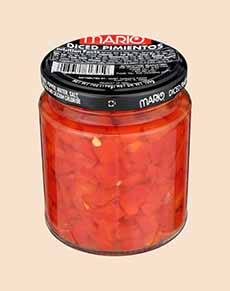
[6] Pimento is sold whole, in strips, and diced. Diced is needed for this recipe. Trivia: Pimento was initially used to cut the fruit’s bitterness (olives are the fruit of the olive tree). It’s the most popular olive stuffing (photo © Mario Camacho Foods | Amazon).
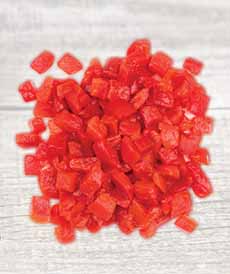
[7] Ready to mix in (photo © Roland Foods).
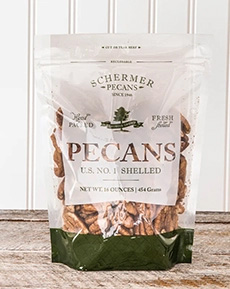
[8] Chopped pecans add a southern nut to a southern spread. Georgia is the “pecan capital” of the U.S. and the world. Schermer is a 5th generation Georgia farming family (photo © Schermer’s Pecans).
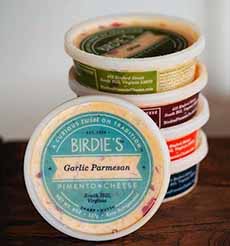
[9] Birdie’s, a popular Southern brand, makes pimento cheese in 8 favors, all delicious: Classic, Cream Cheese + Black Pepper, Garlic Parmesan, Ghost Pepper, Jalapeño, Olive Dill, and Smoked Gouda + Roasted Red Pepper (photos #9, 11, 13, and #14 © Birdie’s Pimento Cheese).
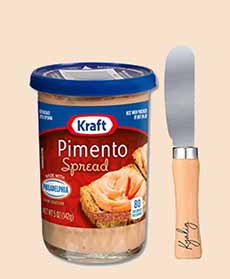
[10] Kraft acquired the company that made one of the early comkmercial brands of pimento cheese (photo © Kraft Heinz).
[11] Pimento cheese biscuits are a big thing in the South, and we don’t know why they haven’t taken the North by storm, too (photo © Melissa’s Produce).
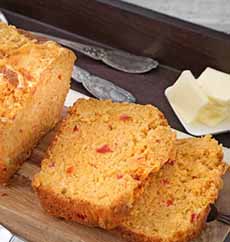
[12] Pimento cheese quick bread. Here’s the recipe (photo © Go Bold With Butter).
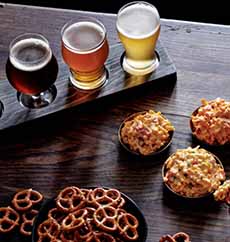
[13] A beer tasting with pimento cheese.
[14] A better version of a cheese dog.
|
|
What’s for lunch? April 9th is National Pimento Cheese Day and we’re having not only one pimento cheese sandwich (photo #2), but a second, grilled pimento cheese sandwich (photo #3).
And maybe a third, for dinner—the pimento cheese we grew up with: chopped pimento, cream cheese, and minced chives (photo #15).
At its core, pimento cheese (photo #1) is a spread made with shredded cheddar cheese, mayonnaise, and chopped pimentos (more on them in a sec). People often customize it with cream cheese, garlic, hot sauce, or jalapeños.
It has became an iconic part of Southern fare, acquiring the sobriquets “pâté of the South, “caviar of the South,” and “Carolina caviar.”
While ready-to-eat containers are probably available in every food store in the South, there’s nothing better the all-natural, preservative-free homemade version that takes just five minutes to whip up. So let’s dig in.
> The recipe follows, but first:
What Is Pimento Cheese?
In its simplest form, pimento cheese is a spread or dip made with shredded Cheddar cheese, mayonnaise, chopped pimentos, and optional cream cheese. People often add with garlic, hot sauce, jalapeños, and different seasonings. It’s typically served on crackers, sandwiches, or even burgers and hot dogs.
What Is Pimento?
Pimento (photo #5) is a milder member of the Capsicum annuum species. Other cultivars in the species include bell peppers, cayenne peppers, cherry peppers, jalapeños, and paprika, among others.
Most sources say that pimentos and cherry peppers are the same thing, others disagree.
Is It Pimento Or Pimiento?
Both spellings. are correct, depending on where you stand.
Pimiento, the original Spanish word for the chile pepper, is used in some parts to describe foods that are made with it.
Pimento, the anglicized variation, is the spelling most often used in the U.S.
> The history of pimento cheese is below.
> So are uses for pimento cheese if you don’t want a sandwich.
> Plus our own favorite pimento cheese, the original with cream cheese only.
> The history of the sandwich.
> The history of cheese.
> The different types of sandwiches: a photo glossary.
> The different types of cheeses: a photo glossary.
> All the sandwich holidays.
> All the cheese holidays.
> Recipe: olive and pimento cream cheese.
RECIPE: PIMENTO CHEESE SANDWICH WITH PECANS
In the South, this sandwich is made on white bread. But no; you deserve better. We recommend a tasty, sturdy sourdough or those stalwarts of the Reuben sandwich, rye or pumpernickel.
Toast the bread as you prefer.
We have been known spread pimento cream cheese (no cheddar or mayo) on a baguette. Yum! And the spread works great in pinwheel wraps.
This recipe was provided by Schermer Pecans from a recipe by Kathleen Purvis in Pecans, A Savor The South Cookbook. The recipe was revised by The Nibble.
Ingredients For 3-4 Sandwiches
For The Cheese Spread
1 pound sharp cheddar cheese, shredded
1 package (8 ounces) cream cheese, room temperature
½ cup mayonnaise, or to taste
1-1½ teaspoons Tabasco
1 jar (7 ounces) diced pimentos, undrained
1 cup chopped pecans
Salt or garlic salt to taste, if necessary
Optional: 1/2 cup pimento-stuffed green olives
For The Sandwich Assembly
Sourdough or bread of choice
Romaine
Sliced tomato or whole pimentos or…fried green tomatoes
Optional garnish: olives, gherkins or other pickled vegetables (okra, cauliflower, whatever—here’s how to make pickles in 2 hours)
Optional Substitutions
For the Cheddar: Monterey Jack, Pepper Jack, or Smoked Cheddar.
For the Tabasco: smoked paprika adds smokiness.
For more heat: diced green jalapeños.
For the mayonnaise: Greek yogurt for a lighter version.
Preparation
1. PULSE the Cheddar and cream cheese in a food processor. Mix in the mayonnaise and Tabasco. Scrape into a mixing bowl and stir in the pimentos, their juice and the pecans.
2. TASTE and season as desired (salt, pepper, garlic, e.g.).
3. REFRIGERATE until a bit before you’re ready to make and serve the sandwiches, to let it come to room temperature.
HOW TO SERVE PIMENTO CHEESE IF YOU DON’T WANT A SANDWICH
For An Appetizer Or Snack
Crackers, toasted baguette slices
Crudites: bell pepper strips (particularly orange, red, and yellow), carrots, celery sticks, cucumber rounds
Dippers: pita chips, pretzels, tortilla chips
Mixed into deviled egg filling
Nachos
Stuffed cherry tomatoes, poppers
Lunch Or Dinner
Baked potato/sweet potato topping
Cheeseburgers
Cheese grits
Chili topping
“Double” mac and cheese
Melted
Omelet
Stuffed chicken breasts
Creamy pasta sauce (thinned)
And if we may suggest another sandwich…
BLT with pimento cheese instead of mayo!
THE HISTORY OF PIMENTO CHEESE
While today pimento cheese is best known as a Southern Cheddar cheese spread, it originated as a cream cheese spread in the North. The original was made without Cheddar, just cream cheese and pimento.
Some savvy person added olives, and today the cream cheese spread can be made simply by mixing in chopped pimento olives.
For our mom, however, that tipped the balance to the olives, so to even things out she added more chopped pimento.
[15] The original pimento cheese was cream cheese, and a brilliant variation appeared: cream cheese with pimento-stuffed olives. Here’s a recipe (photo © Southern Mom Loves).
The Pimento Cheese Chronology
1872: The story of cream cheese begins in 1872, when a dairyman named William Lawrence of Chester, New York invented it by happy accident: He was trying to make Neufchâtel, a soft French cheese.
With bricks of cheese wrapped in foil, Lawrence’s company began to distribute cream cheese in 1880. Here’s the history of cream cheese.
Circa 1908: Recipes for pimento cheese (sometimes written as “pimiento cheese”), mixing diced pimentos into cream cheese, began to appear in women’s magazines and cookbooks. Jars of Spanish pimentos had begun to be imported and became trendy.
It was a tasty new sandwich spread that was easily adapted to appetizers with crackers.
Circa 1911: Shortly thereafter, the first recipes for pimento cheese that used Cheddar cheese instead of cream cheese began to appear.
Southern cooks began to tinker with the recipe, and added mayonnaise, which provided the spreadability that cream cheese offered but Cheddar did not. Mayonnaise was also the binder needed to blend the grated Cheddar and chopped pimentos into a spread.
Commercial brands of pimento cheese began appearing on the market in the 1910s, following the growing popularity of homemade versions.
One of the earliest commercial producers was the Phenix Cheese Company—later part of Kraft—which began marketing a cream cheese with pimentos product around 1915. The Kraft version exists today as a mixture of Cheddar and cream cheese (photo #10).
Other early brands were Ruth’s Salads and Star Foods (also later acquired by Kraft). These and other manufacturers led to Charlotte’s nickname as “The Pimento Cheese Capital Of The World.”
Circa 1920: By the 1920s, the combination of cheddar cheese, pimentos, and mayonnaise had become the standard formula for pimento cheese across the southern United States. By the 1930s, the recipe had become firmly established in Southern cookery traditions, and had spread (no pun intended) nationwide.
1928: Kraft acquired the Phenix Cheese Company, whose brands included one of the earliest commercial pimento cheeses. Phenix also owned the Philadelphia Cream Cheese brand, which it had acquired in 1903 from Alvah L. Reynolds. Reynolds had previously partnered with William Lawrence, the original creator of cream cheese, to market the product under the Philadelphia name starting in 1880.
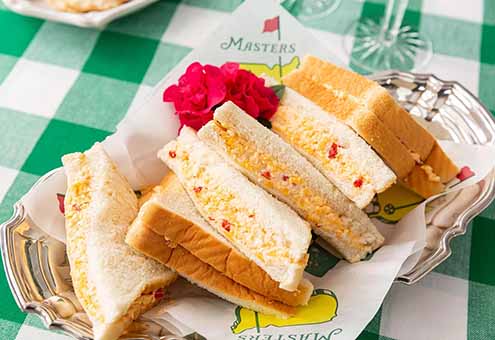
Circa 1950: Pimento cheese sandwiches began to be served at the Masters Tournament at Augusta National Golf Club in Georgia. Served on white bread, they remain part of the Masters “experience.”
There was actually some controversy in 2013 when the tournament changed suppliers for their pimento cheese sandwiches. The new ones had a slightly different taste that some “regulars” complained about.
Augusta National worked with their new vendor to adjust the recipe to more closely match the original flavor profile that patrons had come to expect. Most seemed satisfied with the adjustments, although some purists still claim they can taste the difference from the original version (source: Claude.ai 2025-04-09).
The recipe has remained a closely guarded secret, but here’s a copycat recipe (see photo #16). It combine Cheddar with Monterrey Jack, which is perhaps the “secret.” Like other recipes, it also uses cream cheese, diced pimentos, mayonnaise, onion powder, garlic powder, and cayenne.
2016: National Pimento Cheese Day was declared on April 9, 2016 by The Fresh Market, a specialty grocer that had introduced their own pimento cheese recipe in 1983. Here it is.
[16] A copycat recipe of the famed Masters Tournament (photo © Pizzazzerie).
|