|
We’re one of those households that wastes a lot of fresh produce.
Thanks to Taste Of Home for these tips:
Some of these you may already know. Most were new to us.
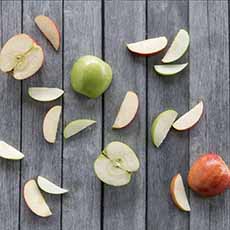
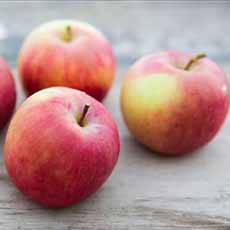
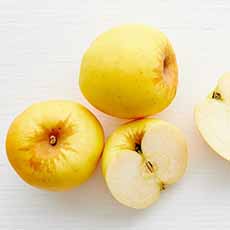
APPLE SLICES: SOAK IN SALT WATER
Sliced apples are a convenient snack or salad topper, but if you slice them in advance, they brown.
Soak the slices in a bowl of cold salt water, ½ teaspoon of salt or less per quart of water.
After five minutes, pat dry and store the slices in the fridge in an airtight plastic bag. Your slices won’t brown!
Why do some sliced fruits brown more quickly than others?
They contain different levels of polyphenol oxidase (PPO) enzymes, which cause browning when oxygen is introduced into the plant tissue.
The level of PPO not only varies between varieties of fruits, but within different subspecies within the species.
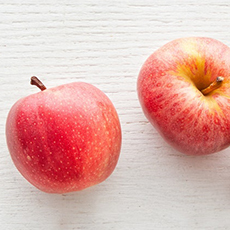
That’s why, for example, apple varieties like Granny Smith brown less, and less quickly, than Red Delicious.
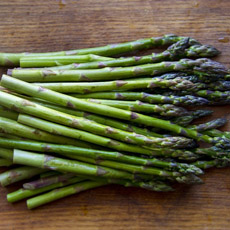
ASPARAGUS: STORE UPRIGHT IN A CUP OF WATER
Asparagus often can dry out when you keep it a few days before cooking. But it’s easy to keep it moist.
Treat asparagus as you would flowers. Trim the ends a bit and place the asparagus upright in a glass of water, covering the bottom couple of inches.
Place a plastic bag over the stalks and place it in the fridge.
Do the same with fresh herbs, as well.
AVOCADO: BRUSH WITH LEMON JUICE
Avocado may be the fastest “browner” among all the fruits (yes, avocados are a tree fruit, just like apples and pears). They have the most PPO of the fruits most of us commonly eat.
To avoid browning, squirt it with a little lemon or lime juice, and brush the juice over the cut surface (truth to tell, we use our fingers).
The citric acid will help prevent browning for at least a day. This also works with guacamole.
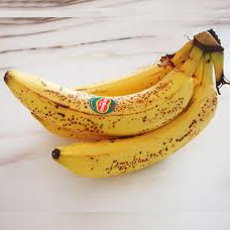
BANANAS: WRAP THE STEMS WITH PLASTIC WRAP
Bananas give off lots of ethylene gas, which makes them brown.
Separate each banana from the bunch and wrap it in plastic wrap to stop the spread of the gas.
If the bananas are already too ripe for your liking, peel them and store them in the freezer. You can use them to make banana bread and other banana desserts.
Try them in a Banana Daiquiri: You’re in for a treat!
BERRIES: RINSE WITH VINEGAR>
You’re often told not to wash produce before you refrigerate it. But berries are different:
They carry mold spores that develop and rot the fruit, as you’ve noticed if you keep berries for longer than several days after you bring them home.
Wash your berries with a mix of vinegar and water in a 1:3 ratio and pat them dry before refrigerating (we let ours dry on the countertop).
This disinfects against mold, which can lengthen shelf life by weeks.
Rinse the berries thoroughly when you’re ready to eat them.
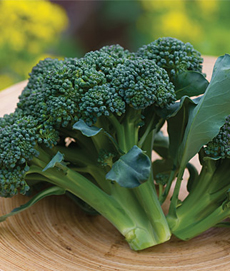
BROCCOLI: PLACE STEMS-DOWN IN A GLASS OF WATER
Trim off the dried stem bottoms and place the head in in a glass of water.
As with asparagus, only the bottom of the stems need to be in the water. Cover with a plastic bag.
If you’ll be eating it in the next day or so, a wet paper towel wrapped around the head will do.
If you feel you won’t be eating it anytime soon, slice it and freeze it. You can add the frozen slices to omelets, soups and other dishes.
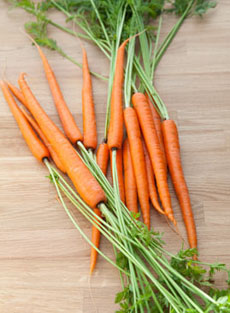
CARROTS: STORE WITH WATER
Do your carrots get that dried-out look? Just like broccoli, loves moisture. To avoid the dryness, first chop off their leafy tops (here are 25 uses for carrot tops, and a recipe for carrot top pesto).
The leaves typically pull nutrients out of their roots (i.e., the carrots we eat).
Place the trimmed carrots in a container filled with water, cover with plastic wrap and store in the refrigerator. Fresh carrots will stay moist for 3-4 weeks this way.
If you don’t have space in the fridge for a stand-up container, wrap the carrots in bubble wrap.
This allows just enough moisture from the fridge to reach the carrots.
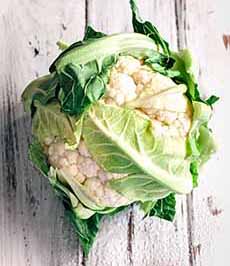
CAULIFLOWER: WRAP IN A WET TOWEL
Loosely wrap a wet paper towel around the head of the cauliflower and place it in a plastic bag, before placing in the fridge.
This storage trick will keep your cauliflower fresh (holding off the brown spots) for up to 14 days
If you’re not going to eat it anytime after that, you can freeze cauliflower for up to eight months.
Cut it into pieces, first. Slice and freeze the stems as well: They’re just as delicious.
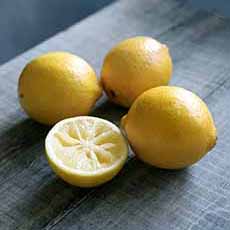
LEMONS: DON’T CUT THEM IN HALF
If you need just a squeeze of citrus juice but don’t need to juice the whole lemon, just puncture it with a fork or skewer instead of cutting it in half.
This way, you can squeeze out what you need without drying out the entire lemon.
LETTUCE: STORE WITH A PAPER TOWEL
This trick can be used if you want to wash lettuce in advance, or if you’ve prepared too much of it.
Wrap unused (and undressed) leaves in paper towels, then insert them into a plastic bag (or plastic wrap). Place in the crisper drawer.
The towels will absorb moisture, which prevents the leaves from becoming soggy and brown.
Replace the towel(s) when it becomes damp. Don’t pack the leaves too tightly: They need to breathe.
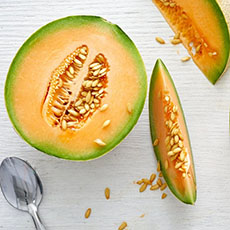
MELON & MANGO: CUT INTO LARGE SLICES
When they’re ripe, cut them into large slices, wrap the slices in plastic wrap and place them in the fridge.
Watermelons are usually ripe* when you buy them, and can be stored on the counter for 7-10 days.
ONIONS: WRAP IN PANTYHOSE
Nylon pantyhose and knee-highs with runs have a second life: storing onions. The mesh-like material allows just enough air to reach the onions, which helps them stay fresh.
Insert the onions into the leg and tie a knot between each bulb.
But remember, don’t place onions in the fridge! Store them in a dry, dark, aerated space.
And when you buy onions, be sure that the skins are intact. They help the onion last longer.
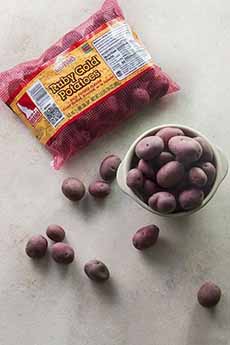
POTATOES: STORE WITH APPLES
Apples produce ethylene gas that can keep your potatoes fresh for more than eight weeks: no sprouts popping up.
Just make sure that you don’t store the potatoes near the onions. Both onions and potatoes release moisture, which can lead to faster spoiling for both.
TOMATOES: STORE ON THE COUNTER STEM SIDE DOWN
Never store tomatoes in the fridge: The cold can degrade their flavor and texture.
Tomatoes do not like the cold so if you keep them in the fridge, they’ll lose their ideal flavor and texture.
Place them on the counter stem side down, as this part of the fruit is the last to ripen.
If the tomatoes have been cut, store halves cut-side down on a paper towel inside a storage container and use within two days.
If they’re smaller slices, also store them in a sealed container. If you’re not going to use them, freeze them.
> Also See How To Store Produce
|