|
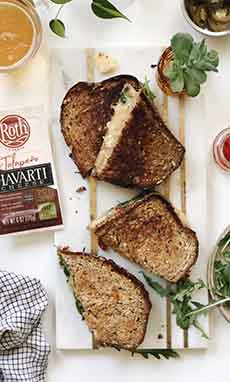
On April 7th, National Beer Day, we made a recipe called Pub Crawl Muenster Dip (photo #1). We don’t have any pub crawl experience, but we liked the idea of melted cheese with dippers—a.k.a. fondue with an American twist. We ended up with this rather long article on the difference between muenster and Munster cheese. If you want an education, here it is! If not, jump to the recipe.
This muenster cheese dip recipe, made with beer, was a good choice for National Beer Day—and for any of the 30+ additional beer holidays.
Before we get to the recipe, we’re using today as an opportunity to discuss America’s muenster cheese (with an “e”) versus France’s Munster cheese (named for a town with no “e”).
We’ll also clarify some facts about a warm cheese dip versus fondue. First, the simple part:
CHEESE DIP VS. FONDUE
The Recipe
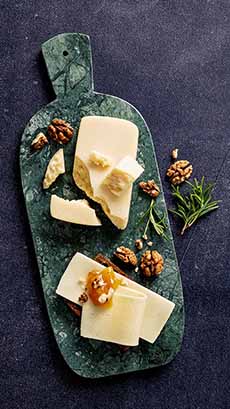
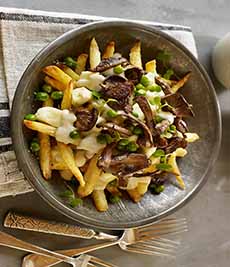
Fondue is a warm cheese dip: cheese melted with wine, seasonings, and a bit of flour or cornstarch and served with numerous types of dippers: bread, fruit, meat, seafood, and vegetables (photo #2). The name comes from the French verb fondre, to melt.
If you compare a cheese fondue recipe with the warm cheese dip recipe below, you’ll see that they’re very much alike.
Fondue, usually made with wine, can be made with beer, like the cheese dip recipe.
Any type of melting cheese (i.e., a cheese that melts well) can be used. The type of cheese, the seasonings, and even the alcohol vary greatly by region in France and Switzerland.
Dipping
How do you eat that warm, melted cheese?
The French access fondue with a long, thin fondue fork. Just spear whatever dippers have been provided with a fondue fork, and dip it into the pot of cheese fondue. (Ditto with chocolate fondue.)
In the U.S., the dippers are handheld: a piece of bread, a carrot stick, e.g.—and swiped through the bowl or pot of dip.
So enjoy the Pub Crawl Muenster Dip, and if your crowd is more chic, call it beer fondue.
> Fondue history.
> 20 cheese fondue recipes.
> Fondue dippers.
> Fondue vs. fonduta.
> Chocolate fondue.
MUENSTER VS. MUNSTER
Muenster, spelled with an “e,” is an American† cheese that sounds like a Munster, a cheese from Alsace, in northeastern France.
Before we can understand American muenster (the section is below), as are food, wine and beer pairings with both types of Munster, we need to understand Alsatian Munster.
THE HISTORY OF ALSATIAN MUNSTER CHEESE
Alsatian Munster is an ancient cheese, a semisoft, washed-rind cow’s milk cheese, that becomes very strong and aromatic as it ages (here’s more about washed rind cheeses). It’s traditionally flavored with cumin. (Munster flavored with caraway seeds can be found today but purists eschew it.)
Munster (photos #4, #5, and #6) has been made since the 7th century in the upper Munster Valley in the Vosges Mountains of Alsace, France (photo #14).
In the 7th century, Irish Benedictine monks established an abbey in the Vosges mountains of France. They did not eat meat on fasting days: a strong cheese was the stand-in.
The village that grew up around the abbey became known as Munster, from monasterium, the Latin word for monastery (photo #15). The cheese was well-favored by the locals, and the monks taught the peasants how to make it. It brought needed income to the townspeople.
Many think Munster is a German cheese, named the German city of Münster. However, the Alsatian town of Munster (photo #13) is clearly the source of Munster cheese’s name [source].
Munster is located in the heart of Alsace (photo #15), in one of the largest and most beautiful valleys (Munster Valley, formerly known as the Flecht Valley) on the Alsatian side of the Hautes-Vosges.
By the Middle Ages, the village had grown. The people had freed themselves from the authority of the monastery and formed alliances with neighboring towns including Gérardmer, which lay across the Fecht Valley to the west in what is now the region of Lorraine. They called their cheese Géromé, which means “from [the town of] Gérardmer” in the local dialect.
The production of Munster cheese spread throughout the region, which gradually became an important business center [source [PDF]).
In the 18th century, dairy farmers imported what are now called Vosgienne cows from Scandanavia. The milk of the breed is known for the high protein content of their milk. Even better, the robust animals can travel over the rockiest terrain, and are well suited to the difficult conditions of mountain breeding.
Munster Vs. Munster-Géromé
As just noted, the same cheese is made on both sides of the Vosges Mountains, one production center in Munster, Alsace, producing the cheese called Munster, the other production center in Gérardmer, Lorraine, producing the cheese called Géromé.
Munster cheese gained its A.O.C. status in 1969 (Appellation d’Origine Contrôlée)‡. In 1978, the A.O.C. granted the protection to Géromé cheese as well, and united the two names under the A.O.C. name Munster-Géromé.
With the formation of the E.U., the certification changed to P.D.O. (Protected Designation of Origin) across E.U. members and the U.K.
In the case of Munster-Géromé cheeses, the P.D.O. guarantees authenticity, and dictates, among other things, that the cheese is made from raw (not pasteurized) cow’s milk, using specific techniques and aging requirements, in a designated geographical area.
The minimum aging time is three weeks before release; ten weeks is more common. In the case of Petit Munster, the minimum aging time is two weeks [source].
HOW P.D.O. MUNSTER IS PRODUCED
The unpasteurized (raw) milk from the Vosgienne cows is curdled and the curds are formed into disks that are approximately 5 inches to 7.5 inches in diameter and 1 to 3 inches high. Alsatian Munsters are made in sizes ranging from 4 ounces (Petit Munster) to 3 pounds.
The disks are washed (i.e., rubbed by hand) with brine and Brevibacterium linens (B. linens) bacteria, which create the intense, pungent aroma of the mature cheese.
They are washed a number of times over the course of five weeks and kept in a damp cellar to encourage the bacteria to grow [source]. The rind turns reddish-orange from the repeated washings.
They then go into a cave (maturing room) where they are placed on straw made from rye stalks and acquire some rind flora from the more mature cheeses in the cave.
Maturation takes 4 to 6 weeks for small disks and 2 to 3 months for larger, thicker cheeses. (Cheeses continue to mature past their peak ripeness. A Munster will grow even more pungent.)
The mild, pale paste of the young cheese turns a creamy gold and more complex and savory: beefy and garlicky, buttery and sometimes mushroomy.
Young Munsters have a pinkish-white rind. The paste‡‡ is pale cream in color, firm, and smooth yet slightly brittle—not the creamy paste it will become. The flavor has character but is mild.
As Munster ages, the rind developes a sticky surface and an assertive, pungent aroma (photos #4, #5, and #6). The bacterial activity on the rind transforms the texture into a moist and supple, semisoft paste. The color of the paste becomes more golden (photo #6). The flavors are very rich, smooth, and slightly tangy on the finish [source].
Modern Munster
The cheese is not exactly as it was in the 7th century. The first major change came with the Vosgienne cattle in the 18th century. That change was good.
But, as in much of the first world, agricultural policy at the end of World War II became focused on mass production, and the Vosgienne breed of cattle was compatible with mass production. The herds began to be eliminated, in favor of more productive breeds.
There are now two types of Alsatian Munster:
Mass-produced industriel cheese, made with pasteurized milk of non-Vosgienne cows. These are not qualified to be an A.O.C. cheese. Industriel Munster don’t develop the penetrating taste or smell of the P.D.O. fermier cheese. (The term for industriel in the U.S. is factory cheese.)
Fermier or coopérative cheese made by artisans in the traditional way, with raw milk from Vosgienne cows. This is today’s P.D.O. Munster, and is the cheese to look for if you want an authentic Munster experience. (The term for these cheeses in the U.S. is farmhouse or farmstead cheese, and the term artisan cheese is also used.)
In the 1970s, with only 3,000 heads of Vosgienne cattle remaining, a plan was launched to protect the breed. There are only thirty or so breeders with pure herds [source].
The lion’s share of Munster produced is industriel. Only a few farms still make Fermier cheese.
AMERICAN MUENSTER
While we’ve seen that the origin of Munster traces back to the Middle Ages, muenster, the American relative, was created in the 19th century.
French immigrants to Wisconsin set out to make Munster—they spelled it muenster. They tried to make the Munster cheese from Alsace, but it didn’t turn out to be the same cheese.
Instead of B. linens bacteria to color (and flavor) the rind, muenster rind gets its color from annatto, the natural vegetable dye that gives many Cheddars their familiar orange hue.
They didn’t age the cheese either—likely also due to the need to eat it and sell it.
The result was a mild cheese that did have the same semi-soft texture. Its distinctive red-orange rind is from annatto natural vegetable dye, rather than the benevolent bacteria.
American muenster starts with pasteurized whole cow’s milk. The milk is partially skimmed, heated, then has rennet and bacteria added.
As with many cheeses, when the milk is curdled, the curd is cut, the whey is drained away, and the curd is put in rectangular “brick” molds. The molds are let stand for 24 hours. Then, the cheeses are turned out of their molds, and aged for 5 to 7 weeks.
As a result, its flavor is very mellow with a pleasing tang, somewhat like a Monterey Jack. It was, and is, very popular for sandwiches and subsequent uses like burgers, which evolved around the same time (the history of the hamburger). See the food-and-beverage pairings section below).
Many countries now make Munster-type factory cheeses—notably Germany, the Scandinavian countries, and the U.S. They can’t use the name Munster, which is P.D.O. protected, so they use muenster or other designation.
One of these cheeses is Finlandia—the brand which inspired this article of Munster vs. muenster (photo #11).
German Münster is closest to the original (as is the Austrian Munster in photo #6).
RECIPE: PUB CRAWL MUENSTER DIP
We love to dip soft pretzel bites or cut-up pieces of standard soft pretzels (photo #17) plus crudités into the velvety cheese dip. Finlandia, which created this recipe, also recommends toasted rye triangles.
In fact, this warm cheese dip is pretty much the same recipe as cheese fondue.
So if you have a fondue pot or brazier, now’s the time to dig it out of the closet. Don’t forget the fondue forks (if you have skewers, they’ll work, too).
Finlandia notes that when the warm dip is chilled, it becomes a spread for bread or crackers. Let us add: the warm dip is also nice as a sauce over potatoes, cooked vegetables, grains, and chicken.
Beer note: If you don’t have lager but have another style of beer, feel free to substitute.
Prep time is 30 minutes. Makes about 2 cups.
Ingredients For 8 Servings
2 tablespoons unsalted butter
¼ cup thinly sliced scallions (green onion)
¾ teaspoon minced garlic
3 tablespoons all-purpose flour
½ cup whole milk
1 cup lager
1 teaspoon ground mustard powder
1 teaspoon granulated sugar
1 teaspoon Worcestershire sauce
½ teaspoon fine salt
⅛ teaspoon finely-ground black pepper
Cayenne pepper, to taste
16 ounces munster cheese†
Dippers: bread, crackers, cruditeé, pretzels, sliced sausage
Preparation
1. HEAT the butter in a 4-quart saucepot over medium heat just until melted. Add the sliced scallions and minced garlic. Stirring often with a wooden spoon, slowly cook until soft, about 2 minutes.
2. IMMEDIATELY SPRINKLE in the flour. Continue to cook and stir over medium heat until the flour mixture is lightly browned and smells like baked piecrust, about 1-2 minutes.
3. REDUCE the heat slightly, slowly whisk in the milk, and then lager, a little at a time, stirring well to remove lumps between each addition.
4. WHISK in the mustard powder, sugar, Worcestershire sauce, salt, black pepper, and cayenne pepper. Increase heat, and simmer until the flour is cooked and the sauce is velvety, about 5-8 minutes. Stir and scrape the sides and bottom of the pot constantly.
5. REDUCE the heat and add the cheese about ½ cup at a time, stirring constantly, and waiting until each batch is fully melted before adding the next.
6. REMOVE from the heat. Serve immediately with toasted rye bread triangles, pretzel bites, sausage, or sliced vegetables.
FOOD, WINE & BEER PAIRINGS
Both Alsatian Munster and American muenster are delicious in sandwiches, including burgers, cold cuts, and grilled cheese; melted in other recipes such as cheese sauce, sliced into salads, and on a cheese or charcuterie plate.
American muenster is commonly melted into macaroni and cheese and used in quesadillas. You can use it in quiche.
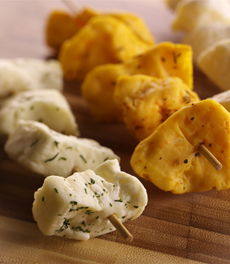
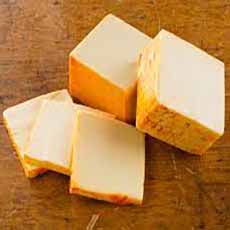
Muenster slices neatly into cubes for snacks and skewers (photo #9). For a sweet snack, we especially like apple slices and a drizzle of honey.
|
|
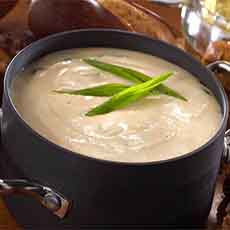
[1] This warm cheese dip (recipe below) is very close related to fondue—photo #2 (photo © Finlandia Cheese).
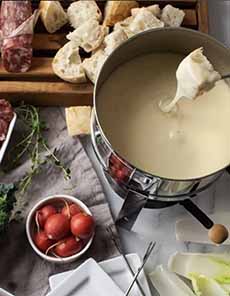
[2] Cheese fondue with salame and soft pretzels (photo © iGourmet).
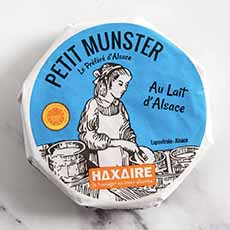
[3] Petit Munster refers to disks that are about 4.4 ounces (125g). There are also larger disks (photos #3, #4, #5 © iGourmet).
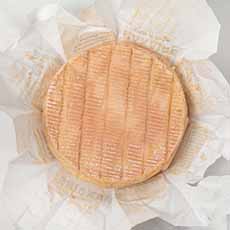
[4] You can see the reddish-orange color of the washed rind.

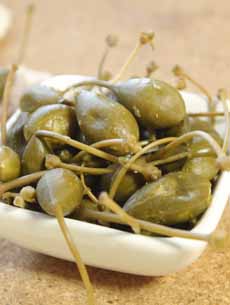
[5] A great snack with beer. Add gherkins, crackers, even sliced salami or dry-cured (hard) sausage.

[6] Edwin’s Munster is produced in Austria, in the style of Alsatian Munster (photo © Artisanal Cheese).

[7] It’s easy to spot the difference between Alsatian Munster and American muenster. Muenster is made in rectangular bricks, Munster is made in round disks (photo © Pearl Valley Cheese).
[8] At the store, the log is cut down into smaller rectangles, or shaved into slices (photo © Cugini Cafe).

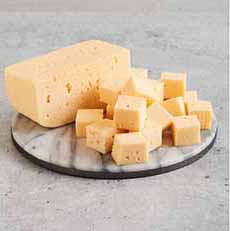
[9] The smooth consistency of muenster makes it easy to cube for snacking and horse d’oeuvre (photo © Pondereosa Farmstead).
[10] It’s easy to slice the brick of cheese at the deli counter (photo © Shisler’s Cheese House).

[11] Several brands, like Finlandia, sell pre-sliced muenster (photo © Finlandia Cheese).

[12] The bricks of muenster can also be sliced into wedges (photo © Wisconsin Cheese).

[13] Back to Europe: A view of the town of Munster in the Grand Est department of France, an administrative region (like an American state) in Northeastern France. It superseded three former administrative regions, Alsace, Champagne-Ardenne and Lorraine, in 2016 (photo © Italian Kiwi).
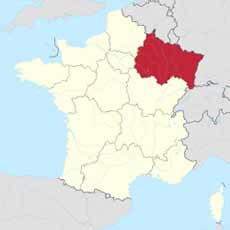
[14] Here’s the location of the Grand Est department of France, which includes the Munster-making areas of Alsace and Loraine (photos #14 and #15 courtesy Wikipedia).
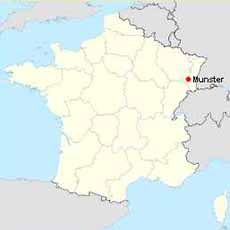
[15] The town of Munster.
[16] For the recipe: Use your favorite lager or other beer (photo © Samuel Adams).
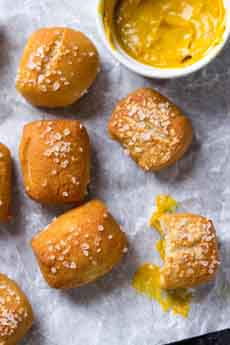
[17] One of the things we like to serve with cheese dip or fondue: soft pretzel bites (photo © King Arthur Baking).
|