THE NIBBLE BLOG: Products, Recipes & Trends In Specialty Foods


Also visit our main website, TheNibble.com.

RECIPE: 12+ Different Types Of Gourmet Ice Cream Sandwiches

Cookie Dough Ice Cream Sandwich
[1] Cookie Dough ice cream sandwiches. Be still our foolish hearts (photo courtesy McCormick).

Ice Cream Sandwich Sundae
[2] An ice cream sandwich sundae (photo courtesy Tony Roma’s).

Donut Ice Cream Sandwiches
[3] Ice cream sandwich on a donut (photo courtesy Elegant Affairs Caterers).

Palmier Ice Cream Sandwich
[4] Ice cream sandwich on French palmier cookies (photo courtesy Sugar Bowl Bakery).

Churro Ice Cream Sandwich

[5] Go Mexican: Ice cream sandwich on churros, with dulce de ledche, from Boqueria | Brooklyn.


Time to celebrate: August 2nd is National Ice Cream Sandwich Day.
 
 
ICE CREAM SANDWICH HISTORY

According to an article in the July 1900 issue of The New York Herald Tribune, the ice cream sandwich was created in 1899 by a pushcart peddler in the Bowery area of the Lower East Side.

The first ice cream sandwiches were a slice of vanilla ice cream pressed between two thin graham wafers. The slice was cut from a larger slab.

In July 1900, The New York Tribune published an article about the pushcart vendor who was selling the sandwiches.

  • The vendor was so busy pressing the sandwiches into a tin mold (to order) that he didn’t have time to make change. Customers had to pay the exact price, one cent.
  • Shortly thereafter, the treats made it to pushcarts on the beach at Atlantic City.
  •  
     
    MODERN ICE CREAM SANDWICHES

    The modern version with the rectangular chocolate wafers was allegedly created in 1945 by Jerry Newberg, an ice cream vendor at Forbes Field in Pittsburgh; although Wikipedia gives credit to partners Jack Delaney, Tim Jones, John Defilippis, and Sam West whom it says originally created and patented the chocolate wafer sandwich in 1963. The thin wafers gain moisture in the freezer, which gives them a cake-like quality.

    In actuality, versions of that iconic sandwich can be seen in photos from Atlantic City in the early 1900s.

    The next step, the Chipwich, was ice cream sandwiched between chocolate chip cookies. It was created in 1981 by Richard LaMotta of New York City and sold from a pushcart like the Bowery originals (the brand was subsequently bought by Dreyer’s, and is now owned by Retrobrands USA).

    Today the ice cream sandwich is enjoyed worldwide, in forms that include the Vietnamese bánh mì kep kem, a baguette stuffed with scoops of ice cream topped with crushed peanuts, instead of conventional sandwich fixings; to Iranian “bread ice cream” which sandwiches rosewater, saffron, or vanilla ice cream between thin, round, crunchy wafers.

    In Scotland, vanilla ice cream sandwiched is between one wafer and one block of chocolate-covered nougat (a “single nougat”) or between two blocks of nougat (a “double nougat”).

    We’ve seen macaron ice cream sandwiches and churro ice cream sandwiches. What would you like for your perfect ice cream sandwich?
     
     
    MODERN ICE CREAM SANDWICH RECIPES

    Since the Chipwich, making ice cream sandwiches other cookies and bars (blondies, brownies, oatmeal, etc.) have come to the fore. But creativity doesn’t stop there. Here are other delicious variations of ice cream sandwiches:

  • Blueberry Ice Cream Sandwiches On Blueberry Pound Cake
  • Brioche Or King’s Hawaiian Ice Cream Sandwiches
  • Brownie Ice Cream Sandwiches
  • Cookie Dough Ice Cream Sandwich
  • Crunchy Strawberry Ice Cream Sandwiches
  • Donut, Rice Krispie Treat & Waffle Ice Cream Sandwiches
  • Frozen Cheesecake “Ice Cream” Sandwiches
  • Granola Ice Cream Sandwiches
  • Ice Cream Sandwich Sundaes
  • Popcorn Ball Ice Cream Sandwiches
  • Strawberry Shortcake Ice Cream Sandwiches
  •  
    We celebrated today with ice cream sandwiches on black and white cookies!

    But alas, so many options, so few excuses for eating them all.


    Comments off

    TIP OF THE DAY: How To Remove Food Stains On Teeth, Hands & Fabric

    If you’ve ever drunk more than a few glasses of red wine; eaten lots of beets, berries or carrot purée; you know that food can stain teeth, as well as the hands used to prepare it and the clothes worn to make or eat it.

    Even white wine can stain: It has both acid and some tannins that make teeth susceptible to pigments in other foods.

    According to Web MD, tooth stains are caused by:

  • Acids, which make tooth enamel softer and rougher, so it’s easier for stains to set in.
  • Chromogens, compounds with strong pigments that cling to tooth enamel.
  • Tannins, plant-based compounds that make it easier for stains to stick to teeth.
  •  
    Red wine is a triple threat, with all three.

    Tea stains teeth more than coffee: In addition to the acid they both share, tea also contains tannins.

    Fortunately, there are remedies.
     
    TO REMOVE FOOD STAINS ON TEETH

  • Brush right away; use a paste with a bit of whitening agent. Keep a toothbrush at work.
  • Swish water around in your mouth if you can’t brush. It’s not as effective as brushing, but better than nothing.
  • Use a straw. The liquids are sucked to the roof of your mouth, so bypass your front teeth.
  • Get your teeth cleaned professionally. A professional cleaning and polishing helps to smooth the fine cracks in tooth enamel where color gets trapped. Regular polishing also helps to reduce the amount of staining.
  •   Baby Beets

    Orange Beets
    Except for the uncommon white beets, beets stain (photo #1 courtesy Burpee, photo #2 courtesy Good Eggs | SF).

     
    TO REMOVE STAINS ON HANDS

  • Use a salt or sugar scrub. Some people buy them for skin exfoliation, but you can sprinkle coarse salt or sugar on wet hands and rub to exfoliate. You can also use olive oil instead of water. After rubbing, rinse off the scrub off and wash your hands with liquid dish soap. Rinse and repeat as necessary.
  • Clean fingernails with baking soda. Make a rub by adding some lemon juice to the baking soda. Scrub with a nail brush.
  • Prevent them in the first place. Get a box of plastic food-prep gloves for a song: 500 gloves for $9.
  •  
    TO REMOVE STAINS ON FABRIC

  • Immediately blot, not rub, with a paper towel. Then use a laundry pre-stain stick or liquid detergent. Wash ASAP in cold water (the sink is fine).
  • Soak in cold water with chlorine or oxygen bleach if the stain persists.
  • Launder in cold water if needed.
  • Use a fabric-appropriate bleach: Chlorine bleach is preferable if it is safe for the fabric.

  • Get an adult bib from Dress Tiez. We have two and love them: They’re waterproof and easy to clean.
  •  
    MORE HELP

  • For red wine and other stains, we’ve had great success with Wine Away spray. It aso removes coffee, blood, ink, fruit punch, sauces, red medicine stains, even pet stains. Try it on anything.
  • There’s also a pocket size for dining out.
  •   

    Comments off

    RECIPE: Chocolate Raspberry Cream Pie For National Raspberry Pie Day

    /home/content/p3pnexwpnas01_data02/07/2891007/html/wp content/uploads/raspberry chocolate cream pie driscolls 230
    [1] A chocolate cream pie with a raspberry cream top (recipe below, photo © Driscoll’s).

    Fresh Raspberries In Box
    [2] This is the right month to find well-priced raspberries (photo © MorgueFile).

    Nabisco Famous Chocolate Wafers
    [3] Chocolate wafer cookies are crushed for the crust (photo © Nabisco).

    Raspberry Tart
    [4] A raspberry tart with a coconut crust. Here’s the recipe (photo © Lottie And Doof).

    Linzertorte
    [5] A Linzertort is a shortbread crust filled with raspberry preserves (photo © Mackenzie Ltd).

    Raspberry Pie
    [6] Raspberry pie with a flower crust. Here’s the recipe from Driscoll’s (photo © Driscoll’s).

      August 1st is National Raspberry Cream Pie Day, completing a sweet trifecta that also includes National Cheesecake Day (July 30th) and National Raspberry Cake Day (July 31st).

    For a previous year’s Raspberry Cream Pie celebration, we published a classic French raspberry tart (see Pie Vs. Tart, below): a shortbread crust filled with creme patisserie and topped with raspberries. Here’s the recipe.

  • Those who have a bargain source of fresh raspberries can make a raspberry pie or a raspberry-apple pie.
  • It’s easy to make a raspberry ice cream pie with a pre-bought crust (try a chocolate cookie crust), raspberry ice cream (if you can find it) or vanilla ice cream, softened and blended with fresh raspberries and/or raspberry preserves.
  • Make Linzertorte, an Austrian favorite that requires only that you make the crust and add raspberry preserves (here’s a recipe).
  • How about a Raspberry Mousse Pie?
  • Or, make a deconstructed raspberry pie: Layer crushed graham cracker or shortbread cookie crumbs, ice cream or whipped cream, and fresh raspberries. Use a parfait glass, sundae dish or other dish (we used our glass coffee mugs).
  •  
    > In addition to Chocolate Raspberry Pie, check out five more raspberry pie recipes below.


    RECIPE: CHOCOLATE RASPBERRY CREAM PIE

    This recipe one-ups a simple raspberry cream pie: It’s a chocolate cream pie topped with raspberry cream (photo #1).

    Prep time is 25 minutes plus chilling.

    Ingredients For The Crust

  • 1-1/4 cups chocolate wafer cookie crumbs
  • 3 tablespoons sugar
  • 4 tablespoons unsalted butter, melted
  •  
    For The Filling

  • 4 ounces dark or semisweet chocolate
  • 2 cups whole milk, divided
  • 4 tablespoons cornstarch
  • 1/2 cup sugar
  • 2 tablespoons unsweetened cocoa powder
  • Pinch salt
  • 2 teaspoons vanilla extract
  •  
    For The Raspberry Purée

  • 1 package (6 ounces or 1-1/3 cups) raspberries
  • 3 tablespoons sugar
  •  
    For The Topping

  • 1 cup heavy cream
  • 2 tablespoons confectioner’s sugar
  • 1 teaspoon vanilla extract
  •  
    Preparation

    1. MAKE the crust. Preheat the oven to 350°F. Place the crumbs and sugar in a medium bowl and stir in the butter until evenly blended. Press the crumb mixture firmly on the bottom and up the sides of a 9-1/2-inch pie plate. Bake for 10 minutes. Cool.

    2. MAKE the filling. Whisk together 1/2 cup milk and the cornstarch. Set aside.

    3. BRING the remaining 1-1/2 cups milk, sugar, cocoa and salt just to a simmer over medium heat, stirring frequently. Stir the cornstarch mixture then add to the milk mixture in saucepan and bring to a boil, whisking constantly. Once mixture is at a boil and quite thick, cook 1 additional minute. Remove from the heat.

    4. MELT the chocolate and stir it into the melted chocolate and vanilla.

    5. SPOON the filling into the cooled crust. Cover the surface directly with plastic wrap to prevent a skin from forming (personally, we like the skin!). Chill at least 4 hours or overnight.

    6. MAKE the raspberry purée. Purée 1/2 package of raspberries in the food processor fitted with metal blade (the other half is used for garnish). Strain through a fine mesh strainer. Discard the seeds. Stir the sugar into the purée until dissolved.

    7. BEAT the heavy cream and sugar until stiff peaks just form. Stir in the vanilla. Spread the whipped cream topping on chilled pie. With a small spoon (an espresso spoon is great) drop small amounts of raspberry purée onto the whipped cream. Use a toothpick or sharp knife to swirl the purée into the whipped cream (see the 4th photo). Garnish with the remaining raspberries.
     
     
    MORE RASPBERRY PIE RECIPES

  • Raspberry Cream Pie
  • Raspberry Cream Pie With Raspberry Filling Layer
  • Raspberry Pecan Crumble Slab Pie
  • Raspberry Rhubarb Pie
  • White Chocolate Ice Box Pie With Raspberry Swirl (No Baking!)
  •  
    CREAM PIE VS. CREAM PIE

    What’s the difference between cream and creme? Just the spelling.

    Creme is an Americanization of the French word for cream, crème (pronounced KREHM), most likely adopted to make a dish sound more special.

    But why mispronounce another language’s word for cream? Unless it’s a French recipe, such as Coeur à la Crème or Crème Brûlée, stick to cream.
     
    PIE VS. TART

    We made a raspberry cream tart instead of a pie? What’s the difference between a pie and a tart? It’s interesting enough that we created an article about it. Check it out!

    For a quick visual, compare the first two photos at the top of the page.


    CHECK OUT WHAT’S HAPPENING ON OUR HOME PAGE, THENIBBLE.COM.


    Comments off

    RECIPE: Crunchy Fried (Or Baked) Tortilla Strips

    What more crunch in your summer salads? Toasted croutons and chow mein noodles have long served that purpose. But in recent times, tortilla chip strips have become the modern touch. We have a recipe to make your own, below.
     
     
    OTHER CRUNCHY OPTIONS

    You can also add slices of bell pepper, bok choy, carrot, celery, fennel, kohlrabi, radish or water chestnut; florets, and stalks* of broccoli, and cauliflower; and even nuts (try cashews).

    Romaine is the crunchiest lettuce; you can substitute or add shredded cabbage.

    But one ingredient we’ve been enjoying lately is fried tortilla strips.

    It had not been top-of-mind for us until the lightbulb turned on as we were crunching on the Skinnylicious Mexican Tortilla Salad at The Cheesecake Factory. These strips are more flavorful than chow mein noodles and most packaged croutons.

    We asked ourselves: Why don’t we use them on every salad?

    We headed to the supermarket and found bags of fried tortilla strips, from Fresh Gourmet’s slender Tri-Color Tortilla Strips to Mission’s standard strips that are wide enough for dipping.

    But you can easily make your own, simply by cutting corn tortillas into strips and frying or baking. The only difference is that yours will be fresh, warm, and all-natural. Bonus: You can control the amount of salt.

    There’s nothing better than homemade tortilla strips, warm and fragrant from cooking. They’re made the same way as tortilla chips; just in a different shape.
     
     
    RECIPE: FRIED TORTILLA STRIPS

    Ingredients

  • 4 six-inch corn tortillas
  • Vegetable oil
  • Kosher salt
  •  
    Plus

  • Deep-fry/candy thermometer
  • Wire skimmer
  •  
    Preparation

    1. STACK the tortillas. Cut them in half, then crosswise into thin strips (you can use a pizza cutter). Line a baking sheet with a double thickness of paper towels, for draining.

    2. POUR 3 inches of oil into a 4-5 quart pot. Clip the thermometer to the pot and heat the oil over medium-high to 350°F. Test the oil with a drop of water from the tap. If it sizzles, it’s ready; if it splatters, it’s too hot. Turn off the heat for a few minutes.

    3. ADD half of the tortillas to the oil carefully—that oil is hot!—and use a wire skimmer or slotted spoon to stir often so they don’t burn. The strips should be submerged in the oil until golden brown (about 3 minutes).

    4. REMOVE the tortillas with the skimmer or a slotted spoon, allowing the excess oil to drain back into the pot. Spread the strips on the paper towels to drain, and sprinkle with salt. Repeat with the remaining tortillas.

      Tortilla Strip Garnish
    [1] Mexican Tortilla Salad. Here’s the Skinnylicious recipe from the Cheesecake Factory (photo © Cheesecake Factory).

    Tortilla Strips
    [2] You can make your strips long as in the first photo, or short like these (photo © Heather H. | Food.com).

    Tortillas
    [3] Add pizzazz with beautiful colored tortilla chips (photo © Ramiro Valencia Fotografía).

     
    If you won’t be using the strips within a few hours, let them cool and store them in an airtight jar.
     
    Spicy Variation

    This option brushes the tortillas with seasoned oil, before stacking and cutting.

  • 1-1/4 cup vegetable oil
  • 2 teaspoons chili powder
  • 1/2 teaspoon ground cumin
  • 1/4-1/2 teaspoon cayenne pepper or 1?4-1?2 teaspoon ground red chili flakes
  •  
    COMBINE the oil and spices; brush one side of each tortilla with the mixture and proceed with steps above.
     
    Oven Variation

    1. PREHEAT the oven to 400°F.

    2. SPRAY a baking sheet with cooking spray and spread the strips, trying not to let them overlap. Sprinkle with salt.

    3. BAKE for 10-15 minutes until golden brown.
     
     
    USES FOR TORTILLA STRIPS

    In addition to a salad garnish, try them on:

  • Mac & Cheese, instead of toasted crumbs
  • Sandwiches, including burgers and franks
  •  
    __________________

    *There’s no reason to toss the bottom stalks of broccoli and cauliflower. The reason people do is because we’re accustomed to eating the “pretty” florets. The stalks are just as delicious—and they’re the parts used to make fancy purées. We cut them into coins and steam or roast them.
     

    CHECK OUT WHAT’S HAPPENING ON OUR HOME PAGE, THENIBBLE.COM.


    Comments off

    RECIPE: No-Bake Raspberry-White Chocolate Cheesecake

    Raspberry White Chocolate Cheesecake
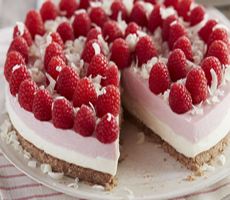
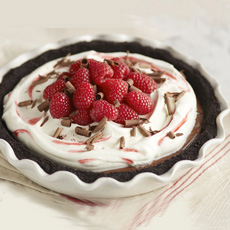
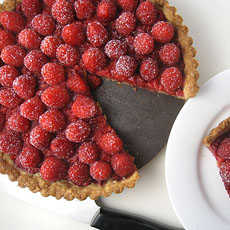
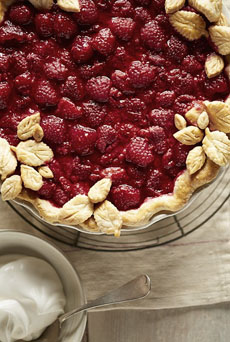
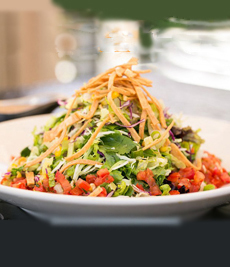
    [1] Raspberry-White Chocolate Cheesecake (photos #1 and #2 © Driscoll’s Berries).

    Raspberries Growing
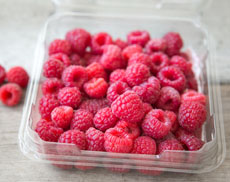
    [2] [2] A half-pint of raspberries.

    Scoop Of White Chocolate Chips
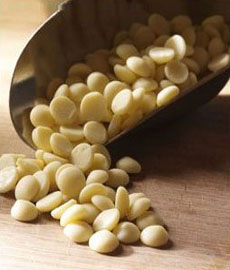
    [3] You can use white chocolate chips or chop up a white chocolate bar (photo © Lake Champlain Chocolates) .

    Bowl Of Almond Flour
    [4] Almond flour makes a delicious crust, and it’s also gluten free (photo © Webstaurant Store).

    Bob's Red Mill Almond Flour Package
    [5] Better food stories carry Bob’s Red Mill brand almond flour (photo © Bob’s Red Mill).

    Raspberries Growing On The Bush
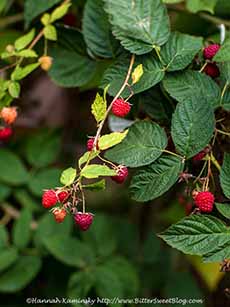
    [6] Raspberries growing on the bush (photo © Hannah Kaminsky | Bittersweet Blog).


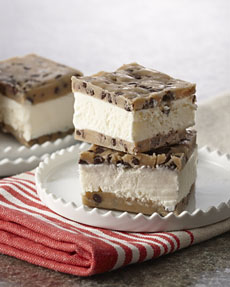
    July 31st is National Raspberry Cake Day: time to get out the cake pans and make a selection.

    With these yummy recipes, the choice isn’t easy! We’re starting off with a No-Bake Raspberry White Chocolate Cheesecake, but there are more raspberry cake recipes below.

    > The history of raspberries.
     
     
    RECIPE: NO-BAKE RASPBERRY WHITE CHOCOLATE CHEESECAKE WITH ALMOND CRUST (GLUTEN-FREE!)

    These recipe is from Driscoll’s, which supplied most of the recipes above to show off their delectable raspberries.

    It uses an almond flour crust, which is wonderful and happens to be gluten-free. However, if you don’t want nut flour, use your favorite cheesecake crust.

    Prep time is 40 minutes plus 6 or more hours of chilling time.

    > The history of cheesecake.

    Ingredients For 16 Serving)

    For The Filling

  • 2 packages (6 ounces each) Driscoll’s raspberries
  • 8 ounces white chocolate chips or white chocolate bar, chopped
  • 1/2 cup cold water
  • 1 package unflavored gelatin
  • 3 packages (8 ounces each) cream cheese, at room temperature
  • 1/2 cup sugar
  • 1 cup heavy cream
  •  
    For The Crust

  • 13/4 cups almond flour
  • 1/3 cup sugar
  • 1 tablespoon cocoa powder
  • 4 tablespoons unsalted butter, melted
  •  
    For The Garnish

  • 1 bar white chocolate, shaved
  •  
    Plus

  • 9″ springform pan
  •  
    Preparation

    1. MAKE the crust: Combine the almond flour, sugar, cocoa, and melted butter in a bowl until evenly blended. Press mixture into the bottom of a 9-inch springform pan and refrigerate.

    2. PLACE the chocolate in a double boiler or a metal bowl set over a saucepot of simmering water to melt chocolate. Stir constantly and be careful not to let any water or steam get into the chocolate. Set aside and let cool as you complete the next steps.

    3. COMBINE the cold water and gelatin in a small saucepan and heat over low, stirring just until gelatin is dissolved.

    4. BEAT the cream cheese, sugar, and dissolved gelatin in the bowl of an electric mixer on medium, until evenly blended.

    5. CHECK the temperature of both the cream cheese mixture and melted chocolate. They should be at the same temperature to continue. Then, mix a few tablespoons of the cream cheese mixture into the melted white chocolate until it looks shiny and smooth. Gradually add the white chocolate mixture to the remaining cream cheese mixture, mixing until blended. Divide the mixture evenly into 2 bowls.

    6. BEAT the heavy cream in a separate bowl, to stiff peaks. Fold the whipped cream into one of the bowls of the cream cheese mixture.

    7. PURÉE 1 package of raspberries in a blender or food processor. Strain (sieve) and discard the seeds; you should have about 1/2 cup purée. Stir the purée into the second bowl of cream cheese mixture, until evenly blended.

    8. POUR the whipped cream mixture into the cake pan and spread evenly. Spoon the raspberry mixture on top of the whipped cream mixture and gently spread it evenly. Cover the pan with plastic wrap and refrigerate for at least 6 hours or overnight.

    9. UNMOLD: Briefly wrap a warm, wet kitchen towel around the pan for a short while before opening the latch. This prevents the cake from sticking to the sides. A hairdryer also works.

    10. USE a vegetable peeler to make white chocolate curls from the chocolate bar. Place on top of the cheesecake with the remaining raspberries.
     
     
    MORE RASPBERRY CAKE RECIPES

  • Chocolate-Raspberry Bundt Cake
  • Chocolate-Raspberry Cheesecake
  • Greek Yogurt-Coconut Milk Cake With Raspberries
  • Hazelnut Raspberry Cream Cake
  • Raspberry Ombre Cake
  • Raspberry Heart Cake
  • Raspberry Ice Cream Cake
  • White Chocolate Raspberry Cheesecake (recipe above)
  • White Layer Cake With Raspberry Cheesecake Middle Layer
  •  
    And the easiest options of all: pound cake topped with:

  • Raspberry ice cream or sorbet
  • Vanilla ice cream and raspberries
  • Whipped cream and raspberries
  •  


    CHECK OUT WHAT’S HAPPENING ON OUR HOME PAGE, THENIBBLE.COM.


    Comments off

    The Nibble Webzine Of Food Adventures


    © Copyright 2005-2026 Lifestyle Direct, Inc. All rights reserved. All images are copyrighted to their respective owners.