[1] Spaghetti-stuffed meatballs. Here’s the recipe from Thrillist (photo © Drew Swantak).

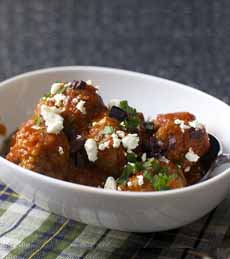
[2] Lamb and feta meatballs; here’s the recipe from Smitten Kitchen (photo © Smitten Kitchen).

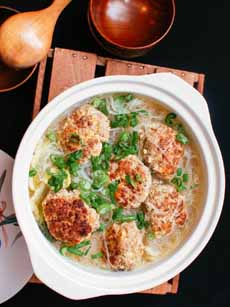
[3] Vietnamese who with meatballs. Here’s the recipe from Cooking And Beer (photo © Cooking And Beer).
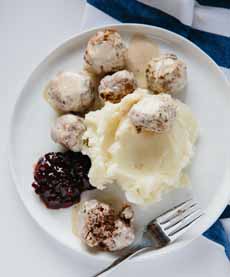
[4] Shanghai Lion’s Head; here’s the recipe from Serious Eats.

[5] Floating meatballs made from turkey, in carrot soup with spinach. Here’s the recipe from Parade (photo © Parade). |
|
MEATBALL TRENDS
What’s trending as of March 9th, National Meatball Day?
Flavor & The Menu, a magazine and website for chefs, took a look at what’s happening with meatballs.
Meatballs have been popping up on menus nationwide—beyond Italian restaurants, sub shops and the emerging meatball restaurants.
The ideas below may be new to some of us, but most of the recipes go back for centuries, if not longer.
Meatballs are being made with almost any ground or chopped meat, seafood, poultry, and vegetarian/vegan versions made with beans, grains and veggies.
Not only are meatballs a comfort food; they’re a canvas for endless versatility in formats, sauces, seasonings, sizes and garnishes.
Ten flavor trends were spotted by by Joan Lang, who wrote the article.
HOW ABOUT A MEATBALL PARTY?
The tempting variety of meatballs inspired us to plan a DIY Meatball Party, with a buffet of fixings from breads (pita, Italian rolls) to bases (pasta, cellophane noodles, rice or other grains), to condiments (grated or crumbled cheese) and raw vegetables (cucumber, lettuce, onion, tomato) and fresh herbs.
For a variety of choices, you can make meatball recipes as time permits, and freeze them until you have what you want for the party. If your guests typically ask what they can bring (and are good cooks), give them recipes to prepare.
TRENDS ONE THROUGH TREND FIVE
Today we present the first five meatball trends. The others arrive tomorrow.
Whatever types of meatballs appeal to you, you’ll find score of recipes online.
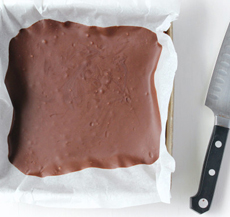
1. STUFFED MEATBALLS
Stuffed meatballs require only the simple addition of a tasty filling inside a handful of ground meat. Don’t tell anyone, and let them be surprised when they dig in.
Different types of cheeses are the traditional stuffings—everything from mild mozzarella and ricotta to tangy blue and feta.
But we’ve also found meatballs stuffed with spaghetti (photo #1) and with mac and cheese. More examples:
Polpetta Napoletana: A meatball stuffed with ham, peas and mozzarella in tomato sauce, at Bella Tuscany in Windemere, Florida.
Spaghetaboudit Meatball: A classic meatball stuffed with three cheeses and fusilli pasta, topped with marinara and shaved Parmesan. It’s also garnished with ricotta, at The Meatball Room in Boca Raton, Florida.
Brisket Meatballs: An interesting concept, stuffed with blue cheese and accented with a balsamic glaze, at Clark Food & Wine Co. in Dallas.
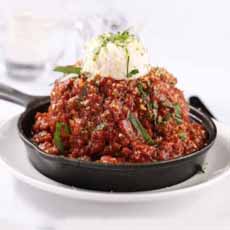
2. LAMB MEATBALLS
Inspired by Greek recipes, lamb meatballs—keftedes—will make lamb lovers happy. We purchase ground lamb and mix it with crumbled feta and herbs (photo #2). Or, you could stuff them with feta, for the surprise.
Mixed with mix with bulgur wheat, it becomes Lebanese-style kibbeh. Add a yogurt sauce.
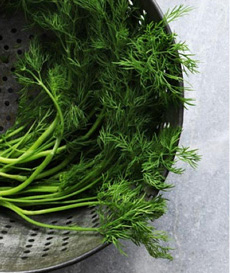
Use plenty of Mediterranean spices—basil, cilantro, dill, rosemary, oregano, sage, thyme. Check out the spices: cinnamon, coriander, cumin, nutmeg and za’atar. You can:
Shape the meat mixture into small balls like falafel, serve it in pita with yogurt sauce, tahini and hummus and raw veggies: cucumber, red onion, shredded lettuce and/or tomato.
Serve them over pasta or grains, with yogurt sauce flavored with dill, lemon or mint.
Serve on skewers with a plate of sautéed or roasted vegetables.
Make them slightly larger than cherry tomatoes, and serve in a bowl with the tomatoes and an herb garnish as a cocktail snack (with picks), plain with a squeeze of lemon juice or with a yogurt-garlic-dill dipping sauce (recipe).
Serve with fresh mint chimichurri and yogurt sauce, as at Mud Hen Tavern in Los Angeles.
Make soutzoukakia, grilled lamb meatballs with spiced tomato sauce and Greek yogurt, as at Kokkari, San Francisco.
3. ASIAN MEATBALLS
The meatballs of Asia are typically made from pork or seafood, and to a smaller extent chicken. Consider:
Vietnamese/Laotian pho noodle soup with meatballs (photo #3). You can add them to Asian soup or ramen bowls, too.
Shanghai Lion’s Head, a dish of large pork meatballs stewed or steamed with cabbage. Here’s a recipe from Serious Eats.
Shrimp balls: fried balls of chopped shrimp, drizzled with katsu sauce and/or Kewpie mayonnaise.
Tako yaki, deep fried octopus balls.
Tsukune, a Japanese chicken meatball most often cooked yakitori style, and sometimes covered in a sweet soy sauce or yakitori tare, which is often mistaken for teriyaki sauce but is its own recipe.
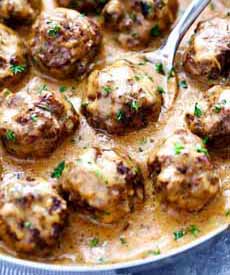
We like this Asian Meatballs recipe from Life Makes Simple Bakes. Its served with a hoisin-based sauce, and traditional Asian flavors (photo #3).
Chefs are making:
Meatball Spring Rolls: steamed rice paper wrapped around pork meatballs, pickled carrots and vermicelli, served with peanut sauce, at Pho Bistro in Malden, Massachusetts.
Tsukune: chicken meatballs with a choice of flavorings, including teriyaki, spicy miso, yuzu, daikon, goma (sesasme), kimchi, curry and cheese fondue—at Tsukuneya Robata Grill in Honolulu.
|