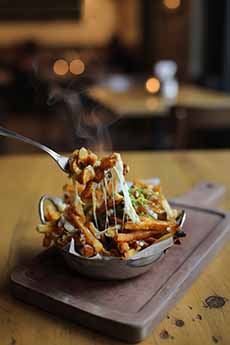
[1] Classic poutine (photo © La Poutine Week | Facebook).
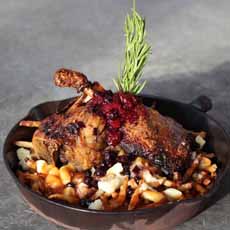
[2] Gourmet poutine with boar shank, duck confit and foie gras sauce (photo © Brasseur de Montréal).
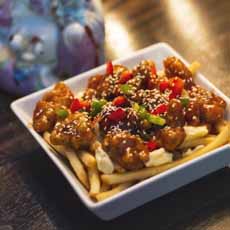
[3] Poutine topped with General Tso’s Chicken (photo © Wok N Roll).
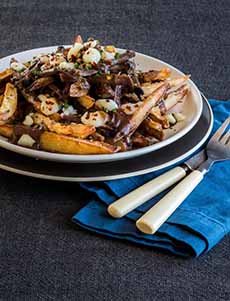
[4] Pulled pork poutine (photo © Dirty Dogs).
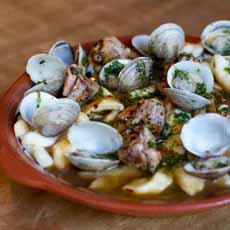
[5] Surf and turf poutine with pork and clams (photo © Grillades Dasilva).
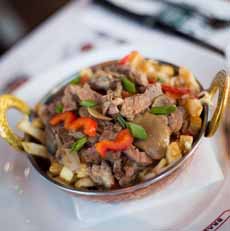
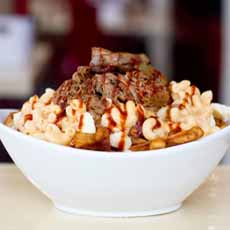
[6] Cheese steak poutine (photo © 3 Brasseurs Canada).

[7] Corned beef and fried egg (photo © Tavern Ferriera).
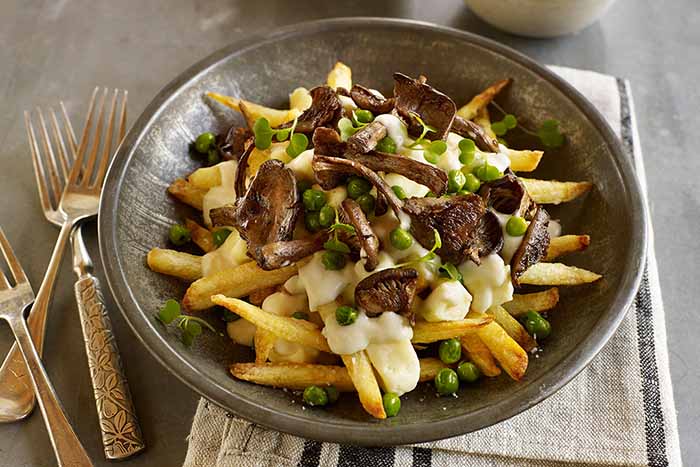
[8] A hearty meal: Beef Brisket Poutine. Here’s the recipe (photos #8, #9, and #11 © Idaho Potato Commission).
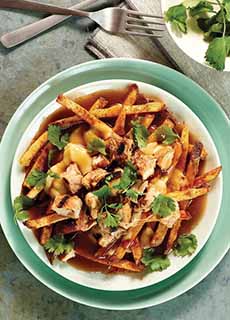
[9] Fusion food: Chicken Tikka Poutine. Here’s the recipe.
|
|
The first week in February is La Poutine Week in Canada.
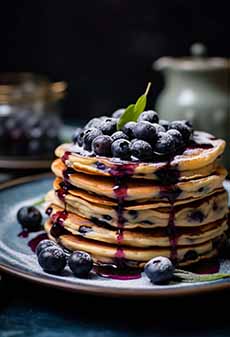
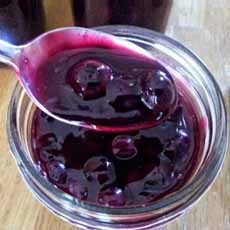
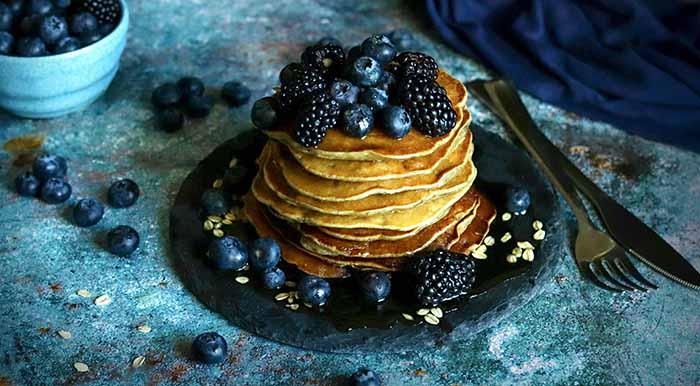
Often referred to as the national dish of Canada, poutine is comfort food made of French fries and cheese curds topped with brown gravy.
It’s the northern version of cheese fries, with brown gravy instead of ketchup. It begs to be accompanied by a cold beer.
Below:
> Fancy poutine toppings.
> The history of poutine.
> How to have a poutine party.
Elsewhere on The Nibble:
> The different types of French fries: a photo glossary.
> The different types of potatoes: a photo glossary.
> The history of potatoes.
> The year’s 30+ potato holidays.
GET FANCY WITH POUTINE TOPPINGS
What was a simple recipe, developed decades ago in Quebec as a snack to follow a night of drinking, has become a culinary phenomenon.
During La Poutine Week, chefs at restaurants across Canada pull out all the stops to out-poutine the classic poutine with toppings, that go atop the fries, curds and gravy.
These enhancements are just some of the variations added on top of the basics:
Asian fusion, with caramelized kimchi, beef tongue and Japanese mayonnaise.
Asian surf and turf with pork balls, Vietnamese shrimp, curry poutine sauce and lime leaf.
BBQ beef, with fried egg and scallions (recipe).
Bourguignon, with braised beef in red wine, pearl onions, bacon and mushrooms.
Breakfast, with bacon, scrambled eggs, grated cheese and chorizo sauce.
Caesar, with grilled romaine, anchovy, 65-degree egg, croutons, fried capers, prosciutto chips, mustard and balsamic sauce.
Chicken dinner, with roast chicken and green peas topped with mashed potatoes.
Fried chicken, with pickled onions, shredded scallions and honey poutine sauce.
Fried fish filet, with tartar sauce and lemon wedge.
General Tso’s chicken (fried chicken pieces with sesame seeds, red and green bell peppers, Chinese brown sauce, peppers and sesame seeds.
Gourmet with braised boar shank, confit duck leg, Black Watch beer sauce with foie gras, rosemary and blueberry jam.
Japanese, with minced pork, grated cheese, shiro miso sauce, half boiled egg, scallions, nori seaweed julienne.
Mac and cheese, topped with mac and cheese, bacon, scallions.
Mexican style with cheese sauce, chile sauce, sour cream, coriander.
Middle Eastern-style with hummus, green peas, shallots and a touch of hot sauce.
Nacho style with pico de gallo, grated jack cheese.
Oktoberfest, with duck-fat fries, Oktoberfest sausage, beer cheese, beer sauce, apples, bacon and sauerkraut.
Philly steak style with sliced beef, melted cheese, onions and fried mushrooms.
Pizza, topped with melted mozzarella and pepperoni.
Pork Lovers with pulled pork, pork meatballs and cheese with bacon bits, topped Jack Daniels sauce.
Reuben with corned beef, Swiss cheese, sauerkraut and Russian dressing.
Ribs with honey-whiskey sauce, and smoked grated cheese.
Tex-Mex, with guacamole, salsa, tortilla chips and cilantro.
Seafood, with shrimp, lobster, smoked trout, grated gruyè re, sliced jalapeños and béchamel sauce.
Year-round, La Banquise in Montreal serves more than thirty different kinds of poutine. It’s open 24 hours daily. Here’s the menu.
HAVE A POUTINE PARTY
It’s fun to set up a buffet and let guests top their own.
To make it a group effort, you can ask everyone to bring a different topping.
Bacon
Broccoli and/or other vegetables
Cubed chicken
Onion rings
Other cheese (crumbled blue cheese, grated cheddar, etc.)
Sliced steak
Tofu, grilled or sautéed
Plus condiments and garnishes: chopped scallions, fresh dill or parsley, ketchup, mustard, sour cream.
And plenty of beer.
POUTINE HISTORY
Various places claim the credit for inventing poutine, in rural Quebec in the 1950s, where numerous dairies produced Cheddar cheese curds.
The first leg of the story is that poutine originated in a restaurant called Le Lutin Qui Rit (“The Laughing Goblin”), when a customer asked the owner Fernand Lachance to mix cheese curds with his fries.
A restaurant called Le Roy Jucep is the first to have served poutine as we know it today—French fries, cheese and gravy—in 1964. The owner registered a trademark for the dish.
Another restaurant La P’tite Vache (“The Little Cow”) sold curds from the local Princesse dairy. Customers would order fries and buy a bag of cheese curds to mix together at their tables in a 50:50 proportion. When gravy was added, the dish became known as “mixte” (“mixed”).
The name “poutine” appeared in 1982, when large restaurant chains began to sell it. While no one can explain the derivation for certain, it could be derived from the English word “pudding,” which was expressed as “pouding” in Acadian French.
One meaning of “pouding” in Canada is “an unappetizing mixture of various foods, usually leftovers.” According to Merriam-Webster, poutine derives from a Quebecois slang word meaning “mess.” [Source]
Turn the “mess” into a DIY-topping treat!
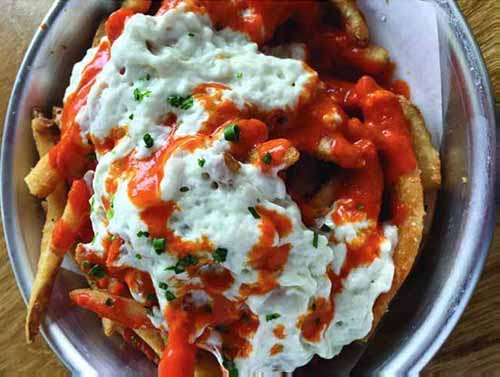
[10] The Red Herring in Louisville, Kentucky makes a Buffalo wing-style poutine with blue cheese and hot sauce replacing cheese curds and gravy (photo © Red Herring).
|