|
We don’t know who invented S’mores, but the Girl Scouts certainly popularized them. The first published recipe is in their 1927 handbook.
(Here’s the history of s’mores.)
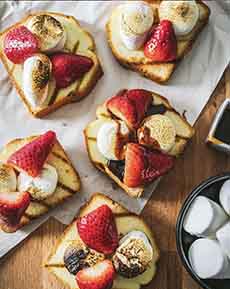
S’mores around the campfire has been a yummy tradition: a stick, a fire, two toasted marshmallows, a square of chocolate and two graham crackers turn into a delicious chocolate marshmallow sandwich.
While there have been numerous creative uses of s’mores (see our recipe list), as well as flavored marshmallows and chocolate-covered marshmallows, there’s now a true innovation:
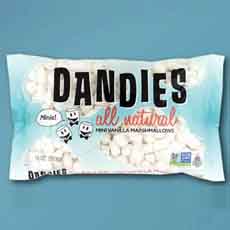
This summer, Stuffed Puffs, marshmallows filled with chocolate, debuted at WalMart.
Stuffed Puffs were created by Michael Tierney (who also created the Mikey’s line of paleo baked goods).
What seems like an obvious idea, he says, was actually born around a campfire. It’s a simple idea, but very hard to execute—which is why it hasn’t been done before.
It took Tierney seven years to work out the details. Now that chocolate-filled marshmallows are a reality, S’mores lovers no longer have to juggle marshmallows, chocolate bars and graham crackers over heat—be it campfire, fireplace, grill or gas stove.
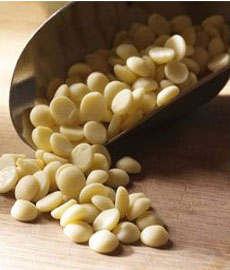
It also solves the problem that the marshmallow does not get hot enough to melt the chocolate. With the chocolate inside the marshmallow, Stuffed Puffs has ingeniously solved the problem:
The chocolate melts while the marshmallow toasts. It’s fail-safe.
NATIONAL S’MORES DAY IS AUGUST 10TH. Plan ahead!
BEYOND S’MORES
While Tierney created Stuffed Puffs specifically for S’mores, we also enjoy them for snacking, right out of the bag.
We’ve also used them for:
Dessert garnishes
Dessert skewers, with cake cubes and fruit
Hot chocolate
Snack plates, with cookies, peanut butter cups and other favorites
Sundaes
Toasted on skewers (skip the graham crackers)
For Summer 2019, you can find Stuffed Puffs at WalMart.
In the fall, they will be available at stores nationwide.
Different flavors and coatings are in the works. We can’t wait!
For more information visit StuffedPuffs.com.
THE HISTORY OF MARSHMALLOWS
Marshmallows take their name from the marsh mallow plant (Althea officinalis)—a large herb that grows in marshes.
The root of the plant produces a sticky, white, almost jelly-like (or sap-like) substance called mucilage. (Sound familiar? Mucilage is also a term used for glue, because it’s sticky like the sap.)
Mallow was an edible vegetable in Roman cuisine. A a dish of marsh mallow was one of their delicacies [source].
The Egyptians may have used it as early as 2000 B.C.E., combining it with honey to make a candy.
The Greeks (and later, the Arabs and Indians), used marsh mallow for medicinal purposes, often as an ingredient in preparations to quiet coughs.
Today, we have better cough remedies: Bring on the candy!
Here’s more history of marshmallows.
|