|

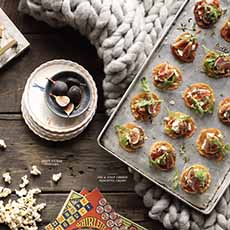
[1] The recipient gets a certificate suitable for framing…and then updates until the cheddar cheese arrives (photos #1 and #2 © Rent Mother Nature).
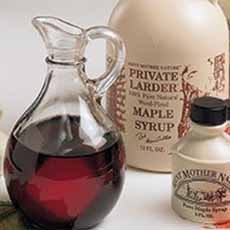
[2] This maple syrup comes from “your” sugar maple tree.
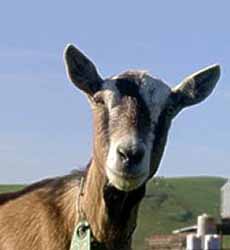
[3] You’ll get updates from your goat, and then her cheese will arrive (photo © Laloo’s Goat Milk Ice Cream | Laloo’s | Ice Cream Source).

[4] Busy bees are making honey for your gift recipient (photo © Wolfgang Hasselmann | Unsplash).
|
|
This specialty business lets you “lease*” a farm animal, tree or field and receive its bounty: cheese, fruit,
Since 1979, Rent Mother Nature has been supporting natural, organic agriculture on small family farms.
Your “lease fee” lets you gift farm-fresh harvests. They’re:
Nutritious.
Organic and sustainable.
Vegetarian/vegan options.
Something the recipient doesn’t have.
Immediately consumable.
Supporting small family farmers.
WHAT YOU GET
Lease a cow, for example, and you’ll get:
A “lease” document printed on parchment stock, embossed with a gold seal (it’s hand personalized, and suitable for framing).
An announcement folder that describes the many benefits of your ongoing gift.
Your gift message and a brief description of the upcoming harvest.
A photo of your cow (let’s say her name is Flossie).
Regular progress reports to keep you up-to-date on the harvest.
Upon completion of the harvest, the gift is delivered to your door.
In the case of Flossie, you six wheels of “her” cheese.
According to the company, satisfaction and bountiful yields are 100% guaranteed.
WHAT ELSE CAN YOU LEASE?
Rent Mother Nature, founded in 1979, “leases” some 20 different animals, trees and grains.
The crops come from 15 U.S. states plus Colombia, Mexico and Peru.
Depending on your choice, your lease could yield a jug of maple syrup from “your” tree, a wool blanket from “your” sheep, or a jar of honey from “your” beehive.
The current lease opportunities include:
Animals: beehive, cow, goat, lobster, oysters
Trees: apple, date palm, cocoa, coffee, grapefruit, honeybell, maple, peach, pistachio, tangerine
Grains: rice, wheat field.
Of course, you could purchase the food items in a store for a lot less money.
But where’s the fun in handing someone several pounds of wild rice or three wheels of cheddar?
> LEARN MORE & GET YOUR LEASE HERE.
________________
*What’s the difference between lease and rent? In real estate terms, a lease is a contract for a specific period of time (e.g., 6 or 12 months), after which the contract expires. Rent is the payment made under the terms of the lease [source].
|