THE NIBBLE BLOG: Products, Recipes & Trends In Specialty Foods


Also visit our main website, TheNibble.com.

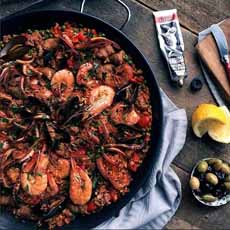
TIP OF THE DAY: More Modern Surf & Turf Ideas … Plus Spring Peas

National Surf & Turf Day falls on February 29th. Why would anyone choose to celebrate this tasty holiday only once every four years?

That honor should go to, say, National Chocolate Covered Cashews Day, which happens to be today’s holiday (April 21st). Or how Kitchen Klutzes of America Day (June 13th), or Cheese Sacrifice Purchase Day (July 29th)?

So today, we’re featuring some novel approaches to surf and turf.

On THE NIBBLE alone, we have obvious and not-so-obvious recipes:

  • Beef Carpaccio & Anchovies
  • Broiled Seafood With Beef Jerky Garnish
  • Clam Chowder With Bacon
  • Filet Mignon With Lobster Topping
  • Ham & Biscuits With Seafood Gravy
  • Modern Surf & Turf (18 recipe ideas)
  • National Surf & Turf Day (5+ recipe ideas)
  • Raw Scallops With Steak Tartare Or Bacon
  • Salmon BUrger With Bacon
  • Seafood Cobb Salad
  • Sea Urchin & Roast Beef Rolls
  • Surf & Turf Burgers
  • Surf & Turf Sushi & More (18 recipe ideas)
  • Surf & Turf Bloody Mary
  • Surf & Turf Eggs Benedict
  • Veal Osso Bucco On Tuna Sashimi
  • Vietnamese Pancakes With Shrimp & Pork
  • Wiener Schnitzel Surf & Turf
  •  
    Not to mention, Surf & Turf Pizza (clams or shrimp with pepperoni) or skewers (any meat, any shellfish).

    Our latest dish in the collection:
     
     
    RECIPE: SQUID & SPRING PEAS

    Who’d have thought of combining squid and bacon with fresh spring peas and fresh mint? Catalan chefs, with bounties of fresh squid pulled from the Mediterranean.

    This recipe is from Executive Chef Jaime Chavez of Sirena Cucina Latina in San Diego (which alas, closed in February).

    It’s a traditional Catalan starter from the chef’s mother, and is one of the restaurant’s best sellers.

    “[Mother] taught me that the best dishes are made from simple flavors, and when we respect the products, they give us back the very best of them,” notes Chavez.

    While Chef Jaime didn’t intend to create “surf and turf,” we’re always seeking new ways to extend the original concept of filet mignon and lobster tail, christened Surf & Turf (here’s the history of Surf & Turf).

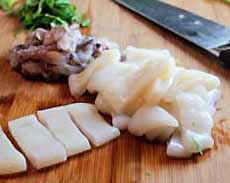
    This is an easy recipe; the most demanding parts are slicing the squid and cooking the bacon.

    The season for fresh spring peas is short, so don’t bookmark this for “later.”

    Check out the difference between spring peas and other green peas, below.

    Ingredients For 4 Servings

  • 8 each squid tubes and tentacles
  • 1½ cups fresh English peas, shelled
  • 1 teaspoon chopped garlic
  • ½ cup sliced celery
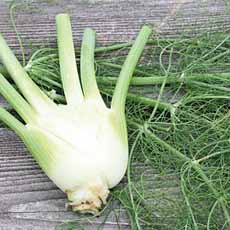
  • ½ cup sliced fennel
  • 3 tablespoons crisp bacon
  • 1 tablespoon extra virgin olive oil
  • ½ teaspoon Champagne vinegar (substitute white wine vinegar)
  • 1 tablespoon chopped fresh mint
  • Salt and pepper to taste
  • Optional garnish: edible flowers
  •  
    Preparation

    1. SAUTÉ the squid and garlic in olive oil in a hot pan. Cut the squid into rings.

    2. ADD the peas and season with salt and pepper. Then add the vinegar and mint.

       
    Squid Salad With Spring Peas
    [1] Squid, bacon and spring peas unite in a vinaigrette (photo © Chef Jaime Chavez).

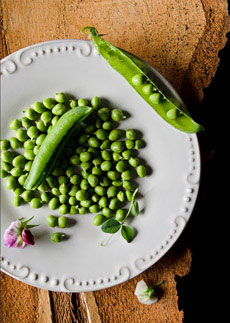
    Shelled Peas
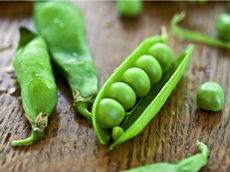
    [2] Just-shelled spring peas (photo © The Chef’s Kitchen).

    Raw Squid
    [3] Raw squid (photo © Williams-Sonoma).

    Grilled Bacon
    [ ] .

    Fennel Bulb
    [4] Fennel (photo courtesy Burpee).

     
    3. REMOVE from the heat and add the celery, fennel, and bacon. Garnish as desired and serve (the edible flowers add another touch of springtime).
     
     
    Here are more ways to use spring peas.


    Spring Peas
    [5] There are three types of green peas. Here, spring peas, also called English peas and garden peas (photo © Hannah Kaminsky | Bittersweet Blog).

    Snow Peas
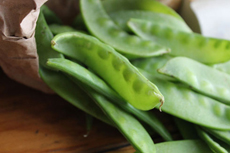
    [6] Snow peas (photo © AllWomensTalk.com).

    Sugar Snap Peas

    [7] Sugar snap peas (photo © Good Eggs).

      SPRING PEAS, ENGLISH PEAS OR GARDEN PEAS?

    Spring peas, English peas, and garden peas are three names for the same thing. All can be eaten raw or cooked.

    Three types of green peas:

  • Spring peas (Pisum sativum var. sativum, photo #5), also called English peas and garden peas, which must be shelled to be edible (although some people do cook the stringless varieties).
  • Snow peas (Pisum sativum var. saccharatum, photo #6), called “Chinese pea pods” by some consumers, which are edible flat pods with tiny peas inside.
  • Snap peas (Pisum sativum var. macrocarpon, photo #7), also called sugar snap peas, are plump edible pods with smaller peas inside.
  •  
    Peas (Pisum sativum) are native to the Mediterranean basin. They grew wild and were one of the earlier vegetables cultivated at the dawn of agriculture in the Neolithic Era, beginning about 12,500 years ago.

    Having said that, pea pods are botanically a fruit since they are pods that contain seeds, and the pods developed from the ovary of a flower.

    Peas, beans, and lentils are all legumes with seeds that grow in pods. It’s easy to distinguish them by their shape:

  • Dry beans are oval or kidney-shaped.
  • Lentils are flat disks.
  • Peas are round.
  •  
    Legumes are members of the botanical family Fabaceae, which also includes alfalfa, carob, licorice, peanuts, and the sweet pea garden plant.
     
    Peas are sweet but can get starchy soon after harvesting. The fresher, the better.

     
    HOW TO BUY & STORE FRESH PEAS

    For the best flavor, choose small peas. They’re younger, sweeter, and more tender than large ones. Look for medium-size pods that are firm and green, with no yellowing. Break open a pod and check the peas. They should be small, bright green, and firm. Taste the peas in the pod: They should be tender and sweet.

    Freshness counts. As with corn, once picked the peas’ high sugar content begins to convert to starch. Don’t pay for mature peas. You might as well use frozen peas.

    Don’t pay extra for shelled peas. You don’t know how fresh they are; and since you aren’t shelling peas day in, day out, it’s a fun activity.

    Storing Fresh Peas

  • Store the pods in the crisper drawer of the fridge in a plastic storage bag. Use them within two days.
  • Once the peas are shelled, the best way to store them is to freeze them. First, blanch the peas for a minute in boiling salted water. Then shock them in an ice-water bath to stop the cooking and maintain their bright color. Drain and freeze them in freezer storage bags for up to six months.
  •  
     

    CHECK OUT WHAT’S HAPPENING ON OUR HOME PAGE, THENIBBLE.COM.


    Comments off

    History Of The Upside Down Cake & The History Of Cake Pans

    If you’ve never had an upside-down cake, today’s the day: April 20th is National Pineapple Upside Down Cake.

    Why are cake pans round? The answer is below, with the history of cake pans.

    With an upside-down cake, fruit is set on the bottom of the pan, topped with cake batter.

    When the cooking is complete, the skillet is inverted onto a plate, such that the fruit is now on top, although it was baked upside-down.
     
     
    THE HISTORY OF THE UPSIDE DOWN CAKE: SCION OF THE SKILLET CAKE

    This cake was originally made on the stove top in a skillet, and called skillet cake (photo #4). Today, it’s the same process, but with the benefit of cake pans and ovens.

    (Want to be authentic with a skillet and the stove top? No one will stop you! Those who want to go really authentic should try cooking it over a campfire or wood fireplace.)

    To make a skillet cake, fruit is set on the bottom and the batter poured on top. When the skillet or pan is inverted, the fruit that was once at the bottom forms a decorative topping. Any fruit can be used.

    When canned pineapple rings became available in the first half of the 20th century, Pineapple Upside Down Cake became the rage—often with maraschino cherries in the center of the pineapple rings.

    As the recipe evolved, cooks put their skillets in the oven to bake. Nordicware, creator of the bundt pan, created a special round pan with indentations for the pineapple slices (photo #6), guaranteeing a perfect presentation.

    To show how popular the cake became, they also make mini pans for individual Upside-Down Cakes.

    Check out these upside down cake recipes:

  • Blood Orange Upside Down Cake (photo #2)
  • Upside-Down Ginger-Pecan Peach Pie
  • Upside Down Irish Whiskey Cake
  •  
    Upside Down Cake is related to Tarte Tatin, an accidental upside-down pie from 1880s France.

    Also check out the different types of cakes.
     
     
    THE HISTORY OF CAKE PANS

    Why are cakes round?

    Generally, the round cakes we know today are descended from ancient breads, before there were baking pans of any kind.

    Yeast-risen breads and cakes were made by hand, patted into balls and baked on hearthstones, griddles, or in low, shallow all-purpose pans.

    By the 17th century, cake hoops made of metal or wood were placed on flat pans to shape cakes.

    According to food writer Elizabeth David, in the seventeenth century, tin or iron hoops (photo #4) were increasingly used and to shape cakes, and are frequently mentioned in the “cookery books” (think of the modern flan ring, but much deeper).

    The hoop was placed on an iron or tin sheet, with a layer of floured paper on the bottom (think of today’s parchment paper). The sides of the hoop were buttered to ease removal of the baked cake.

    You can find “these or similar directions offered over and over again in Eliza Smith’s The Compleat Housewife, first published in 1727 (which has recipes for 40 cakes, the large ones being yeast-leavened).

    In the preface of her book, Mrs. Smith says that her recipes reflect some 30 years of experience, so it is likely that her methods date back to the previous century.

    Some recipes direct the reader to bake the cake in a paper hoop (oiled so not to burn), which was used in kitchens of the 1600s [source].

    Wooden hoops were also fairly common. Some cooks preferred them to tin, perhaps because they didn’t rust and thus were easier to store. Wood also didn’t overheat, so were less likely to burn the sides of the cake in those primitive ovens.

    Over time, baking pans in various shapes and sizes became readily available to the general public. By the 17th century, it was common for a western kitchen to contain a number of skillets, baking pans (including cake pans with bottoms), a kettle, and several pots, along with a variety of pot hooks and trivets.

    In the American colonies, these items would have been produced by a local blacksmith from iron, while brass or copper vessels were more common in Europe.

    Improvements in metallurgy during the 19th and 20th centuries enabled the economical production of pots and pans from lighter metals such as steel, stainless steel and aluminum [source].

    Molded cakes in fancy shapes reached their zenith in the Victorian era (commencing with the crowning of Queen Victoria in 1831).


    Pineapple Upside Down Cake
    [1] A Pineapple Upside-Down Cake. Here’s the recipe (photo © King Arthur Flour).

    Blood Orange Upside Down Cake
    [2] A Blood Orange Upside Down Cake. Here’s the recipe (photo © from Good Eggs).

    2 Layer Apple Upside Down Cake
    [3] A two-layer Apple-Whiskey Upside Down Cake. Here’s the recipe from Betty Crocker).

    Skillet Cake
    [4] A skillet cake. Here’s the recipe for a Pineapple Upside-Down Skillet Cake (photo © King Arthur Flour).

    Wood Baking Hoop
    [5] An old-fashioned baking hoop (photo © Creeds Direct).

    Pineapple Upside Down Cake Pan
    [6] Nordicware’s Pineapple Upside-Down Cake pan (here it is on Amazon—photo © Nordic Ware).

     
    Today, fancy cake molds can still be had; as well as animal molds, action figures, beehives, sports equipment and football fields, vehicles and other popular culture shapes. Here’s the history of the bundt pan.
     
     
    LIKE FOOD HISTORY?

    Check out the history of some 700 foods on THE NIBBLE.
      

    Comments off

    TIP OF THE DAY: Spring Peas, Use ‘Em Or Lose ‘Em

    Green Pea Potstickers
    [1] Recipe #1, Spring pea dumplings (photo © Hannah Kaminsky | Bittersweet Blog.


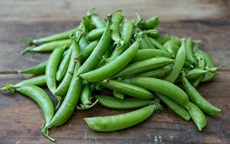
    [2] Spring peas, also called English peas and green peas (photo © R.Khalil | Pexels).

    Edamame
    [3] Edamame, immature soybeans that are boiled or steamed (photo © Burpee).

    Head of Savoy Cabbage
    [4] Savoy cabbage, the most elegant-looking of the cabbage varieties. It is named after the Savoy Region in France (photo © Monika Grabowska | Unsplash).

    Spring Tartine
    [5] Recipe #2, a tartine (open face sandwich) with spring peas and other spring ingredients from Chef Alain Ducasse (photo © All My Chefs).

    Fresh Green Asparagus
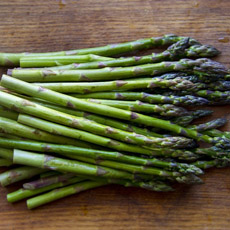
    [6] Fresh asparagus for the tartine, recipe #2 (photo © Baldor Specialty Food).

    Fennel Bulb
    [7]

    Baby Arugula
    [8] Baby arugula for the tartine (photo Baldor Specialty Food | Facebook).


    [9] If you can find a box of mixed-color cherry tomatoes, it will give your tartine that much more appeal (photo © Love Food Art | Pexels).

    Spring Peas Salad
    [10] Recipe #3: burrata salad—note that you can’t eat the shells of spring peas (photo © The Gourmet RD).

      Spring pea season is fleeting. Enjoy as much of the tender green nuggets as you can: raw in salads or for snacking; or spring peas lightly steamed in recipes. (Spring peas are also known as English peas and garden peas.)

    At breakfast—the meal least likely to include spring peas—you can use them to garnish eggs, avocado toast, or a bagel with cream cheese.

    You can toss raw or cooked peas into plain Greek yogurt. Use them as a garnish, or mash them and stir them in as you would with preserves.

    Moving on to snacks and appetizers: Here are three tasty recipes for appetizers, first courses, or snacking. For a special main course, check out this innovative approach to surf and turf: Squid With Bacon & Spring Peas.

    The recipe for Spring Pea Or Edamame Potstickers follows.

    The recipe for Spring Tartine is below.

    The third recipe is below

    > Here are more ways to use spring peas, and the history of peas.
     
     
    RECIPE #1: SPRING PEA OR EDAMAME POTSTICKERS

    Hannah Kaminsky adapted her easy edamame potstickers recipe (photo #1) to showcase spring peas. She mixes the legumes with hummus for extra protein, although you can skip the hummus and just fill the dumplings with peas).

    Hannah notes:

    “General folding advice still stands as a good guideline to follow when wrapping things up, but once you get those papery thin skins to stick, you’re pretty much golden.

    If you’re less confident in your dumpling prowess, cut yourself a break and fold square dumpling wrappers in half instead. You’ll still get neat little triangles.”

    If celebrate Purim, you can serve these as savory Haman’s Hats.

    Ingredients For 15 Dumplings

  • 1 cup shelled spring peas (photo #2) or edamame (photo #3)
  • 1/3 cup edamame/pea hummus (mash them into regular hummus, to taste)
  • 1 scallion, thinly sliced
  • 1 clove garlic, finely minced
  • 1/2 teaspoon fresh ginger, finely minced
  • 1 teaspoon soy sauce, plus more for dipping
  • 1 teaspoon toasted sesame oil
  • 1/4 teaspoon ground cumin
  • Savoy cabbage (photo #4)
  • 15 (3-inch) round wonton skins or gyoza wrappers*
  •  
    Plus

  • Steaming basket or rack
  •  
    Preparation

    1. SET UP the steaming apparatus: Line a bamboo steamer or metal steam rack with leaves of savoy cabbage to prevent the dumplings from sticking to the bottom (and eat it afterward). Place the steamer in a large pot with water and heat the water to boiling; then reduce to simmer. Meanwhile…

    2. MIX together the shelled edamame, hummus, scallion, garlic, ginger, soy sauce, sesame oil, and cumin, stirring thoroughly. Lay the dumpling wrappers on your work surface and place about 1 tablespoon of filling in the center of each. Run a lightly moistened finger around the entire perimeter and bring the sides together, forming a triangle. Tightly crimp the corners together with a firm pinch.

    3. PLACE the dumplings on the cabbage leaves and cover the steamer or pot. Steam for 2 to 4 minutes, until the wrappers are translucent. Serve immediately, with additional soy sauce for dipping if desired.

    ________________

    *You can typically find these either in the produce section near the tofu, or in the freezer aisle with other Asian ingredients.
    ________________


    RECIPE #2: SPRING TARTINE

    This recipe, courtesy of All My Chefs, is from the great Alain Ducasse.

    It requires no particular cooking technique…or even cooking, except for blanching the asparagus and green beans. Otherwise, you just slice and assemble.

    Serve them as a snack, a first course, or with a glass of wine.

    Here’s more about tartines, French for open-face sandwiches.

    This recipe was originally published in “Nature By Alain Ducasse” (Éditions Alain Ducasse).

    Ingredients For 4 Servings

  • 16 small green asparagus
  • A good handful† peas
  • About 10 radishes, washed and peeled
  • 1/4 fennel bulb, rinsed
  • About 20 cherry tomatoes, rinsed and halved
  • A handful wild arugula, rinsed, patted dry, stalks removed (you can save them for salads)
  • 4 slices multigrain or whole wheat bread
  • 5-1/2 ounces (100g) Saint-Moret** or similar cream cheese
  • 1-1/2 ounces (40g) grated parmesan cheese
  • Sea salt or flake salt
  • Freshly-ground black pepper
  •  
    Preparation

    1. BRING a saucepan of salted water to a boil, and prepare a bowl with water and ice cubes.

    2. CUT the tips of the asparagus into approximately 2-inch (5-6 cm) pieces. Rinse and immerse in the boiling water with the peas.

    3. DRAIN and immediately plunge them into the ice water to keep their color. Leave for 2 minutes, then drain with a slotted spoon and lay on a dry tea towel. (TIP: We put the vegetables into a strainer. It’s easy to lift the strainer to drain, then plunge it into the ice bath.)

    4. SLICE thee radishes into fine rounds (about 3 mm) with a mandoline (we used a knife). Slice the fennel into thin slivers of the same size.

    5. ASSEMBLE: Spread the bread with cream cheese and arrange the vegetables on top. Sprinkle with parmesan, a bit of crunchy salt and some pepper.

    ________________

    **Saint-Môret is the leading natural fresh cheese in France. While it has a different flavor and texture from American cream cheese, it is the closest comparison. We actually used spreadable goat cheese: We love the extra tang.
    ________________
     
     
    RECIPE #3: SPRING PEAS & BURRATA SALAD

    We adapted this recipe from Julie Andrews, The Gourmet RD. It takes just 10 minutes to prep. We could eat it every day.

    Her recipe uses sugar snap peas. We added spring peas as well.

    You can eat the pods (shells) of sugar snap peas, but it depends on the age of the pea. Older sugar snap peas tend to be more fibrous, making the pod hard to chew. Eat one, then decide.

    Unlike sugar snap peas or snow peas, the fibrous pods of English peas cannot be eaten—although they can be saved and used in a vegetable stock (freeze until needed).

    TIPS:

  • Shell spring peas immediately before cooking. Break off the stem and pull the fibrous string down the length of the pod.
  • If you can’t find burrata (we get ours at Trader Joe’s), use a mozzarella ball. And…we serve 1/2 ball with each salad.
  • If you have fresh tarragon on hand, toss in some leaves.
  • As a change, we like to substitute balsamic vinegar for the honey.
  •  
    Ingredients For 4 First Courses

  • 1 medium lemon, zested and juiced
  • 1 tablespoon honey
  • 3 tablespoons extra-virgin olive oil
  • Salt and pepper
  • 1/4 cups fresh basil leaves, chopped
  • 1/4 cups fresh mint, chopped
  • 1 cup sugar snap peas, trimmed, strings removed
  • 1 cup green beans, trimmed
  • 1 cup carrots (thinly sliced
  • 2 cups baby arugula
  • 1 ball burrata (substitute fresh mozzarella)
  • 1/2 cups pistachios (roughly chopped
  • For serving: toasted sourdough bread
  •  
    Preparation

    1. WHISK together fresh lemon zest and juice, honey, olive oil, and a dash of salt and pepper in a large bowl. Taste and adjust the seasoning, as necessary.

    2. ADD the peas, green beans, carrots, arugula, basil, and mint to the bowl, and toss with the dressing.

    3. QUARTER or halve the ball of burrata and arrange it on a platter. Top with salad, sprinkle with additional coarse salt and ground black pepper, and garnish with pistachios.
     
     
    MORE BURRATA

    > More burrata salad recipes.

    > Dessert burrata recipe.

    > The history of burrata.


    CHECK OUT WHAT’S HAPPENING ON OUR HOME PAGE, THENIBBLE.COM.


    Comments off


    © Copyright 2005-2026 Lifestyle Direct, Inc. All rights reserved. All images are copyrighted to their respective owners.