
[1] Try baked eggs in bell pepper halves (photo courtesy Foodie Crush | Go Bold With Butter). [2] Eggs Benedict on a croissant instead of the classic English Muffin (photo courtesy Peach Valley Cafe). [3] A fried egg sandwich, elevated with a whole grain seeded roll (photo courtesy National Pasteurized Eggs).
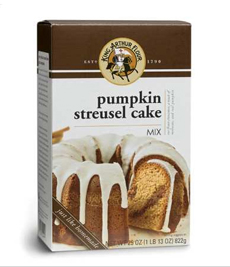
|
|
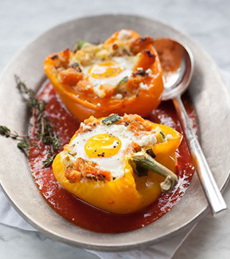
World Egg Day is October 21st.
Most of us have grown up with the incredible, edible egg; and we are egg-static to celebrate this little protein powerhouse.
With over 6 grams of high-quality protein, nine essential amino acids and only 70 calories, , it’s one of the least egg-spensive sources of high-quality protein per serving.
It’s a staple food as well as an indulgence (caramel custard, French ice cream, hollandaise sauce, mousse…).
20 RECIPES TO CONSIDER FOR TODAY
Options from breakfast, lunch and dinner through dessert.
Breakfast & Brunch Eggs
Best Scrambled Eggs recipe from Chef Wylie Dufresne. It has both butter and cream cheese!
Eggs Benedict in your signature style (recipe) (photo #2)
Eggs On Hash recipe
Egg-Stuffed Peppers (recipe) (photo #1)
Shakshouka, Spicy Poached & Baked Eggs (recipe)
Brunch, Lunch & Dinner Eggs
Chinese Egg Drop Soup (recipe) (photo #4)
Croque Madame Sandwich, a grilled ham and cheese sandwich topped with a fried egg
Egg Salad, 25 Ways (recipes) (photo #3)
Fried Eggs On Rice Or Other Grain (recipe)
Frittata (recipe)
Lyonnaise Salad With Bacon & Eggs (recipe)
Poached Eggs With Lentils & Arugula (recipe)
Pork Strata (recipe)
Steak & Eggs, in your signature style (recipe)
Torta Española, Spanish Omelet (recipe)
Egg Cetera
Deviled eggs (recipes; for Halloween check out the Deviled Eyeballs)
Green Eggs & Ham (recipe)
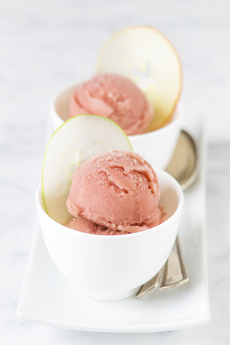
Soufflé Omelet With Balsamic Strawberries (recipe)
Next, a recipe that is new to us: Huevos Divorciados, a Mexican breakfast dish that means “divorced eggs.” (We’ve also made it for lunch and a light dinner.)
Sunnyside-up fried eggs are dressed up in different ways and separated on the plate, “each going its own way” (photo #4, below).
The typical direction uses two different salsas: a spicy red salsa for one egg and a cooling tomatillo (green) salsa with the other. The salsa and eggs are set upon two crispy corn tortillas.
But you can use different salsas, toppings and underpinnings, and come up with your signature style.
We adapted this recipe from one by Chef Jeffrey Clark for Davidson’s Eggs.
|
|
RECIPE: HUEVOS DIVORCIADOS
As is our won’t at THE NIBBLE, we like to push the boundaries of the original dish and find fun ways to customize it. For Huevos Divorciados, you can separate the two eggs and their different salsas with:
Bacon strips
Black beans or refried beans
Chopped cilantro
Crumbled cotija or queso fresco
Drizzled cream: crema, sour cream, yogurt
Fried plantains or plantain chips
Gringo food: cherry tomato/onion salad in vinaigrette, grilled vegetables, grits, toast fingers, wilted greens (asparagus, broccolini, collards, kale, spinach, etc.)
Guacamole or avocado, sliced or diced
Potatoes: papas bravas, papas fritas or American potato tots
Refried beans
Rolled flour tortilla
Sausage
Sliced jalapeños
Tortilla chips
|
|
Ingredients For 2 Servings
4 six-inch corn or flour tortillas
Olive oil
2 tablespoons butter
4 eggs
12 tablespoons roasted fresh tomato salsa heated, divided
12 tablespoons roasted tomatillo salsa, heated, divided
1/4 cup crumbled queso fresco or shredded Monterey Jack cheese
1/4 cup minced fresh cilantro
4 thin slices red onion, separated
2 lime wedges
4 tablespoons guacamole
Serve with: breakfast potatoes, black or refried beans
Preparation
1. BRUSH both sides of the tortillas with olive oil. Place in baking pan and bake at 400°F for 6 minutes or until crisp. Meanwhile…
2. PREPARE the sunny side-up eggs. Heat 1 tablespoon butter in a large nonstick skillet over medium-low heat until melted. Gently slide 2 eggs into the skillet. Cook 1 to 2 minutes or until the whites are set and opaque, and the yolks begin to firm. Gently remove from skillet; repeat with the remaining butter and eggs.
3. PLACE two tortillas side by side on dinner plates. Place one egg on each tortilla. On each plate, ladle 6 tablespoons of the red salsa around one egg and 6 tablespoons of the salsa verde around the second egg.
4. SPRINKLE eggs with equal amounts of cheese and cilantro. Garnish with onion slices, a lime wedge and guacamole. Serve with breakfast potatoes, refried beans, or black beans, if desired.
CHECK OUT OUR EGG GLOSSARY
It’s a view of the different types of eggs, from blue hen eggs to ostrich eggs.
How many of these types have you had?
EGG ETYMOLOGY
The French have the ouef, the Italians and Spanish have uovo and ovo from the Latin ovum. The Greeks have oon, the Germans have Ei.
How did we get egg?
Egge appeared in the the mid-14th century northern England dialect, derived mostly from Old Norse and Proto-Germanic ajja, possibly derived from root awi, bird.
|
|


[4] Huevos Divorciados from OiYouFood. Here’s the recipe. [5] It’s easy to make egg drop soup at home with this recipe (photo courtesy Good Eggs).
|
This Norse-derived northern word vied in Middle English with cognates* eye, eai and the Old English æg, until egg finally displaced the others sometime after 1500. It appears in print in the description of a man at a public house on the Thames who asked for eggs [source].
________________
*Cognates are words with common etymological origins.
|
|