|
This make-ahead beauty (photo #1) is a stunning first course or, turns into a dinner with a light salad. You can make it vegetarian or add meat: chicken, ham, turkey or sausage.
This squash soup is packed with shiitake mushrooms, sausage and red chard, and topped with a fresh sage chiffonade. There are no right or wrong ingredients: Use whatever sounds good to you.
The soup bowl in photo #1 is from Olmsted restaurant in Brooklyn, New York. The photo, along with the availability of so much squash in the markets—had us spending a week trying different recipes that used small squash as individual edible bowls.
The result: delicious baked squash filled with other delicious things, from breakfast eggs to baked fruit sides.
WHAT SQUASH SHOULD YOU USE?
While stuffed squash has served as edible bowls for millennia, our concept was to expand the squash bowl for soup (broccoli soup, butternut squash soup, mushroom soup, etc.) to other uses.
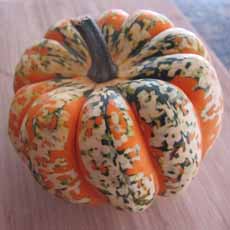
Small acorn squash squash (photo #1) are the most available; but you may be able to find eight-ball zucchini (photo #2), carnival squash (photo #6) or golden nugget pumpkins (photo #5). A farmers market is your best bet.
WHAT SHOULD YOU PUT IN YOUR BOWL?
Use whatever filling you want.
Soup is most popular: not just butternut squash soup, but mushroom and any but that’s because most people haven’t thought further. Here are 20 options, including two for breakfast.
You can serve the squash bowl as a side, or add as a main with a protein (chicken or turkey, sausage, tofu).
Baked fruit: apples, cranberries pears, quince, with walnuts and/or raisins
Beans or lentils with corn, onions, roasted tomatoes
Breakfast hash and a poached egg
Buffalo chicken
Cheese: a bubbling bowl of fondue
Cruciferous bowl: broccoli, Brussels sprouts, cauliflower, rutabaga, turnips
Grain salad or hot grains: barley, bulgur, kasha (buckwheat), quinoa, rice, wild rice
Greens bowl: broccoli rabe, collards, kale, mustard greens
Gratins (anything topped with cheese)
Kale, sausage and mushrooms
Mushrooms, sausage and quinoa
Mac and cheese
Pumpkin ravioli topped with fried sage
Rice and beans
Roast vegetables
Sausage, zucchini, rice
Scrambled eggs
Stuffing
Tex-Mex fillings (chicken enchilada, taco, rice and beans
Turkey, stuffing and gravy (leftovers!)
Garnishes
Fresh herbs, especially sage and thyme
Nuts, or nuts and raisins or other dried fruit
Seeds: chia, flax, pepitas (pumpkin)
PREPARATION
1. MAKE the soup or other filling ahead of time, and warm it when the squash bowls are ready.
2. BAKE the squash: Preheat the oven to 400°F. Halve the squash widthwise and scoop out the seeds and any loose fibers. Discard the fibers and reserve the seeds for garnish, if desired.
3. SLICE a small piece from the bottom halves of the squash, so the “bowls” will sit evenly. You can bake the top halves and serve them as well; or cut the flesh into chunks to use as a filling ingredient or for other purposes.
4. BRUSH the cut surface of the squash with olive oil and season lightly with salt, pepper and thyme. Place face down on a parchment-lined baking sheet. Roast until golden brown and tender, 20-30 minutes, until you can pierce the rind with a fork or tip of a knife.
5. REMOVE any additional center of the squash, until the bowl opening is large enough for your purposes (save the cooked squash for another purpose). Add your filling(s) and serve.
You can also bake the squash in advance and microwave it when ready to serve.
|
|

[1] A squash bowl with soup and lots of extras, at Olmsted | NYC.
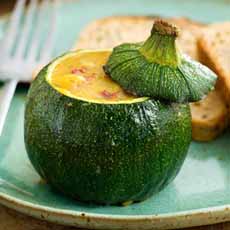
[2] An eight ball zucchini makes an ideal single-portion bowl, at Bittersweet Blog.
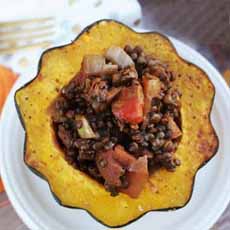
[3] Curried lentils with onion and carrot at Fried Dandelions.
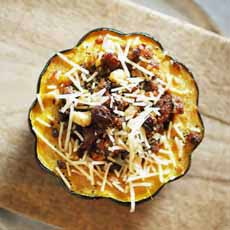
[4] Sausage- and apple-stuffed acorn squash at Cherished Bliss.
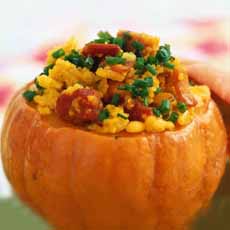
[5] A golden nugget pumpkin stuffed with couscous, bacon and sausage, from Good Food | Australia.
[6] Check farmers markets for squash that work as individual bowls. This is a carnival squash: butternut’s flashier brother (photo courtesy Kitchen Tangents). |