|
National Pizza Day is February 9th, and August 24th is National Waffle Day. Americans don’t need a reason to enjoy their favorite foods (pizza ties with burgers on different surveys [source]).
This savory waffles recipe is a celebration food on either holiday. It was developed with a gluten-free baking mix by Pamela’s Products. The Pancake & Baking Mix (photo #3). The gluten-free mix is made with premium ingredients like cultured buttermilk and almond meal and has 8 grams of whole grains per serving.
You can also use a conventional pancake mix (with no sugar added) or baking mix. The waffles can be customized with each person’s favorite toppings.
> The history of waffles.
> The different types of waffles.
> The history of pizza.
RECIPE: PIZZA WAFFLES
These waffles reheat very well, so make a double batch and freeze some for a quick and easy meal later.
Ingredients For The Waffles
2¼ cups Pamela’s Baking & Pancake Mix or substitute
2 teaspoons Italian seasoning
½ teaspoons salt
2 teaspoons oregano
Pinch of cayenne
¼ teaspoon granulated garlic
¼ teaspoon granulated onion
½ cup milk
½ cup pizza sauce
¼ cup oil
2 eggs, separated
¼ teaspoon vinegar or lemon juice
Optional dipping sauce: ranch dressing
Ingredients For The Filling
½ cup Italian sausage, cooked and crumbled
1 ounce pepperoni, chopped small
Optional: 2 ounces sliced black olives, well drained
1 bunch scallions, half the white and all the green, sliced
1 cup shredded mozzarella or combo of pizza cheeses
½ cup Swiss cheese, grated
½ cup Parmesan cheese, shredded
Preparation
1. MAKE the filling. Cook and crumble the sausage; drain and chill. In a medium bowl add all shredded cheeses and mix well. Chop the pepperoni and slice the green onions; mix well with the cheeses. Add chilled, crumbled sausage and black olives. Mix all together and chill.
2. MAKE the waffles. In a large bowl, whisk together the Baking & Pancake mix, and all herbs and spices.
3. SEPARATE the yolks from the egg whites. Beat the egg whites with vinegar until stiff. Chill.
4. COMBINE in a large measuring cup or small bowl the pizza sauce, milk, and egg yolks; mix with a fork until well combined. Mix into the Baking & Pancake Mix and stir until smooth, with no lumps. Prior to combining stiff egg whites into the batter…
5. PREHEAT the waffle iron to medium-high. Add the cheese and meat mixture to the pancake mixture and mix until well incorporated. Fold the egg whites into the waffle mixture. It takes a little time for the whites to incorporate. Keep folding until there
are no more streaks of white.
6. BAKE immediately in a well-sprayed waffle iron. Once cooked; keep warm in a 200°F oven, on a rack on a sheet pan, or serve. Serve with the optional ranch dressing for dipping.
7. TO FREEZE: Let the waffles cool on the rack. Wrap in individual wax or paper bags, place in a plastic bag, and freeze.
8. TO REHEAT: When ready to eat, thaw the waffles on the counter as the oven pre-heats to 300F°F. Once up to temperature, put the waffles on a rack on a sheet pan and reheat for 8 to 10 minutes. They will be crisp on the outside and delicious on the inside.
> Here’s another recipe for pizza waffles using strained tomatoes, from Colavita.
THE YEAR IN PIZZA HOLIDAYS
Whether you get takeout pizza or make your own, mark your calendars for:
JANUARY: National Pizza Week, beginning the second Sunday in January
FEBRUARY: Great American Pizza Bake, beginning the second week in February, a week where you’re encouraged to not only consume pizza, but to try your hand in making it
FEBRUARY: National Pizza Day (a.k.a. National Pizza Pie Day), February 9th
APRIL: National Deep Dish Pizza Day, April 5th
MAY: National Pizza Party Day, third Wednesday
JUNE: Pizza Margherita Day, June 11th
SEPTEMBER: National Cheese Pizza Day, September 5th
SEPTEMBER: National Pepperoni Pizza Day, September 20th
OCTOBER: National Pizza Month
OCTOBER: International Beer and Pizza Day, October 9th
OCTOBER National Sausage Pizza Day, October 11th
NOVEMBER: National Pizza With Everything Except Anchovies Day, November 12th
|
|

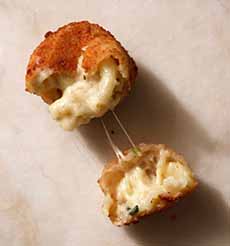
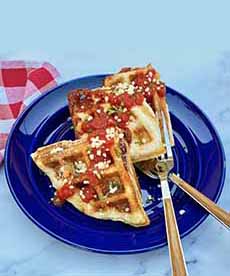
[1] In this pizza waffle recipe (below), from Pamela’s, the flavors are baked into the waffles (photos #1, #2 and #3 © Pamela’s Products).
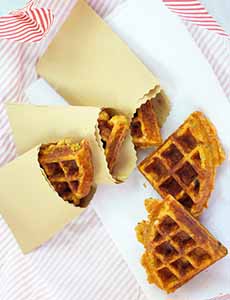
[2] No syrup or sauce needed: All the flavor is baked inside (however, if you want to dip, use ranch dressing or marinara sauce).
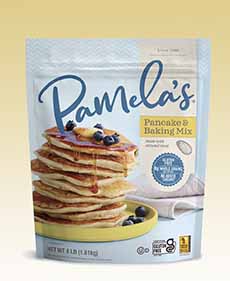
[3] Pamela’s Pancake & Baking Mix.
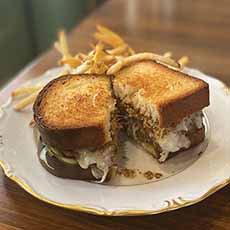
[4] These pizza waffles take a slightly different approach: Store-bought pizza dough is used for the crust, and your favorite pizza ingredients go on top. Here’s the recipe (photos #4 and #5 © Emily Ellyn).
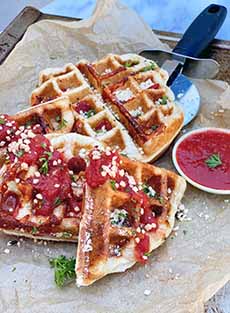
[5] In this recipe, the waffle hot from the waffle iron is top with marinara sauce, parmesan cheese, and any other favorite toppings. It’s not as need to eat, but we like both versions.
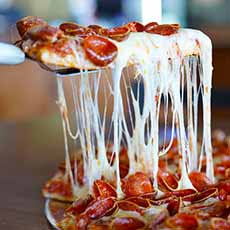
[6] You can also celebrate National Pizza Day with America’s favorite pizza: pepperoni (photo © Mountain Mike’s).
|