|
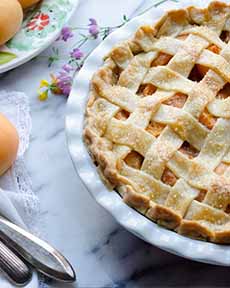
To us, summer means fresh peach pie—a flavor that’s not easy to come by commercially. To enjoy its pleasures, you’ve got to bake your own.
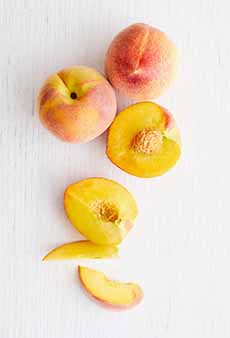
When summer peaches are ripe and juicy, they don’t need a whole lot else to make a terrific pie. In this recipe, an optional tablespoon of dark rum “takes it over the top,” says Annie.
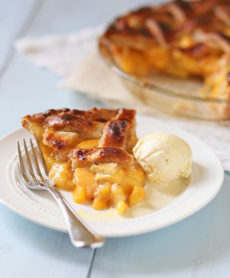
Serve the pie warm with vanilla ice cream—or if you can find it or want to make it, peach ice cream (an exquisite flavor that’s even hard to come by than store-bought peach pie). You’ll be making summer memories for everyone who tastes it.
This recipe is by Annie of Annie’s Eats, for Go Bold With Butter. The recipe follows, but first:
National Peach Pie Day is August 24th and August is National Peach Month.
> The year’s 31 pie holidays.
> The history of pie.
> The different types of pie: a photo glossary.
> America’s favorite pies.
> The difference between a pie and a tart.
> The history of peaches.
> See how to ripen peaches, below.
RECIPE #1: CLASSIC PEACH PIE
Ingredients For A 9-Inch Pie
2 rounds basic pie dough (recipe below)
2-1/4 pounds ripe peaches (about 10-12 medium peaches)
1/2 cup sugar
2 tablespoons flour
2 tablespoons cornstarch
Dash of grated nutmeg
1 tablespoon freshly squeezed lemon juice
Optional: 1 tablespoon dark rum
2 tablespoons cold butter, cut into pieces
1 large egg beaten with 1 tablespoon water, for egg wash
Preparation
1. PREHEAT the oven to 425°F and place a baking sheet on the lowest oven rack to catch dripping juices. Roll out half of the pie dough to approximately 12-inches round so that it fully lines a 9-inch pie plate with some overhang. Transfer the lined pie plate to the refrigerator until ready to use.
2. PREPARE the filling. Peel* the peaches and slice them to 1/4-inch thick slices. In a large bowl, combine the peach slices with the sugar, flour, cornstarch and nutmeg. Toss to coat. Add in the lemon juice and rum and stir once more until well combined.
3. REMOVE the lined pie plate from the refrigerator and pour in the peach filling in an even layer. Dot the top of the peaches with the pieces of cold butter.
4. ROLL out the remaining pie dough to a 12-inch round. Cut into strips with a pastry cutter or paring knife and weave together to form a lattice top (here are step-by-step photos and instructions.) Trim away excess dough and crimp the edges together. Lightly brush the top and edges of the pie dough with the egg wash.
5. BAKE for 20 minutes, then decrease the oven temperature to 350°F; continue baking until the pie is golden brown and the juices are bubbling, about 30-40 minutes more. Check on the pie a few times during baking. If it is browning too quickly, tent loosely with foil and continue baking as directed.
6. REMOVE the finished pie to a wire rack and let cool until just warm, about 2 hours. Slice and serve.
RECIPE #2: BASIC PIE DOUGH
Pie crust dough can be made ahead and frozen for up to two months.
Ingredients For 2 Nine-Inch Pie Crusts
2-1/2 cups all-purpose flour
2 tablespoons sugar
1/2 teaspoon salt
1 cup (2 sticks) cold, unsalted butter, cut into small pieces
6 tablespoons very cold water
Preparation
1. COMBINE the flour, sugar and salt in the bowl of a stand mixer fitted with the paddle attachment. Mix briefly to blend. Add in the butter pieces and mix on medium-low speed to cut the butter into the flour until the mixture resembles coarse sand and the largest butter pieces are not much bigger than peas. Mix in the cold water on low speed just until the dough comes together.
2. DIVIDE the dough in half and shape into 2 balls. Wrap each in plastic wrap and chill in the refrigerator for at least 30 minutes.
3. REMOVE dough from the refrigerator. Roll out on a lightly floured work surface. Use as directed in the pie recipe.
HOW TO RIPEN PEACHES
Simply leave hard peaches on the kitchen counter, but here’s a tip: Set them upside down, on their shoulders instead of their bottoms, not touching one another. If you have a spot where they will receive some direct sunlight, that will speed the ripening (but be sure it’s not hot, baking sunlight).
To really speed the ripening, place the peaches in a paper bag. The ethylene gas given off by the fruit hastens ripening. A banana added to the bag will provide even more ethylene, for even faster ripening.
|