|
When you live in a ceviche culture, what do you do for something new?
Ceviche, raw seafood marinated in lime juice with onions and other vegetables, is the national dish of Peru—and our favorite food. But what’s tiradito? Here, ceviche vs. tiradito and a brief history of them.
While the variations in ceviche recipes seem never-ending—there’s a seemingly infinite combination of seafood, vegetables, and marinade recipes—Peruvian chefs have taken the concept further.
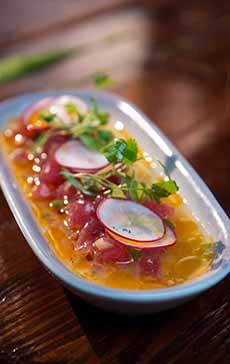
They’ve created tiradito, a dish of raw fish similar to carpaccio, ceviche, crudo, and sashimi, but garnished with a piquant or spicy sauce.
It reflects the influence of Japanese immigrants on Peruvian cookery. It also differs from ceviche in the way in which the fish is cut (sashimi-style slices) and in the lack of onions.
The fish can also be lightly seared.
Both are typically served as a first course. Cool and refreshing, they are ideal summer dishes but delicious year-round (not to mention easy to make, healthful and low in calories).
The classic tiradito sauce is made from citrus juice and a zesty paste of aji amarillo, made from the Peruvian yellow chile pepper (Capsicum baccatum) plus seasonings—grated garlic or ginger, salt, and pepper.
Of course, chefs can create a myriad of sauces with other ingredients.
Unlike ceviche, the fish isn’t marinated in the sauce; the sauce is used as a dressing—think sashimi with sauce and garnishes. Common garnishes include sweet potato and jumbo white corn kernels, both native to Peru.
The key to both dishes is the freshest fish. Ask your fishmonger what’s best.
> A recipe for Fish Tiradito (using the fish of your choice) is below.
A BRIEF HISTORY OF CEVICHE & TIRADITO
In South America, marinated raw fish dishes date to pre-Colombian times, when seafood was “cooked” (acid-cured) with a fruit called tumbo (Passiflora tarminina, a relative of passionfruit).
The Incas cured fish in salt and fermented corn.
In the 16th century, the Spaniards arrived with lemons for the marinade, creating modern ceviche: cubed or sliced, lightly marinated raw fish.
Here’s a longer history.
Recently, a variation has morphed into tiradito, cutting the fish sashimi-style and adding a spicy dressing.
Tiradito derives from the Spanish verb tirar, which means to throw—throwing together raw fish with a sauce.
|
|
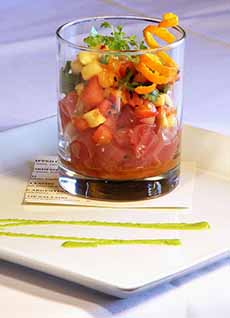
[1] While ceviche is often served in a coquille (scallop) shell, you can serve it in a rocks glass, A Martini glass, or whatever you like (photo © Seviche Restaurant | Louisville).
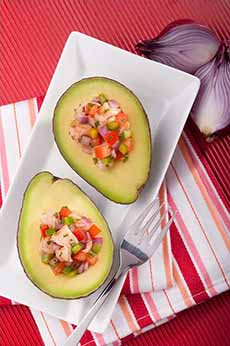
[2] An avocado stuffed with red snapper ceviche. Here’s the recipe (photo © Avocados From Mexico).
|