|
We love fresh sage, but seem to use it mostly in the fall. We use it in stuffing, flash-fried as a garnish, and with cocktails.
But of course, you can enjoy it year-round. It’s a standard herb blend with parsley, rosemary and thyme, a key component of poultry and sausage seasonings. Our mom put fresh sage under the skin of a chicken prior to roasting.
WHAT IS SAGE?
Salvia officinalis, common sage, is a membr of the Lamiaceae family of flowering plants, also called the mint family.
Members are frequently aromatic in all parts* and include many widely used culinary herbs: basil, hyssop, lavender, marjoram, mint, oregano, perilla, rosemary, sage, savory and thyme. Some are shrubs, some are trees; in rare instances, some members are vines.
USES FOR SAGE
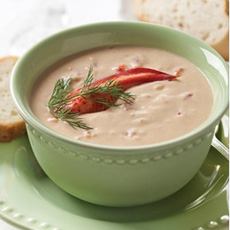
Beverages: sage tea (herbal), crush into vegetable juices, make sage ice cubes for Bloody Marys and other savory drinks
Breads: biscuits, rustic loaves, stuffing/dressing
Condiments: pestle-ground and mixed with mustard, sage-infused honey,
Eggs: frittatas, omelets, quiches, scrambles
Desserts: apple pie and other apple dishes, custards (infuse the cream), olive oil cakes, pear crisps, savory ice cream
Garnishes: serve fresh, flash-fried or deep-fried with fish and seafood, meats and poultry, polenta, potatoes, poultry, salads, soups, vegetable juices and cocktails, winter squash
Grains & Vegetables: barley, beans, rice and risotto
Sauces: tomato sauce, pesto (combine with the traditional basil and/or other herbs)
Proteins: calves’ liver, chicken, lamb
Sandwiches & Burgers: garnish, fresh or fried
Sage Butter: a sauce for fish and pasta, especially with gnocchi, pumpkin pasta and ravioli; a compound butter for duck, lamb, seafood
Search for sage recipes and you’ll find favorites like butternut squash soup, creamed onions with sage, pork chops and loin, roast chicken, roasted vegetables, and saltimbocca (a rolled main of steak, prosciutto and provolone with sage).
COCKTAILS & HORS D’OEUVRE
On this lovely fall weekend, relax with a sage-garnished cocktail and complementary hors d’oeuvre.
The Side Ride cocktail, created by blogger Carey Nershi of Reclaiming Provincial, combines Cognac, Grand Marnier or other orange liqueur, sweet and sour mix (ideally homemade) and Sprite (or 7-Up) lemon-lime soda, both to taste.
It’s similar to a Side Car, but substitutes gin for the Cognac. Carey took this sophisticated approach with a recipe she created for Vermont Creamery, served with hors d’oeuvre made with Vermont Creamery’s Bijou, an award-winning aged goat cheese in the style of the French crottin.
Carey uses barrel-aged gin, a recently-revived practice that ages gin, like tequila—in bourbon barrels that generate more richness and spice.
Wood aging also adds color, so barrel-aged gins are the color of whiskey.
You can use regular gin, or use this as an occasion to try barrel aged gin.
And, since this is the season for sage, the cocktail has a fresh sage leaf garnish.
|
|
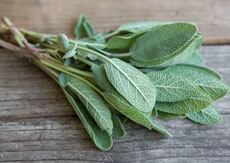
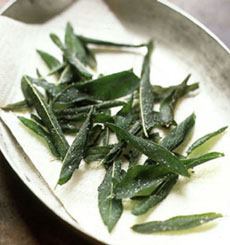
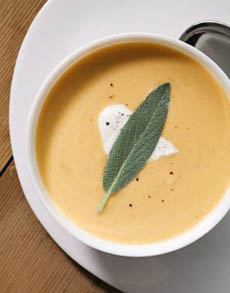
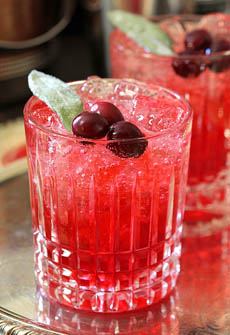
[1] Fresh sage (photo courtesy Good Eggs). [2] Fried sage leaves. Here’s the recipe from Saveur. [3] Butternut soup with a garnish of creme fraiche and a sage leaf. Here’s the recipe from Bon Appetit.[4] Sage as a cocktail garnish in everything from Martinis to this Cranbery Sage Holiday Cocktail (here’s the recipe from Creative Culinary). |