|
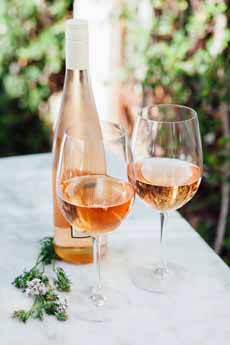
June 10th is National Rosé Day.
Unlike Chardonnay, Cabernet Sauvignon, and the other grape varietals, there is no “rosé grape.” Rosé (French for pink) wine can be made from any variety of red grapes.
As a result, the styles and flavors from different wine-making regions vary widely.
The pink color occurs is when the red grape skins are briefly left in contact with the pressed juice: for only a few hours, as opposed to the few weeks of skin contact when making red wine.
Even within a wine region—New Zealand, Northern California, Provence, South Africa, etc.—rosé wines are made in a variety of styles: drier, sweeter, lighter, fuller, pale in color, deep in color. See the chart below.
The rosé andfood pairings are also below, as is the history of rosé wine.
IT’S MORE POPULAR THAN WHITE WINE
Dry rosé wine is the all-occasion wine in the south of France—no surprise, since Provence is the world base of dry rosé production. There, vin rosé is paired with all the foods, all year round.
In fact, dry French rosé outsells white wine in France!
The dry rosés from Provence can be substituted any time you need dry wine. When you can’t decide between red or white wine, reach for the rosé.
America rosés can be dry or sweet. Many, especially on the lower end are like blush wines, contain nearly seven times as much residual sugar as a Provençal rosé. Ask the wine store staff for guidance, or do research online.
Sweetness in rosés can be very welcome. They’re great for dessert and for casual sipping, instead of a sweet cocktail.
One of our favorite summer desserts or snacks is a scoop of sorbet in a wine glass, topped off with a sweeter rosé.
You can also blend sorbet and rose into a “frozen” cocktail. Here’s a recipe for “frosé.”
Better yet, have a rose wine tasting. It’s a great summer party idea.
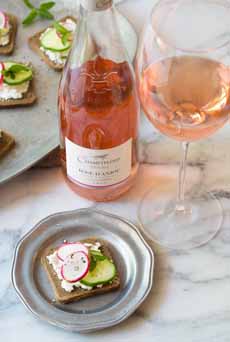
ROSÉ FOOD & WINE PAIRINGS
With Drier Rosés
Here’s how we like to pair dry rosé wines:
American appetizer fare: bruschetta, deviled eggs, cheese balls, chicken wings, crudités, stuffed mushrooms, etc.
Cheeses: fresh (goat, mozzarella) and semisoft (brie, camembert, gorgonzola, gruyère, havarti, young gouda, Monterey jack and provolone).
Egg dishes: breakfast eggs, frittata, quiche.
Cheese dishes: Caprese salad, crostini, fondue, grilled cheese and other sandwiches, soufflés.
Fish and shellfish: baked, poached, grilled, raw (chirashi, crudo, sashimi, sushi, tartare, tiradito), smoked< ./li>
Grain salads and other grain dishes: barley, couscous, farro, quinoa, rice, etc.
Green salads, plain or with chicken and seafood.
Pasta: lighter hot dishes and pasta salads.
Spicy cuisines: Indian, Mexican, Szechuan, Thai.
Summer soups: corn chowder, gazpacho.
White pizza and flatbread.
With Sweeter Rosés
Cocktails, sangria, punch and casual sipping
Fruit and fruit salad.
Desserts.
Fresh cheeses.
MORE WAYS TO ENJOY ROSÉ
Have A Rosé Tasting
Rosé Sangria
Affordable Sparkling Rosé
Frozen Rosé Cocktails
Rosé Milkshakes
THE HISTORY OF ROSÉ WINE
Provence, the warm and sunny southeastern part of France, is where the France’s wine grapes were first cultivated 2,600 years ago. The ancient Greeks brought grapevines to southern France around 600 B.C.E., when they founded the city of Marseille.
In the time of the Greeks, all wines were generally pale in color—the color of today’s rosés. By the time the Romans arrived in 125 B.C.E. (and named the area Provincia Romana, hence Provence), the rosé wine produced there was known throughout the Mediterranean for its high quality. Even when the Romans introduced their preferred red wines to the area, the locals continued to prefer the rosés.
|
|
[1] A bottle of Tavel, from the Southern Rhône wine region of France (photo © Herringbone Eats).

[2] Rosé champagne is costlier than conventional champagne—and worth it (photo © Ruinart).

[3] Rosé is a perfect pairing with seafood (photo © 100 Layer Cakes).
[4] A glass of rosé can go from apéritifs through dinner (photo © Kitchen Aid).

[5] The shades of rosé (Jacksonville Magazine).
|