|
Love bananas? Check out this history of bananas for August 27th, National Banana Lovers Day.
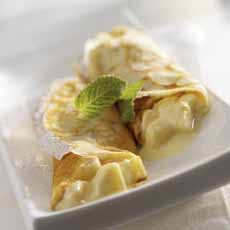
But first: While you’re on a long conference call, or waiting for an internet connection that’s taking its time, show your love by decorating a banana (photo #1).
No drawing talent? Take a Sharpie or a ballpoint pen and create swirls, zigzags, dots, whatever.
Like to draw? Create banana art for family and friends (photo #1).
Can’t do either? Then…
> Then enjoy the history of bananas, below.
> Also below are America’s favorite banana-based dishes.
> Be sure to take a look at this beautiful banana comparison photo, below.
> Bananas vs. plantains: the difference.
> Bananas trivia.
> The year’s 8+ banana holidays.
THE YEAR’S 8+ BANANA HOLIDAYS
February: National Avocado and Banana Month
February 23: National Banana Bread Day
March 2: National Banana Cream Pie Day
April 6: National Bananas Foster Day>/li>
April, 3rd Wednesday: National Banana Day
August 25: National Banana Split Day
August 27: National Banana Lovers Day
October, 1st Tuesday: National Fruit At Work Day
November: Banana Pudding Lovers Month
Plus:
September 26: National Pancake Day
December 2: National Fritters Day
THE HISTORY OF BANANAS
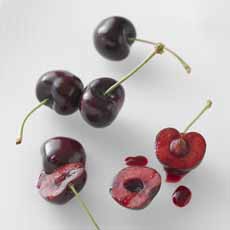
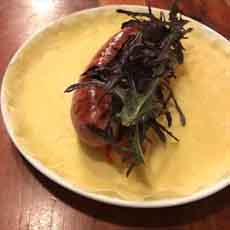
The original, wild, banana was tiny and filled with large seeds the size of peppercorns (photo #2).
Bananas were first domesticated in Southeast Asia and Papua New Guinea, by at least 5000 B.C.E. and possibly as far back as 8000 B.C.E.
Southeast Asia has the largest diversity of banana species, followed by Africa, indicating a long history of banana cultivation in those regions (source). Over millennia, bananas were bred into the fleshy fruits (botanically, they’re the not fruits but the berries** of herbs) we know today.
Many wild banana species can still be found in China, India and Southeast Asia, in the areas south of China, east of India, west of New Guinea and north of Australia. They require a tropical or sub-tropical climate.
A 2001 New Yorker article notes:
“More than a thousand varieties of banana exist worldwide. The vast majority are not viable for export: Their bunches are too small, their skin is too thin, or their pulp is too bland.”
Numerous of these varieties are plantains, are starchy and inedible until cooked (there’s more on plantains below).
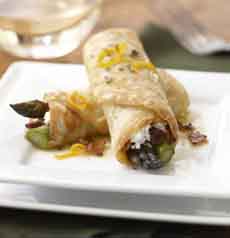
The article continues: “There are fuzzy bananas whose skins are bubblegum pink; green-and-white striped bananas with pulp the color of orange sherbet; bananas that, when cooked, taste like strawberries (photo #3).
“The Double Mahoi plant can produce two bunches at once. The Chinese name of the aromatic Go San Heong banana means “You can smell it from the next mountain.’ The fingers on one banana plant grow fused; another produces bunches of a thousand fingers, each only an inch long.”
Alexander the Great introduced bananas to what is now Western Europe in 327 B.C.E. They were brought back from his campaigns in Asia and India, China and Southeast Asia.
It took centuries after that—around 800 C.E.—for bananas to make their way to the Middle East.
By the 10th century, the banana appears in texts from Palestine and Egypt. From there it diffused into North Africa and Muslim Iberia (southern Spain). During the Medieval Ages, bananas from Granada were considered among the best in the Arab world [source].
BANANA HISTORY (CONTINUED): BANANAS COME TO THE AMERICAS
Bananas were introduced to the New World in the 16th century via Portuguese sailing ships, which carried them from West Africa to South America. The fruit’s name comes from a West African language [Wolof, the major language in what is now Senegal] where banan means finger.
In 1870, a Cape Cod fishing-boat captain named Lorenzo Dow Baker imported 160 bunches of bananas from Jamaica to to Jersey City, New Jersey: the first bananas in the U.S.
Shopkeepers hung the bunches and cut off the number of bananas requested by the customer. By 1900 Americans were 15 million bunches of bananas annually; 40 million by 1910. Twenty years later, Baker’s company was renamed United Fruit, today called Chiquita Brands.
By the 1960, United Fruit controlled nearly seven hundred million acres of land and 90% of the American banana market.
If you’ve had bananas in other countries and find our American imports to be bland in comparison, that’s because the original species Baker imported, the Gros Michel, has long since been replaced by the Cavendish—a blander variety that travels more easily.
THE LOSS OF THE GROS MICHEL BANANA
Many thanks to Wayne Ferrebee for much of this information.
Over millennia, farmers hybridized wild species of bananas and selectively bred the different strains into varieties called cultivars.
The most delicious exportable cultivar was Gros Michel (Fat Michael, Musa acuminata AAA)—so ideal for farming, transporting and retailing that became more than 80% of bananas cultivated worldwide (here’s more about the variety).
A half a century ago, the Gros Michel banana was the principal banana variety imported to the U.S (photo #5, below). They were/are far tastier than the current Cavendish variety: creamier with a tropical fruit taste.
The ripened bananas had a much longer shelf life, and could be sold ripe and ready to eat.
In the 1950s, a blight, the fungus Fusarium oxysporum (“Panama disease”), attacked the Gros Michel banana and wiped out entire plantations in Africa and South America.
All Gros Michel bananas were clones (to achieve desired characteristics and eliminate negative ones, such the seeds—but do not have Darwinian resistance), so the contagion spread unchecked. There were years where there were almost no bananas available to send to Europe, Africa, and the Americas (and worse, to support the local banana workers and others up and down the chain). Entire banana empires turned to rot, and groves needed to be burned to disinfect the soil.
Banana growers re-planted with a new banana variety, the Dwarf‡ Cavendish, which was nowhere near as tasty but was resistant† to the fungus.
Gros Michel ceased being grown commercially. It still grows in its ancestral homeland, Thailand, where it is ubiquitous in home gardens (photo #8). So if you’re going there, eat the bananas! [source]
THE RISE & FALL OF THE CAVENDISH BANANA
The world’s current major banana crop in the world, the Cavendish banana, was grown by a gardener of the William Cavendish, 6th Duke Devonshire, in 1830. He was president of the Royal Horticultural Society.
Using a specimen from a lot sent to the Duke by a colleague in Mauritius, the Duke’s head gardener, Joseph Paxton nurtured it and, five years later, the plant flowered and bore fruit. He named the varietal Musa cavendishii, after the family name of the Dukes of Devonshire, Cavendish. He himself became Sir Joseph Paxton for his contribution to England.
Cavendish plants were sent with missionaries to Samoa and other South Sea islands, the Pacific and the Canary Islands [source].
When the Gros Michel was wiped out, banana growers turned to the Cavendish. It was a smaller and less tasty fruit, but it was immune to the fungus, able to grow in infected soils, and traveled well. Practically all bananas exported to foreign markets were Cavendish.
For decades, practically all bananas exported to foreign markets—China, Europe, North America, etc.—are clones of the first Cavendish plant.
Alas, Panama disease has mutated into a new, deadlier strain (Race IV) that not only kills off the Cavendish, but also numerous local breeds of banana around the world. The world is currently in a banana crisis. You can find more information about it online, starting here.
BANANAS VS. PLANTAINS: THE DIFFERENCE
Plantains, native to India, are used worldwide in ways similar to potatoes. They are very popular in Western Africa and the Caribbean countries, typically fried or baked.
Since popular brands like Dole put their stickers on bananas and plantains alike, here’s how to make sure you’re buying what you want.
Use: Bananas are eaten as a sweet fruit. Plantains are cooked like a starchy vegetable.
Size: Bananas are shorter with thinner skin; plantains are longer with thicker skin.
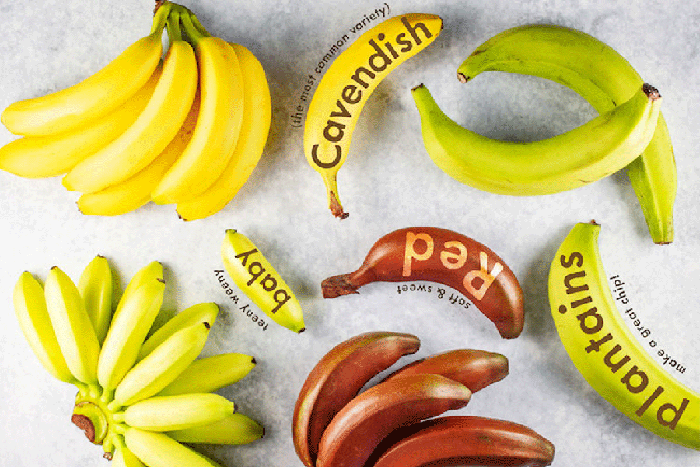
Color: Bananas are green when not fully ripe, yellow when ripe and black when overripe. Plantains are green or black when ripe. They also have natural brown spots and rough areas, a dead giveaway compared to the smooth skin of the banana. See the comparison of ripe varieties in photo #7.
Both are members of the botanical order Zingiberales and family Musacae and the genus Musa, but diverge at the species level.
The scientific name for banana is Musa sapientum, which mean fruit of the wise men. Because of the complexity of the many hybrids, individual cultivars use their cultivar name.
The Cavendish banana plants are in the species M. cavendishii, while plantains are in M. x paradisiaca.
Musa is a Latinization of the Arabic name for the fruit, mauz; muz is the Turkish and Persian name for the banana [source]
&
GO BANANAS: BANANA TRIVIA
From Chiquita Brands:
Bananas don’t grow on trees: The plants are giant herbs: The trunk of a banana plant is not made of wood, but of sheaths of tightly overlapping leaves.
The fruit of the banana plant is botanically a berry.
To bear fruit, banana plants need at least fourteen consecutive months of frost-free weather, which is why they are not grown commercially in the continental United States.
The banana plant reaches its full height of 15 to 30 feet in about one year.
An individual banana is called a finger. A bunch of bananas is called a hand.
The bananas we eat are sterile. Domesticated banana plants produce fruit without fertilization.
Ancient Egyptian hieroglyphs depict people with bananas.
The small country of Ecuador is the world’s biggest exporter of bananas.
Bananas are one of the few foods to contain the 6 major vitamin groups.
If you peel a banana from the bottom up you won’t get the string things, called phloem (FLOM).
And finally…
Bananas float in water (as do apples and watermelons).
AMERICA’S FAVORITE BANANA FOODS
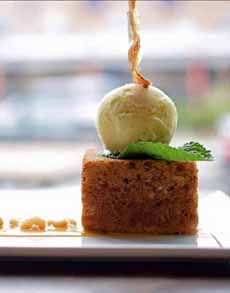
Banana bread
Banana pudding
Banana cream pie
Banana topping on cereal
Bananas Foster
Banana pancakes
Banana split
Banana ice cream
Banana smoothies
Banana cupcakes and muffins
Banana chips
|
|
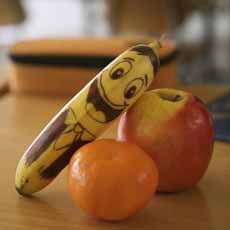
[1] Show some creativity on National Banana Lovers Day (photo © Good Foods Made Simple | Facebook.

[2] The original wild banana was very small and filled with large seeds the size of peppercorns—probably not such pleasant eating. (photo © A. D’Hont | CIRAD).

[3] The peel is red, but the flesh is the same color as a yellow banana (photo © Gardening World). However, bananas in eye-catching colors don’t travel well enough to be exported. Tip: When you’re in a foreign country, seek out the local banana varieties.

[4] Harvesting bananas. (photo © Simon Maina | Food and Agriculture Organization of the United Nations).
[5] Its predecessor, the more flavorful, longer-shelf-life Gros Michel [Little Michael] variety. What happened? See below (photo © Bananas.org).
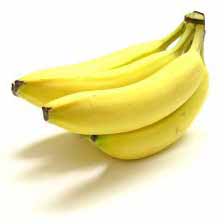
[6] The modern banana we know and love is a variety called the Cavendish (photo © Nathan Ward | SXC)

[7] A comparison of four Musa kin: from left, plantains, red banana, latundan dwarf banana and Cavendish banana (photo © Nathan Ward | SXC)

[8] A comparison of Cavendish banana and the fat Gros Michel. We don’t know how large the Gros Michel grew in Jamaica; but this Gros Michel is from “the source,” Thailand, where it is called gluay hom thong, “the golden fragrant banana.” It was photographed by Ketsanee Seehamongkol, who writes an excellent story on her “discovery” (photo © Ketsanee Seehamongkol).

[9] Banana bread is America’s favorite banana dish. This one has a bonus: chocolate chips Here’s a recipe to enjoy (photo © ).

[10] A favorite comfort food: banana pudding with Nilla wafers. Here’s the recipe (photo © M. Sheldrake | iStock Photo).
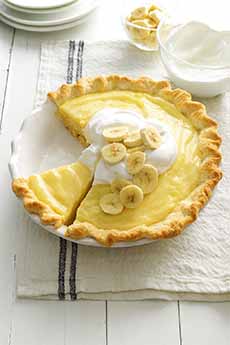
[11] Banana cream pie. Here’s the recipehttps://blog.thenibble.com/2014/03/02/food-holiday-national-banana-creme-pie-day/ (photo © Taste Of Homee).
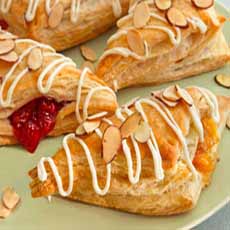
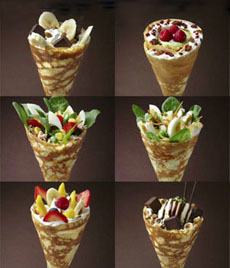
[12] Get as fancy as you like! Take a look at our delicious banana recipes (photo © Good Food On Montford | Charlotte, NC).
|

 Sorre[/caption]