|
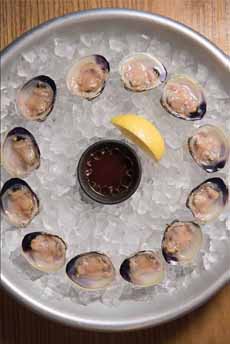
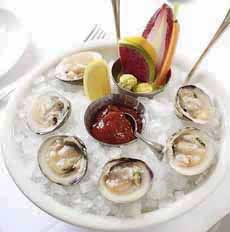
[1] Clams on the half shell with mignonette sauce, at Casino Clam Bar in New York City (photo © Casino Clam Bar).
[2] Clams on the half shell with cocktail sauce and a side of crudites, at The Clam in New York City (photo © The Clam).
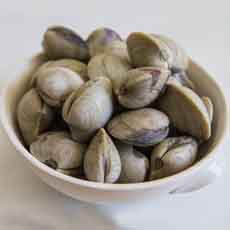
[3] Littleneck clams (photo © Good Eggs).
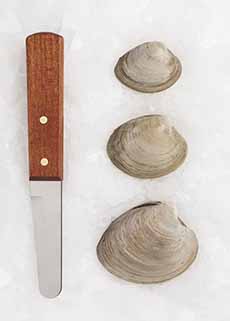
[4] It’s not hard to shuck clams. Here’s a video. Shown, on order of size: littleneck, topneck, and cherrystone clams (photo © Atlantic Aqua Farms).
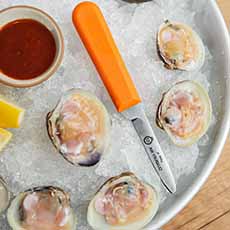
[5] A clam shucking knife is smaller than an oyster shucking knife (photo © Island Creek Oysters).
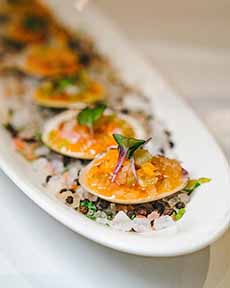
[6] These scrumptious clams were minced, made into ceviche, and returned to the half shell (photo © Delmonico’s | Facebook).
|
|
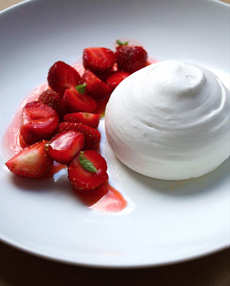
National Clams on the Half Shell Day is March 31st. The half shell (photos #1 and #2) is the simplest way to serve clams, and it is a delightful, high protein, low calorie, and nutritious dish for lovers of raw seafood.
Where’s your nearest Happy Hour with a good deal for clams on the half shell?
If you’re a big clam lover, note that in addition to National Clams On The Half Shell Day, there are two other holidays that celebrate clams: November 1st, National Deep Fried Clams Day; and July 3rd, National Fried Clam Day.
Below:
> What are clams on the half shell?
> The history of clams.
> Wine pairings for raw clams.
> Garnishes for clams.
> Are you ready to shuck?
Elsewhere on The Nibble:
> The different types of clams.
> Wine, beer, and cocktail pairings for clams and oysters on the half shell.
> The year’s 56 fish and seafood holidays.
CLAMS ON THE HALF SHELL
Clams are bivalves, aquatic mollusks that have a compressed body with an upper and lower shell, hinged together.
Other bivalves include oysters, mussels, and scallops, but clams and oysters are most often served on the half shell.
They are shucked*—the top half of the shell is removed—and are most often served on a bed of crushed ice with lemon wedges and mignonette sauce or cocktail sauce. Some modern presentations use a bed of rock salt.
This “on the half shell” presentation enables the diner to pluck the meat from the shell, optionally dip it in the sauce, and bite into the plump mollusk.
When bivalves are shucked properly, the meat will be surrounded by its natural juices, which are lost if you scoop them out and put them on a plate.
Other kinds of shellfish, such as scallops and mussels, can also be served on the half shell.
While “on the half shell” means raw shellfish, there are cooked bivalves served on the half shell, such as Clams Casino, clams topped with breadcrumbs, bacon, and green bell peppers; Coquilles Saint Jacques and Oysters Rockefeller.
In these preparations, the bivalves are topped with bread crumbs and other ingredients, and baked.
Other preparations, such as steamed or grilled clams, should be called just that.
THE HISTORY OF CLAMS
Bivalves appear in the fossil record first appear in the early Cambrian period, more than 500 million years ago.
The total number of living species is about 9,200, representing both marine and freshwater bivalves.
There are more than 150 different edible species of clams in the world. Only a handful of these are pursued as food crops.
Atlantic Ocean/Gulf Coast Clams: cherrystone clam, hardshell/Quahog/top neck clam, softshell clam (steamers), surf clam
Pacific Ocean: butter clam, geoduck clam, littleneck clam, manilla clam
Both Atlantic & Pacific: razor clam
The size of clams ranges from tiny and not worth trying to eat, up to 440 pounds like the giant clam, which is too big to eat. Check out the size classifications in the ‡ footnote.
(Found in the South Pacific, giant clams have a diameter of 47 inches and can live for more than 100 years. Alas, they are an endangered species).
With the evolution of humans, clams, along with oysters and other mollusks, became an important part of the diet of coastal and river people.
Clams spend their lives partially buried in the sand of the ocean floor. They are dug at low tide, leading to the expression, “happy as a clam at high tide.”
GARNISHES FOR CLAMS
Even though they’re much smaller than oysters, you can still serve clams with a festive garnish.
While most people stick to acidic condiments—cocktail sauce, mignonette sauce, a lemon wedge—get creative:
>Modern Toppings: microgreens and edible flowers, heat (minced jalapeños, Calabrian chiles, a dot of wasabi), diced fresh fruit (kiwi, melon, strawberries), or chopped herbs (chives, fennel fronds, parsley).
Raw Veggies: finely diced radishes or carrots.
“Surf & Turf”: crumbled bacon or pancetta.
WHITE WINE PAIRINGS FOR RAW CLAMS CLAMS
Whether on the half shell or in ceviche, these are your go-to white wines. You want wines that are, dry, high-acid, light to medium-bodied, and mineral or saline rather than oaky or buttery.
The Classics: Albariño, Chabalis, Dry Riesling, dry sparkling wine, Muscadet Sèvre et Maine (the go-to in France), Sauvignon Blanc, Unoaked Chardonnay.
Lesser Known: Assyrtiko, Picpoul de Pinet, Vermentino.
Cocktail Party Idea: A selection of these wines with clams on the half shell.
|
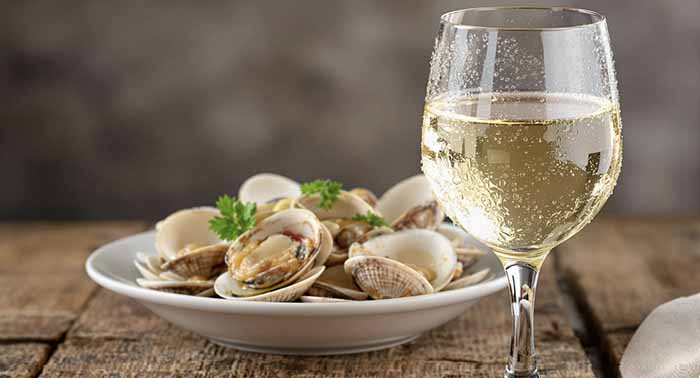
[7] Still white wines are perfection with clams, especially a minerally Chablis. Sparkling wines make things festive (Flux Photo).
SHUCK YOUR OWN CLAMS
What kind of clams should you buy? Whatever is freshest.
Let the fishmonger know that you plan to serve them raw. The Quahog†, a.k.a. hardshell or top neck, is popular for serving on the half-shell.
An Atlantic saltwater clam, it is about two inches in length, and meatier than some other varieties.
> Here’s a video showing you how to shuck clams.
You do need a special clam shucking knife, which is different from an oyster knife. You can buy one for around $10.00.
If you have an oyster knife, of course, try it before buying one just for clams.
Then, scrub the clam shells and get to shucking!
________________
*A shuck is an outer covering such as the shell of a clam or oyster, or the outer covering of an ear of corn or a nut. Since the shuck is discarded, the word became used to describe something of little value—not worth shucks. We don’t know how it evolved to the now-archaic expression, “aw shucks,” used to express shyness, i.e., after a compliment; or to express disappointment, e.g., “Aw shucks, we’re out of coffee.”
†Quahog trivia: The Pilgrims were taught how to harvest clams and other shellfish. In the midst of the first winter of starvation, it helped keep many of the Pilgrims alive. Beads made from the quahog shell, known as wampum, were currency, used in trade throughout the region.
‡The name of the clam changes based on its size, though they are all the same species:
> Littleneck clam: The smallest and most tender (1.5″ – 2″).
> Cherrystone clam: Medium-sized (2.5″ – 3″).
> Top Neck clam: Slightly larger than a cherrystone (3″ – 4″), often used for stuffing or raw bars.
> Quahog/Chowder Clam: The largest and toughest (> 4″), typically chopped for soups.
CHECK OUT WHAT’S HAPPENING ON OUR HOME PAGE, THENIBBLE.COM.
|