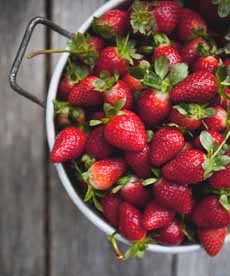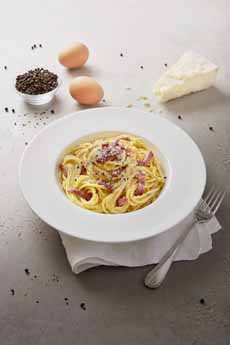
[1] Classic Spaghetti Carbonara (photo courtesy Barilla).

[2] A very modern, deconstructed Carbonara, using wide pasta ribbons and a poached egg. Here’s the recipe (photo © Food Republic).
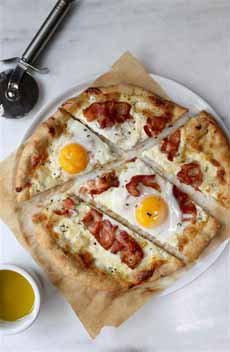
[3] Make Pizza Carbonara. Here’s the recipe from Grace Parisi (photo © Grace Parisi | TODAY).
|
|
April 6th is International Carbonara Day, celebrating Italy’s Spaghetti Carbonara, one of the more famous pasta dishes.
The holiday was launched in 2017 by two trade associations, the Italian Association of Confectionery and Pasta Industries (AIDEPI) and the International Pasta Organisation (IPO).
The goal was to spark a conversation in social media about the different approaches to Carbonara, beyond the classic one [source]. You can participate with the hashtag #CarbonaraDay.
The name “carbonara” comes from the carbonaro, Italian for “coal burner.” It was believed that the dish was created as a hearty, easy-to-make meal by men working outdoors for long periods, who used a coal burner to cook the dish.
> The authentic Spaghetti Carbonara recipe.
> The history of Spaghetti Carbonara (Spaghetti alla Carbonara in Italian) is below.
> The history of pasta.
> The different types of pasta: a photo glossary.
> The year’s 20 pasta holidays.
IF YOU ALTER THE RECIPE, IS IT STILL CARBONARA?
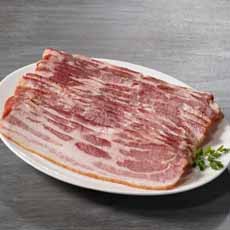
Spaghetti Carbonara is a pasta dish made rich with eggs, cheese and a variation of bacon. The five classic ingredients are spaghetti, guanciale*, pecorino romano cheese, egg yolk and seasonings (salt and pepper).
Guanciale, cured pork jowl, is a Roman specialty; and the traditional Roman grating cheese is Pecorino Romano†, a sheep’s cheese.
To the chagrin of purists, cooks have tampered with these sacrosanct ingredients.
Other ribbon (long-strand) pasta is used, such as bucatini, fettuccine, linguine and tagliatelle. Even shapes like rigatoni tubes are used.
Parmesan is substituted for the Pecorino Romano.
Some recipes use the whole egg.
In the U.K., the egg is often replaced by bechamel sauce. In France, garlic and onion can be added. In Japan, chefs often add cream and omit the cheese.
Some recipes use butter, heavy cream or olive oil (which add more fat to an already rich dish).
We personally feel that rich dishes need a bit of fresh herb counterpoint, and finish the dish with a bit of chopped parsley.
Chef Jamie Oliver’s recipe for Classic Spaghetti Carbonara contains parmesan, pancetta, and [gasp!] garlic and olive oil! So do Marcella Hazan’s and Lidia Bastianich’s recipes. Giada De Laurentiis makes Penne Carbonara with pancetta, heavy cream and parsley. Nigella Lawson also uses heavy cream. Gabriele Corcos uses egg yolks plus a whole egg, Pecorino plus Parmesan, olive oil and garlic.
We couldn’t even find a “classic” recipe from a prominent chef!
All departures from the classic recipe draw criticism from purists; hence the desire by the trade associations to enable a conversation.
We’re on the side of the trade associations. Virtually all recipes evolve over time, due to the availability of ingredients, new techniques and changing tastes.
Not to mention, there are other pasta recipes with egg and cheese that originated elsewhere in Italy. For example, just east of Lazio, the Provence where Rome is located, is the province of Abruzzo, a major producer of pecorino cheese. There, a popular dish is Gnocchi Carrati, gnocchi (instead of pasta) mixed with bacon, eggs and pecorino.
That doesn’t negate the legitimacy of the original recipe. In fact, in Ada Boni’s 1930 book, La Cucina Romana, La Cucina Romana, was written to preserve the classic dishes that were changing or disappearing (Carbonara had not yet been “invented”).
________________
*Guanciale is not smoked. Pancetta can be substituted. Some recipes in the U.S. use lardons of smoked pork belly, or regular bacon.
†Rome is in the region of Lazio, just west of the region of Abruzzo. Both regions are home to the pecorino tradition.
|
THE HISTORY OF SPAGHETTI CARBONARA
There are a number of hypotheses about who created Spaghetti Carbonara, but none is verifiable. That’s surprising, since the dish is a recent one, appearing in the mid-20th century.
What we do know is that the first printed reference to Spaghetti Carbonara is in 1950, in an Italian newspaper article. It was mentioned as a Roman dish enabled by American officers who remained in Rome at the conclusion of World War II. In the after-war privation, powdered eggs and bacon were supplied to Italians by the Americans.
A variation of this story says that the G.I.’s took their rations of eggs and bacon to street vendors to prepare a pasta dish over their streetside charcoal braziers (carbonai in Italian).
The recipe was subsequently was included in Elizabeth David’s book‡, Italian Food, published in the U.S. in 1954. [source].
For a recent recipe, there are a number of theories as to the creator.
The dish was created by charcoal makers (“carbonari” in Roman dialect) in the Apennine Mountains. The ingredients were simple: dry pasta, a bit of pork, a piece of cheese and an an egg. All you needed was a fire and a pot [source].
Similarly, Carbonara was an easy meal created by shepherds.
The dish rose from Neapolitan cuisine.
The recipe was developed by Ancel Keys, the father of the Mediterranean Diet, who in 1942 created a dish of spaghetti, powdered egg yolks and bacon to increase the level of carbohydrates of the U.S. soldiers in Italy.
The dish is served at the restaurant Carbonni, in the Piazza Campo dei Fiori in Rome (and at other restaurants), but the recipe did not originate there.
Older Romans have claimed that they remember enjoying Carbonara before the war, but there’s no proof of such a recipe then.
What to believe? The dish’s origin, somewhere in greater Rome after the war, holds water. In terms of who or how, we can only give that anonymous person our thanks.
Here’s a longer discussion.
________________
‡ Elizabeth David (1913-1992) was a British food writer. She translated the recipe for “maccheroni [not spaghetti!] alla carbonara” as “macaroni with ham and eggs,” and specified using “ham, or coppa (Italian cured pork shoulder)” cut into matchstick lengths. It may well be that guanciale and pancetta were not widely available in the U.K. [source].
|