|
April 23rd is National Cherry Cheesecake Day.
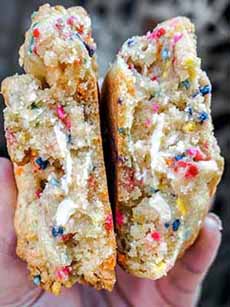
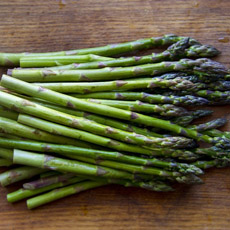
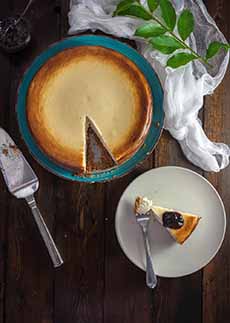
For most of us in the U.S., cheesecake means a cream cheese batter with a crust of graham cracker crumbs. Most of us know cherry cheesecake as the plain cheesecake topped with [usually] canned cherry pie filling (photo #2).
But often the canned filling is glop, and there are other cherry cheesecake recipes we prefer.
CHERRY CHEESECAKE VARIATIONS
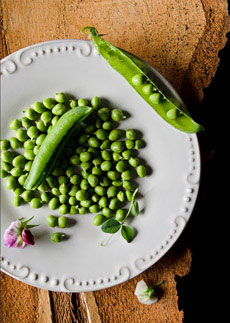
Whole cherries mixed into the cream cheese batter (frozen or canned plain cherries, drained).
A combination of whole cherries and dried cherries.
Whole cherries puréed and mixed into the batter (you get a pink cheesecake!).
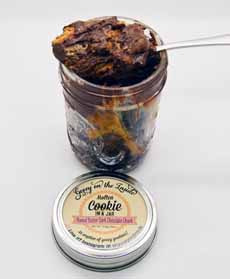
Plain cheesecake with a middle layer of cherries or cherry preserves (photo #3).
Plain cheesecake with a glaze of cherry jelly.
Plain cheesecake with a sour cream-cherry topping (mix cherry preserves into the sour cream and adapt this recipe).
Adult cheesecake, with Kirschwasser (cherry brandy) mixed into the batter or the topping.
Chocolate cheesecake with a mix-in of cherries, a cherry topping, and/or a cherry center layer.
You’ll also find trendy versions, like cheesecake, cherry pie filling, and graham cracker crumbs layered in a Mason jar.
During cherry season, simmer fresh, pitted cherries for a fresh cherry topping (add sugar as necessary), and/or use them as a layer in the center of the cake (pour half the batter into the pan, add the cherries, and top with the remaining batter).
You now have options for many National Cherry Cheesecake Days to come.
OUR FAVORITE CHERRY CHEESECAKE RECIPE
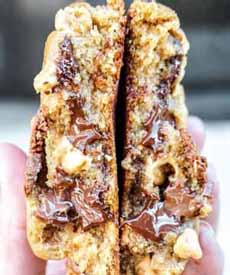
Our favorite recipe combines chocolate and cherries, but not in the aforementioned way. It’s a chocolate cherry cheesecake, or a Black Forest cheesecake (photo #1):
With a chocolate cookie crust.
Frosted with chocolate ganache.
It combines the best of everything, to celebrate National Cherry Cheesecake Day.
Here’s the recipe.
CHEESECAKE TRIVIA
Modern cheesecake is actually not a cake but a pie: It’s a cheese custard pie with a bottom crust. There is no cake layer, although some versions of the recipe do use a half-inch cake bottom layer instead of crushed cookies.
There are savory cheesecakes, too, and you can serve a slice as a first course.
Popular savory cheesecakes use blue cheese, basil, lobster, smoked salmon, even tuna. Here are some recipes.
CHEESECAKE HISTORY
In Greece, cheese made from goat’s or sheep’s milk dates has been dated to the 8th century B.C.E. The easiest cheese to produce was fresh cheese (think cottage cheese or ricotta), which was easy to turn into cheesecake.
Savory cheesecakes were popular in ancient Greece, and subsequently with the Romans. Cheesecakes were served to athletes during the first Olympic Games, in 776 B.C.E. The belief was that cheesecake was a source of fuel for the athletes.
Cheesecake was also commonly served as a wedding cake.
Researchers believe that the first cheesecake was created on the Greek island of Samos in the eastern Aegean Sea. (More claims to fame: Samos was the birthplace of the mathematician Pythagoras and the philosopher Epicurus, and was known for producing sweet Muscat wine.)
Archaeologists unearthed cheese molds for the dessert that were dated back to 2,000 B.C.E. [source].
As with much Greek culture absorbed by the conquering Romans, ricotta cheesecake was brought back to the Roman Empire, where the recipe was adapted.
The Romans used crushed cheese and eggs and served the cheesecake warm. They called this modified version “libum” and made it as a delicacy for celebrations.
It was also given as a temple offering (see photo #6—here’s a link to a recipe to bake your own libum).
The cheese portion was baked on a pastry base, or sometimes inside a pastry case. A 1st century B.C.E. recipe, written by the Roman Marcus Porcius Cato in his treatise on agriculture, “De Agricultura” or “De Re Rustica,” gives this recipe for libum, a small bread-like cake (see photo #6):
Libum to be made as follows: 2 pounds cheese well crushed in a mortar; when it is well crushed, add in 1 pound bread-wheat flour or, if you want it to be lighter, just 1/2 a pound, to be mixed with the cheese. Add one egg and mix all together well. Make a loaf of this, with the leaves under it, and cook slowly in a hot fire under a brick.
By 160 B.C.E. a newer version emerged with a separately baked crust [source].
Roman libum may not have contained any sweeteners, but people would pour honey or pomegranate syrup over it (photo #7).
Cheesecake—made with different fresh cheeses—traveled throughout Europe with the peripatetic Romans.
As Rome conquered much of Europe and brought their foods and recipes with them, cheesecake became popular across Northern and Eastern Europe.
Different regions put their own spin on the cake with local ingredients. Cheesecake became disseminated so widely that each country in Europe eventually had its own variation [source].
The first known sweetened cheesecake recipe was recorded by Athenaeus, a Greek writer, in about 230 C.E. It adds honey.
Athenaeus said, “Take cheese and pound it till smooth and pasty; put cheese in a brazen sieve; add honey and spring wheat flour. Heat in one mass, cool, and serve.”
Interestingly, from one source we learned that libum’s primary function in ancient Rome was as a sacrificial offering to the household gods.
Each household had an altar upon which one or two of the cakes would be offered to give thanks to the gods† [source].
Cheesecake In The Middle Ages
12th Century: Sugar arrived in Europe from the Far East around 1100 C.E. It was very expensive and not widely used except by the wealthy, who used it both to sweeten foods and as a medicine.
14th Century: An English recipe from 1390 C.E. blended sugar and dried elderflowers with cheese curds before baking the entire dish in a pie shell.
|
|
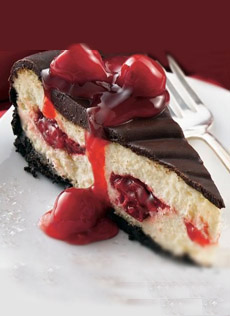
[1] Chocolate cherry cheesecake, a.k.a. Black Forest cheesecake. Here’s the recipe, from Betty Crocker.
[2] A classic cherry cheesecake from Baked NYC.
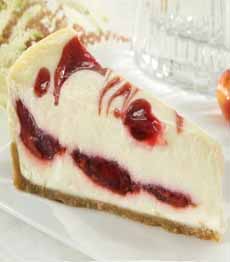
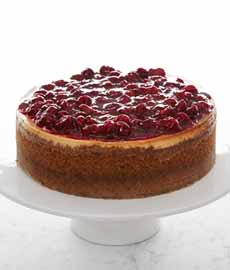
[3] A plain cheesecake with cherries swirled into the batter, at Sweet Street Desserts.

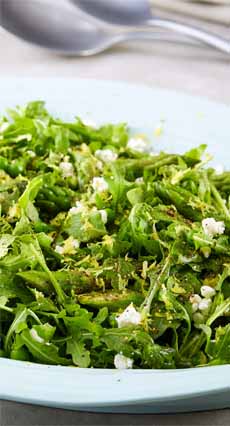
[4] Strawberry cheesecake, looking fetching (photo © King Arthur Baking | Facebook).
[5] A plain piece of cheesecake is heavenly, with or without the topping (photo © Pixabay | Pexels).

[6] Compare the plain cheesecake in photo #5, above, with this re-creation of the Roman libum. It has been recreated by Ellie of The Past Is A Foreign Pantry. Here’s her recipe.

[7] In her article, she notes that while libum was baked without a sweetener, the Romans were more than happy to top it with honey or pomegranate syrup (photos #6 and #7 © The Past Is A Foreign Pantry).
|
16th Century: In the 16th century, the price of sugar, though still high, was affordable by the middle class. A mid-16th-century recipe from a British cookbook shows that the Tudors liked their cheesecake sweet:
To make a tarte of Chese – Take harde Chese and cutte it in slyces,and pare it, than laye it in fayre water, or in swete mylke, the space of three houres, then take it up and breake it in a morter tyll it be small, than drawe it up thorowe a strainer with the yolkes of syxe egges, and season it wyth suger and swete butter, and so bake it.
Modern Cheesecake
The history of modern cheesecake began in 1872 when a dairyman named William Lawrence invented modern cream cheese in Chester, New York. It was a happy accident: Chester was trying to make Neufchâtel cheese*, a soft French cheese.
Wrapping bricks of cheese in foil, Lawrence’s Empire Company began to distribute cream cheese in 1880. He called the product Philadelphia Brand Cream Cheese. At the time, Philadelphia was known for its fine cuisine; “Philadelphia” implied “gourmet.”
In 1903, the Phoenix Cheese Company of New York bought the Empire Company and Philadelphia Brand Cream Cheese. In 1928, the Kraft Cheese Company bought the brand, which it owns to this day.
Home economists at Kraft developed new ways to use the cream cheese, and recipes were printed on the cartons. Cheesecake, along with dips, spreads, fudge, and other recipes that became staples, entered the American culinary repertoire.
And the rest—including thousands of variations on that original plain cheesecake recipe—is history.
________________
*American Neufchâtel cheese is different from French Neufchâtel; the latter is a mold-ripened cheese similar to Camembert. American Neufchâtel has approximately 33% lower fat than cream cheese and a higher moisture content. It was long sold as a reduced-fat option to cream cheese. Philadelphia’s reduced-fat cream cheese, however, is far superior to any American Neufchâtel we’ve had.
†Curious about what happens to food placed on a household altar, we drilled down and found that every household had an altar dedicated to the Penates and the Lares, the guardian gods of the home. Each day the family would pray to them at a small shrine in the home (called a lararium).
The Penates were a group of gods who protected the hearth and were associated with the health and well-being of the Roman family. Once a meal was prepared and set on the table, a portion of each piece of food was placed on a plate and carried to the fire, offered up in sacrifice to the Penates along with sacred wine. Flour and salt were thrown into the cooking fires each day to maintain pax deorum (peace of the gods). Read more about it.
The Lares were believed to observe, protect, and influence all that happened within the boundaries of the house. Statues of Lares were placed at the table during family meals, and their presence was required at all important family events [source].
CHECK OUT WHAT’S HAPPENING ON OUR HOME PAGE, THENIBBLE.COM.
|