|
Want to become a more impressive cook instantly? Use compound butter! Also known as finishing butter, or beurre composé in French, it’s unsalted butter that has been blended with seasonings.
There are endless variations. Escoffier published 35 combinations in 1903, and cuisine has evolved in many directions since his classic renderings of anchovy butter and beurre à la maître d’hotel (lemon parsley butter).
In Continental cuisine, compound butter is added to the pan to finish a sauce; a pat is placed directly atop meat, fish, potatoes or other vegetables to melt into a self-sauce; or is mixed into pasta and rice instead of other sauces/garnishes.
Just a dab transforms a dish: If you think butter makes everything taste better, think of what butter infused with great seasonings will do.
Compound butters are an easy alternative to more complex sauces. Make them ahead of time and keep them in the freezer, slicing off a pat as needed. They are a highly flavorful complement to the main ingredient.
Herb butter (most often served atop steak), Roquefort butter (ditto) and anchovy butter (a classic with grilled seafood) are staples at fine steakhouses. Read a French restaurant menu and maître d’hôtel butter (lemon parsley) is certain to be garnishing some dish. And that delicious sauce served with escargots? A compound butter of lemon juice, parsley and garlic.
Even if you didn’t think of it as compound butter, almost every American has had garlic butter, known as beurre d’ail or beurre à la bourguignonne in France. Italian-American garlic bread is an Americanized bruschetta, made in the U.S. with butter instead of olive oil.
If you go out to nice brunch places, you may have had strawberry butter too: fresh strawberries blended into softened butter.
IT’S EASY TO MAKE COMPOUND BUTTER
The recipe for all flavored butters is the same:
Soften unsalted butter to room temperature and blend in the flavor ingredients with an electric mixer, beating at medium speed until completely blended (1 to 2 minutes).
Use only fresh herbs and lemon or lime juice.
Let the butter stand for an hour in a cool place, covered, so the flavors can develop; then refrigerate to harden.
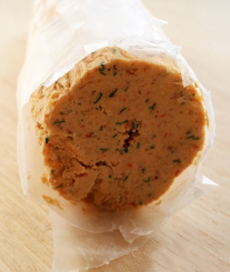
Before refrigerating, you can roll the butter into logs with wax paper; press it into molds to create stars or other shapes; create balls with butter paddles; or simply press it into ramekins for serving.
Compound butter can be made several days in advance of use; or it can be frozen for up to three weeks.
Wrap it very tightly before refrigerating or freezing, in double layers of plastic wrap and freezer bags, since butter absorbs other flavors and odors like a sponge. It’s ready to use whenever the chef wants to add flavor to a dish.
IF YOU DON’T WANT TO MAKE COMPOUND BUTTER, YOU CAN BUY MANY FLAVORS OF IT AT EPICUREANBUTTER.COM.
WHEN TO USE COMPOUND BUTTER
All compound butters can be used as bread spreads. But here’s just a small sample of flavor combinations:
Any flavor butter with popcorn.
Blue cheese butter in the center of a burger.
Chipotle butter for corn-on-the-cob.
Chive butter for baked potatoes.
Cilantro butter for grilled fish.
Cinnamon-sugar butter on French toast, oatmeal, pancakes, sweet potatoes.
Coffee butter for toast or steak.
Harissa-za’atar butter for lamb chops.
Herb butter for cooking eggs.
Radish butter on slices of baguette.
Seaweed butter for fish or noodles.
Sriracha-honey butter for biscuits and chicken.
Sweet butter for pancakes, waffles, muffins and toast (chocolate butter, cinnamon butter, maple butter, pecan butter, strawberry butter, vanilla butter).
Any of these butters can also be used as spreads; on biscuits, potatoes, rice and vegetables; for basting or sautéing foods in butter; or for making a quick butter sauce.
Here is our collection of compound butter recipes:
The Mega Collction: citrus butters, savory butters, spiced butters and sweet butters for pancakes, e.g.
Crawfish Butter
Holiday Compound Butters
Hazelnut Compound Butter
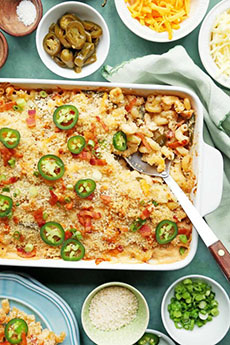
Jalapeño Compound Butter
FIVE COMPOUND BUTTER RECIPES TO START YOU OFF
Perk up your cuisine with these compound butters.
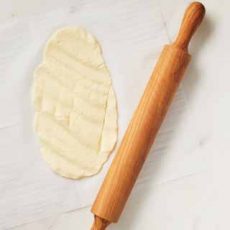
For each of the flavorful suggestions below, simply take your favorite Butter of Europe and let it soften to room temperature over a few hours. Once softened, blend with the ingredients of your choice in a bowl. Once thoroughly blended, place the compound butter in a mold or on a piece of wax paper to be rolled into a log. Then chill until ready to serve. It’s that easy!
Maître d’Hôtel Butter: The French Classic
If you’re in need of an introduction to compound butters, look no further. Just add finely minced parsley, lemon juice, salt and pepper to the softened butter, and voilà!
This classic French recipe can be used on everything from finishing baked fish or an oven roasted chicken to simply adding a zippy twist to a parker house roll.
If you want the full French experience, add a pat to a seared steak. It will melt to create a sauce.
Garlic Chive Butter: The Crowd Pleaser
There are few combinations more popular than butter and garlic. The list of foods that both garlic and butter belong on is seemingly endless, which is why this creation belongs in your refrigerator for frequent use.
Add a touch of chive, to impart some green herbal character. It’s just the thing to add a layer of complexity to a classic combo. Place directly on a grilled steak or drop a pat or two into a steaming baked potato. Or, treat the family to garlic bread!
This one’s made for summer, though we wouldn’t fault you for using it year-round. It can be dialed up or down to taste.
Prefer a tad more citrus? Swap in a lemon for a touch more mouth puckering flavor. Want to turn the heat up a bit? Experiment with other chile peppers that climb the Scoville scale, like Habanero.
Brush over grilled or boiled corn on the cob or grilled shrimp for a bright and delightful flavor addition.
Gorgonzola Honey Butter: Sweet & Savory…& Scrumptious
There’s a reason cheese plates are often presented with a bit of honey. The salty, creamy texture of blue cheese pairs so well with the floral sweetness of honey.
This compound brings those two together, encasing them in butter for an extra dose of deliciousness. Try this melted on a pork loin or chop or tossed with your favorite pasta.
Vanilla Maple Butter: Make Room For Sweet Compound Butter
Serve a sweet compound butter with cornbread, muffins, oatmeal, pancakes, sweet potatoes, and of course, a simple piece of toast.
All of these foods are made that much better when you top them with butter.
Start with a touch of your favorite maple syrup. Next, we’d recommend a fresh vanilla bean, for not only its purity of flavor, but for the flecks of vanilla bean that have eye appeal as well.
|
|
[1] Crayfish compound butter for seafood (photo © Chef Michael O’Boyle.
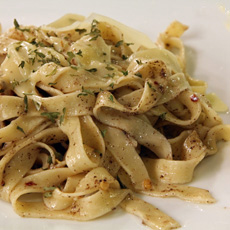
[2] Pasta tossed with truffle butter (photo © WKNOfm.org).
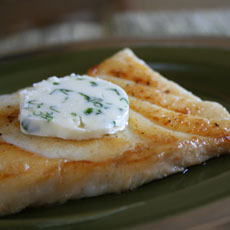
[3] Beurre à la maître d’hotel with roasted sea bass, a.k.a. lemon parsley butter (photo © Brown-Eyed Baker).
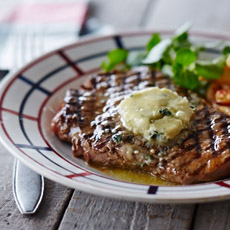
[4] Steak with blue cheese butter (photo © Land O’Lakes).
[5] Want to get fancy? Pipe the butter onto plates or atop the food. These compound butters are herb, bourbon-pecan, and gorgonzola (photo © Land ‘O’ Lakes).
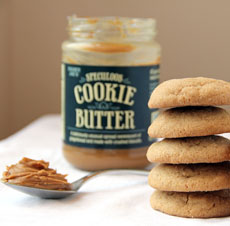
[6] Cookie butter: a sweet compound butter for desserts or pancakes (photo © Feastie.com).

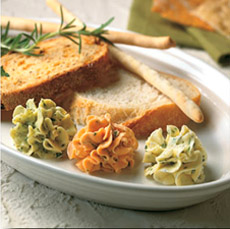
[7] For your next brunch, serve two or three compound butters as a treat (photo © Christopher Koetke | Kendall College | Flavor & The Menu).

[8] For the holidays: cranberry orange butter (photo © Go Bold With Butter).

[9] How about sweet potatoes with cinnamon-brown sugar or cinnamon-maple compound butter (photo © Epicurean Butter).
|
ABOUT THE BUTTER OF EUROPE
Specialty butter like compound butter is a growing category. The Butter of Europe Marketing Campaign, orchestrated by CNIEL (The French Dairy Inter-Branch Organization) and co-funded by the European Union, was designed to create awareness for the variety of European butters available in the U.S. market, and to suggest ways that Americans can incorporate butter into their recipes. Visit @ButterofEurope on Instagram and Facebook.
European-style butter refers to a cultured* butter that has been churned longer to achieve at least 82% butterfat (the EU minimum standard). The American standard is 80% butterfact. The extra fat makes the butter more spreadable. In baking, it makes for flakier pastries.
In the U.S., you’ll come across:
Beurre D’Isigny, Président and Rodolphe Le Meunier brand butters from France.
Delitia buffalo milk butter from Italy, which uses the cream left over from making mozzarella di bufala.
Kerrygold from Ireland, which has the widest distribution.
Traditionally the butter is allowed to ferment to achieve a light sour taste, but you’re more likely to find butter made with added cultures for tanginess. Either way, you still end up with a tangy butter.
In the U.S., you’ll come across:
Beurre D’Isigny, Président and Rodolphe Le Meunier brand butters from France.
Delitia buffalo milk butter from Italy, which uses the cream left over from making mozzarella di bufala.
Kerrygold from Ireland.
Top chefs prefer it.
European-style butters are becoming so popular that U.S. brands like Land ‘O’ Lakes are making their own European-style butters.the EU standard). Plugra is the most widely distributed, but also look for regional butters from Vermont Creamery, Kriemhild Dairy Farms, McClelland’s Dairy and other fine dairies.
> GLOSSARY: CHECK OUT THE DIFFERENT TYPES OF BUTTER <
________________
*Cultured butter is made from fermented cream—fermented with bacteria cultures. During the fermentation process, the bacteria convert milk sugars into lactic acid. The fermentation process produces additional aroma compounds, including diacetyl, which makes for a fuller-flavored, tangy, and more “buttery” tasting product.
|