|
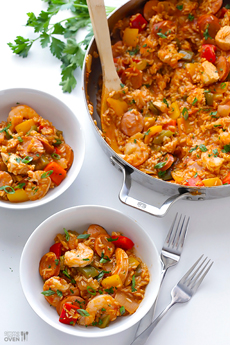
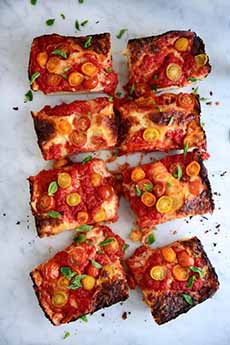
[1] Jambalaya (photo © Gimme Some Oven).
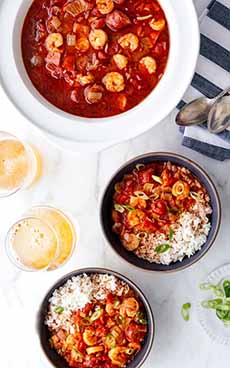
[2] Andouille sausage and shrimp gumbo. Gumbo is the official dish of Louisiana (photo © Good Eggs).
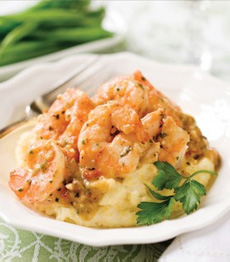
[3] Shrimp and grits, not particularly a Louisiana/Mardi Gras dish, but a Southern favorite that we eat as often as we can (photo © Mackenzie Ltd.).
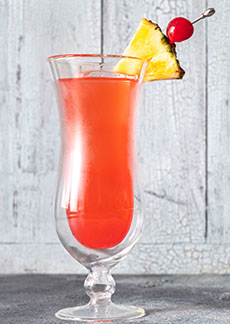
[4] Hurricane cocktail (photo © Alex 9500 | Panther Media).
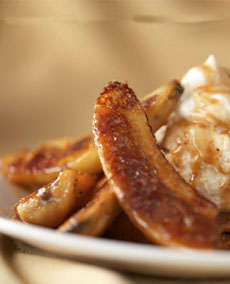
[5] Bananas Foster, caramelized bananas with brandy and/or rum, created at Brennen’s Restaurant in New Orleans (photo © Bonefish Grill).
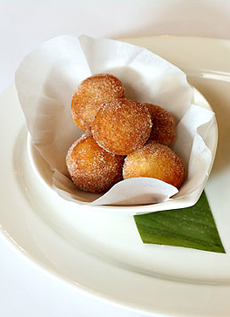
[6] Sweet fritters, perfect for dessert or for an afternoon break with strong coffee (photo © Orsay Restaurant).
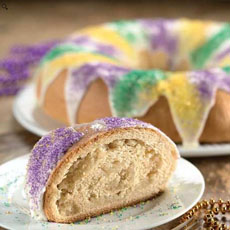
[7] King Cake, garnished in Mardi Gras colors (photo © King Arthur Flour).
|
|
Mardi Gras 2021 begins on February 16th [note: the date changes every year]. While you may not be able to head to a restaurant (much less to New Orleans) to celebrate, you can cook up some celebratory excitement at home. Why not plan your own celebration of traditional foods; costumes optional.
You can find Mardi Gras music on Amazon, and listen to it on YouTube.
If you want to decorate, Mardi Gras colors are purple, green, and gold.
And you can watch these virtual Mardi Gras events.
First, a bit about the holiday; then, delicious recipes await you.
WHY DO WE CELEBRATE MARDI GRAS?
Mardi Gras (Fat Tuesday in French) is the day before Ash Wednesday, the first day of the Lenten season.
The “fat” refers to the practice of eating richer, fatty foods the last night before Lent, the six weeks of penitence before Easter. Lenten season. It’s a period of ritual fasting* for followers.
A very brief history: Centuries ago, Catholics in Italy started the tradition of holding a wild costume festival right before the first day of Lent.
The idea expanded, engendering huge Carnival events elsewhere—the most notable including New Orleans and Rio de Janeiro.
You don’t have to be Catholic to join the celebration, as all attendees are welcome to the parades, etc.
> More Mardi Gras History
MARDI GRAS MENU
Pick and choose from these Mardi Gras recipes:
Cocktails
Hurricane Cocktail
Mardi Gras Color-Themed Cocktails
Milk Punch
Sazerac Cocktail
Appetizers & Snacks
Andouille Dip In A Bread Bowl
Jambalaya Arancini
Jambalaya Nachos
Mains & Sides
Chicken & Andouille Gumbo
Easy Gumbo
Gumbalaya: A Fusion Of Gumbo & Jambalaya
Jambalaya
Jambalaya Party Bar
Jambalaya With Grilled Chicken
Muffaletta Sandwich
Savory King Cake
Shrimp & Grits
Desserts
Beignets
Easy Mardi Gras King Cake Bundt
King Cake Variations
POPULAR NEW ORLEANS DISHES
Bananas Foster: Bananas Foster (photo #5) is a dessert made with bananas and vanilla ice cream. The bananas are sautéed in butter with brown sugar, banana liqueur and Grand Marnier (orange-infused brandy) or rum. The original recipe was created at Brennan’s Restaurant in New Orleans.
BBQ Shrimp: Neither barbecued nor served with barbecue sauce, whole shrimp (with the heads and tails on) are grilled in Worcestershire sauce and butter. Typically, French bread is used to sop up the buttery sauce.
Beignets: Beignets (photo #6) are sweet fritters, typically made from pâte à choux, but may also be made from yeast dough. They are addictive.
Crawfish: A bowl of boil-and-peel crawfish is a New Orleans seafood specialty.
Étouffée: Étouffée is a dish of shellfish, simmered in a sauce made from a light or blond roux and served over rice. The most famous version of the dish is made with crawfish, although crab or shrimp are also popular.
Gumbo: Gumbo (photo #2) is a hearty, thick soup, the official dish of Louisiana. It consists primarily of a strongly-flavored broth with a thick, almost stew-like consistency. The soup is thickened with a roux (pronounced ROO, French for browned butter). The broth contains meat (chicken, sausage) and/or shellfish (crab, crayfish, fish fillets, oysters, shrimp, e.g.). It’s also known for the Cajun/Creole “holy trinity” of bell peppers, celery, and onions; and for filé powder (made from sassafras leaves), sprinkled on top before serving for additional flavor and thickening.
Jambalaya: Jambalaya (photo #1) is a Creole rice dish of West African, French, and Spanish influence, typically consisting of meat and/or seafood and vegetables mixed with rice. Traditionally, the meat always includes andouille or another sausage, along with pork or chicken; and seafood, such as crawfish or shrimp.
King Cake: King Cake (photo #7) is typically a Danish yeast ring (it can be elaborately braided). Some are made from brioche or cinnamon bread. The cake is covered with a poured white icing and sprinkled with purple, green, and gold-colored sugars—the Mardi Gras colors. Contemporary pastry chefs make modern interpretations that go beyond yeast cakes, but still are garnished in Mardi Gras colors.
Milk Punch: Milk punch is a milk-based cocktail made with brandy or bourbon, plus sugar and vanilla extract. It is usually garnished with a sprinkle of nutmeg.
Muffaletta: The muffuletta is a hero-style sandwich made from a type of Sicilian sesame bread of the same. It originated in New Orleans among Italian immigrants. The classic filling has layers of ham, mortadella, provolone, salami, and Swiss cheese, topped with a marinated olive salad.
Po’ Boy: Another signature Louisiana sandwich is the po’boy (poor boy), which has a base of roast beef or fried seafood (crab, crawfish, fish fillet, oysters or shrimp). The protein is served on New Orleans French bread, a style with a crisp crust and a fluffy center. Add-ons can include lettuce, tomato, pickles, and sauces, from hot sauce to rémoulade, a mayonnaise-based sauce that’s a cousin to tartar sauce.
Pralines: New Orleans Pralines are patties made from sugar, nuts and butter. Bring your sweet tooth! Southern-style pralines are not to be confused with chocolate bonbons by the same name, or hazelnut praliné. Here’s a comparison.
Oysters: Oysters from the Gulf of Mexico are served just about everywhere—baked (Oysters Rockefeller were born here), fried, grilled, on the half shell, and everything in between.
Red Beans & Rice: Red Beans & Rice are a tradition on Mondays, dating back to when household chores resumed after Sunday’s day of rest. Traditionally simmered from 4 to 6 hours, practically any meat from ham hock to sausage to pickled pork is placed in the pot with red or kidney beans and spices. Every family and restaurant has its own spice preferences, but bay leaves, cayenne pepper, sage, and thyme are common.
Bon appétit!
________________
*During Lent, many Christians commit to a certain degree of fasting, including giving up rich foods, in order to replicate the account of the sacrifice of Christ’s journey into the Judaean desert for 40 days and nights following his baptism by John the Baptist. This ritual fasting is known as one’s Lenten sacrifice.
†Creole cuisine blends influences principally from France, Spain and West Africa, plus Amerindian (Native American) and Southern U.S. cuisines.
|