THE NIBBLE BLOG: Products, Recipes & Trends In Specialty Foods


Also visit our main website, TheNibble.com.

TIP OF THE DAY: Make Seafood Crudo Or Beef Carpaccio

Carpaccio (beef) and crudo (seafood) are easy to make, and present themselves as a sophisticated dish that took you a lot longer to prepare. If you eat sushi, sashimi, steak tartare and other raw preparations, it’s a dish you can easily make at home.

From the earliest times, fishermen have eaten their catch onboard, without cooking it.

Before man learned to make fire, some 350,000 years ago, the catch was de facto eaten raw.

The tradition continues today. Fishermen bring a bit of salt and/or citrus, and enjoy the rustic version of carpaccio, crudo, poke, or sashimi: brethren raw fish dishes.

While crudo has been eaten for millennia, carpaccio is a modern dish, created in Venice in 1963, at the time of an exhibition dedicated to Venetian painter Vittore Carpaccio (1465-1526).

> Here’s a list of raw fish dishes.

A recipe for a crudo of tuna or salmon (or other seafood) is below.
 

CARPACCIO VS. CRUDO & OTHER RAW FISH DISHES

  • Carpaccio is Italian for raw fillet of beef, not fish. Crudo is the term for raw fish or seafood. You will find fish “crudo” on restaurant menus, but that doesn’t make it correct. While raw fish consumption is ancient, beef carpaccio was based on the Piedmont speciality, carne cruda all’albese (raw beef Alba-style), created by Giuseppe Cipriani, founder of Harry’s Bar in Venice. Using fine Piedmontese beef (Piemontese in Italian), he originally prepared it for a countess whose doctors had recommended that she eat raw meat. At the time, there was a local exhibition of the 15th-century Venetian painter Vittore Carpaccio; hence the name of the dish.
  • Ceviche, seviche or sebiche, from South America, is a marinated raw fish dish that date to pre-Colombian times. Then, seafood was “cooked” (acid-cured) with a fruit called tumbo (Passiflora tarminina, a relative of passionfruit). The Incas cured fish in salt and fermented corn. The Spanish brought onions limes, which are essential to today’s ceviche.
  • Crudo is analogous to sashimi—plain raw fish, although the fish is cut differently.
  • Poke is a Hawaiian dish that recently has made its way from coast to coast. A mix of raw fish and vegetables are served as an appetizer or salad course. It is different from tiradito or ceviche in that the fish is cubed with a soy sauce and sesame oil dressing, and Hawaiian garnishes like roasted crushed candlenut and limu seaweed, along with chopped chiles. It is pronounced poe-KEH. Here’s more about it.
  • Sashimi is Japanese-style sliced raw fish, generally served with a bowl of plain, steamed rice (not sushi rice, which is prepared with vinegar and sugar). The word literally means “pierced body.” No one is certain of the origin, but it may have come from the former practice of sticking the tail and fin of the fish on the slices, to let it be known which fish one was eating.
  • Tataki is a fillet of fish that is lightly seared; just the surface is cooked, with the majority of the fish eaten in its raw state.
  • Tiradito is a more recent dish, fusing the concepts of ceviche and sashimi. Fish is sliced in pieces that are longer and thinner than sashimi. They are artfully arranged on a plate on top of a light sauce, and garnished (with cilantro, fresh corn kernels, thin slices of hot chile, etc.). The name derives from the Spanish verb tirar, which means to throw (i.e., throwing together raw fish with a sauce). Here’s a recipe.
  •  
    Don’t worry if you can’t keep these straight: We saw a dish called carpaccio at New York City’s top seafood restaurant, which was clearly tiradito (with sauce and chile garnishes).
     
     
    RECIPE: CRUDO OF TUNA, SALMON, OR OTHER SEAFOOD

    Tailor this recipe to your preferences. For example, you can replace the conventional olive oil drizzle with flavored olive oil, add the Italian-style shavings of Parmigiano-Reggiano cheese, add balsamic vinegar, use a Dijon vinaigrette, etc.

    You can add as much salad on top as you like…or none at all. If adding a mound of salad, dress it very lightly (we like lemon vinaigrette—half vinegar, half lemon [or lime] juice) before topping the fish.

    Ingredients For 4 Servings

  • 1 pound sushi-grade fish loin or steaks, sliced as desired
  • Quality extra-virgin olive oil
  • Sea salt, plus peppermill
  • Minced chives
  • 2 cups baby greens, loosely packed: arugula, watercress or mesclun mix (more as desired)
  • Vinaogrette as desired
  • Garnishes: capers, microgreens, thinly-sliced hot chile and lemon wedges
  •  
    Preparation

    1. Combine vinegar and mustard in small bowl; whisk in 4 tablespoons olive oil. Season dressing to taste with sea salt and pepper. DO AHEAD: Can be made 1 day ahead. Cover; chill.

    2. Place a sheet of plastic wrap on a damp work surface (the moisture prevents the plastic from slipping).

    Arrange the tuna slices on the plastic as you would like them to be on the plate (this makes plating them easy). Cover with a second sheet of plastic wrap.

    3. USING the flat side of a mallet, gently pound the fish slices until they are to your desired thinness. Do this in batches as necessary.

    Refrigerate the fish in the plastic for at least 30 minutes, and up to 4 hours.

    3. ASSEMBLE: Remove the top plastic sheet from each serving of fish and place a plate upside-down on top of the fish.

    Invert the fish onto the plate and peel off the remaining plastic. Drizzle with olive oil, then sprinkle with a bit of sea salt, chives and pepper.

    Toss watercress and 2 tablespoons dressing in medium bowl; season to taste with sea salt and pepper.

    4. MOUND the salad greens on top and serve.
     
     
    WOULD YOU RATHER HAVE BEEF CARPACCIO?

    Take a look at:

  • Filet Mignon Carpaccio
  • “Stonehenge” Beef Carpaccio (fancifully decorated)
  •   Bluefin Tuna Carpaccio
    [1] Bluefin tuna crudo (photo © Caviar Russe | NYC).

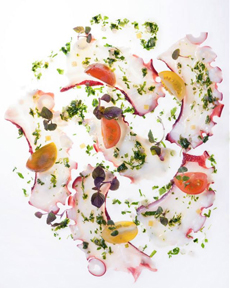
    Octopus Carpaccio
    [2] Octopus crudo (photo © Katsuya | Los Angeles).

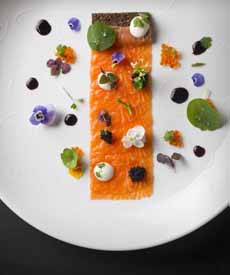
    Salmon Carpaccio
    [3] Salmon crudo (photo © Mihoko’s 21 Grams | NYC).

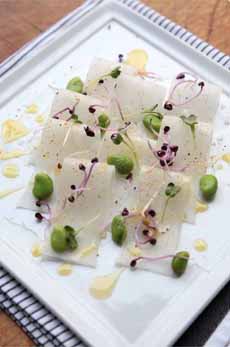
    Squid Carpaccio
    [4] Squid crudo (photo © Njam! TV).

    Beef Carpacio Salad Topped
    [5] You can top carpaccio or crudo with as much salad as you like (photo © Cooking Channel TAV).

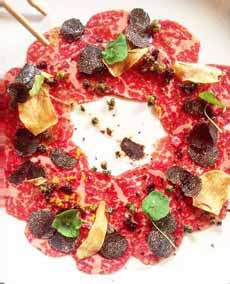
    Wagyu Carpaccio
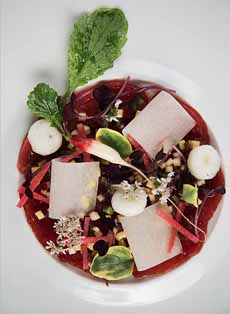
    [6] Wagyu carpaccio, simply dressed with truffles and garlic potato chips (photo © Catch NYC).


    Comments off

    RECIPE: Strawberry Shortcake – Tiramisu Fusion

    Srawberry Shortcake
    [1] Today’s recipe: an Italian spin on strawberry shortcake (photo courtesy King Arthur Flour).

    Strawberries In Colander
    [2] You can buy strawberries year-round, but summer strawberries are (no surprise) the sweetest (photo courtesy California Strawberries).

    Biscuit Strawberry Shortcake
    A traditional strawberry shortcake combines strawberry, whipped cream and biscuits. It might have been a way to use leftover biscuits (photo courtesy Driscoll’s Berries).

    Strawberry Shortcake With Ice Cream
    [4] Trade the whipped cream for ice cream, on a biscuit or in a layer cake (photo courtesy Nestlé).

    Blueberry Tart
    [5] This is what a tart looks like: It stands free of the tart pan (photo courtesy Chilean Blueberry Committee).

    Blueberry Pie
    [6] This is what a pie looks like: It needs to remain in the pie plate (photo courtesy Taste Of Home).

    Tart Slice

    [7] A tart has a solid filling (photo courtesy Butter Flour Sugar).

      June 14th is National Strawberry Shortcake Day, and we have a recipe below that builds on the concept.

    But first, a request that you not name your recipes with the name of a different recipe. We mean no disrespect to anyone involved with naming a recipe: It’s a teaching moment for everyone.

    In fact, yesterday we received a recipe for a banana cream pie, that is clearly a tart. Here are all the differences; the first is that the crusts and fillings are different.

  • A tart crust is buttery, firm and stands up on its own. The filling solidifies, like a custard.
  • A pie crust is soft and pliable, made with shortening. It needs the support of the pie plate. The center is usually runny, especially in the case of fruit pies. (Others, like pecan pie, solidify.
  •  
    See photos #5, #6 and #7.

    Now onto today’s misnomer. The recipe below (in photo #1) is called a Berry Tiramisu Cake by its creator, a professional baker. The name follows the downward slope of appending the name of a well-known, popular food to something new.

    Hence, for example, there are hundreds of cocktail recipes called a [add a modifier, e.g. cherry] Margarita or [chocolate] Martini, because the name “sells.” But it dowesn’t track: The ingredients do not build on the essential ingredients of the recipe they claim to represent.
     
    WHAT’S THE BEEF?

    You can build on a basic recipe—for example, make a flavored Martini. But if it doesn’t have vermouth plus gin or vodka in addition to the fruit, chocolate, coffee or whatever, it isn’t a Martini. Simply adding vodka (or tequila) to a recipe does not a Martini (or Margarita) make.

    See our rant on this topic.
     
    ON TO DESSERT!

    Following the beef above, we now comment on the concept of “Berry Tiramisu.”

    Tiramisu is a recipe that comprises sponge cake or ladyfingers (sponge fingers), soaked in espresso liqueur or a coffee syrup (for a non-alcoholic version), and layered with a mascarpone cheese and custard mixture. It is garnished with a dusting of cocoa powder or shaved chocolate.

    To build on it and still call it tiramisu:

  • You can switch the mascarpone and custard for ice cream and have a tiramisu sundae.
  • You can combine espresso liqueur, vanilla or Irish cream liqueur (for the mascarpone) and vodka and have a tiramisu cocktail, garnished with chocolate shavings and perhaps, a ladyfinger on the side.
  • You can use a different cake instead of the ladyfingers; for example, a pound cake or pandoro tiramisu.
  • You can substitute the custard for heavy cream, for a frozen tiramisu.
  • You can add a layer of fruit, for a cherry tiramisu.
  •  
    But you can’t get rid of the coffee.

    Coffee is an indispensable ingredient in tiramisu: The name means “pick me up,” referring to the caffeine in coffee.
     
    WHY DOES IT MATTER?

    Why does accuracy in anything matter?

    End of teachable moment.

    RECIPE: ITALIAN-STYLE STRAWBERRY SHORTCAKE

    This recipe, developed by MaryJane Robbins of King Arthur Flour, is called Berry Tiramisu by its creator. You can watch the step-by-step production here.

    We have renamed it Italian-Style Strawberry Shortcake. Here’s the history of shortcake; you’ll see why shortcake is an apt description.

    As for “Italian-style,” the shortcake uses mascarpone instead of whipped cream, and soaks the sponge layers in syrup.

    Whatever you wish to call it, prep time is 35 to 45 minutes; bake time is 20 to 23 minutes.

    The syrup and cream can be made up to 3 days ahead of time and held in the refrigerator until the cake is ready to assemble.
     
    Ingredients For A 9-Inch Cake

    For The Sponge Cake

  • 6 large eggs
  • 1 cup sugar
  • 1/2 teaspoon almond extract
  • 1 cup unbleached all-purpose flour
  • 1 teaspoon baking powder
  • 1/2 teaspoon salt
  •  
    For The Citrus Soaking Syrup

  • 3/4 cup water
  • 3/4 cup sugar
  • 2 tablespoons fresh lemon zest (grated peel of 2 lemons)
  • 1/3 to 1/2 cup lemon juice (juice of 2 lemons)
  • Pinch of ground cloves
  •  
    For The Citrus Cream Filling

  • 2 cups mascarpone cheese
  • 2 tablespoons freshly grated orange peel (from 1 orange)
  • 1 cup heavy or whipping cream
  • 1/2 cup confectioners’ sugar
  • 2 quarts fresh berries of your choice (strawberries, blueberries, raspberries)
  •  
    Preparation

    1. PREHEAT the oven to 350°F. Lightly grease and line with parchment two 9″ square* pans. Combine the eggs, sugar and almond extract in a mixing bowl. Beat on high speed until the eggs thicken and lighten in color, about 5 minutes.

     
    2. WHISK together in a separate small bowl the flour, baking powder and salt. Sprinkle 1/3 of the dry mixture over the beaten egg and gently stir it in. Repeat twice more, using 1/3 of the flour mixture each time. The batter will begin to look spongy and fluffy.

    3. POUR the batter into the prepared pans. Bake the cake for 20 to 23 minutes, or until the top is lightly browned and the edges begin to pull away from the sides of the pan. Remove from the oven and place on racks to cool in the pan completely.

    4. MAKE the syrup: Combine all of the syrup ingredients in a small saucepan and bring to a boil over medium heat. Simmer for one minute, or until the sugar dissolves. Remove from the heat, strain, and set aside to cool.

    5. MAKE the filling: In a small bowl, combine the mascarpone and orange zest. Gradually stir in the heavy cream until the mixture is smooth and thick. Stir in the confectioners’ sugar.

    6. ASSEMBLE the cake: Place one cake layer on a serving platter and brush it with syrup. Allow the syrup to soak in, then apply more. You’ll use about half of the syrup for the first layer.

    7. SPREAD half of the sliced berries over the moist cake. Dollop on half of the cream filling, and spread in an even layer. Top with the second layer of cake, repeating the soaking process. Spread with the remaining cream filling, then top with the last of the berries. Refrigerate the cake for at least an hour (or up to overnight) before serving.

    Store any leftover cake in the fridge for up to 2 days. Freezing is not recommended.

    ________________

    *If you don’t have two 9″ square pans, you can bake in two 9″ round pans. The layers will be slightly thicker, and will take a few extra minutes to bake.

    MORE SHORTCAKE RECIPES

  • Cupcake Strawberry Shortcake Recipe
  • Easy Strawberry Shortcake Recipe
  • Matzoh Strawberry Shortcake Recipe
  • Red, White & Blue Shortcake Recipe
  • Strawberry Shortcake Ice Cream Cake Recipe
  • Triple Berry Shortcake Recipe
  •  
      

    Comments off

    PRODUCT: A New Manual Coffee Grinder

    Everything is cyclical, even mundane household appliances like the coffee grinder.

    In centuries past, coffee beans were ground manually. Depending on your age, your great-grandmother ground beans in a rectangular wood or metal mill (or combination)
    with a ceramic burr. The grains fell into a drawer underneath the mechanism.

    But technology marches on: first to pre-ground coffee from supermarket brands, and then, by having your beans freshly ground at the market.

    By the early 1970s, the movement to buying premium beans from different terroirs around the world had begun. Shops sprang up* that sold only beans. A cup of coffee was no longer just a cup of coffee.

    The first electric grinder was invented in 1930, but was cumbersome and shortly discontinued. In the 1950s and 1960s, a new generation of engineers took up the challenge [source]. Slowly, they made their way across Europe, and then across the pond.

    By the 1980s, most households that ground their beans at home had moved on to the new, small electric grinders that ground the beans with stainless steel blades. The result was quicker ground coffee with little or no no effort.

    But purists complained that the friction and waste heat from the motor impacted the flavor. Some of them stuck with the manual mill and ceramic burr, which has never gone out of style. And commercial use grinders use only ceramic burrs, never metal blades.

    There’s more coffee grinder history below. But since everything old is new again, we’d like to present old-school grinding technology with a new-school upgrade.
     
     
    THE NEW BIALETTI HAND-GRINDER WITH A CERAMIC BURR

    The Bialetti Manual Coffee Grinder (photo #1) incorporates an easy-to-adjust ceramic burr grinder designed to utilize less effort, while creating more output (46%-165% depending on the coarseness of the grind).

    A conical ceramic burr grinder crushes whole coffee beans into the desired coarseness, achieved with an easy-to-adjust wheel.

  • There are measurement markings on the bottom chamber that indicate the amount of grounds needed for a coarse, medium, fine, and ultra-fine, and for use in a coffee press, pour over, moka pot and ibrik (Turkish brew pot).
  • The grinder also has a silicone grip for secure handling.
     
    If you’re a coffee purist—or you need to buy a gift for one—Bialetti’s Manual Coffee Grinder is available at Target stores nationwide for an MSRP of $39.99; and at Amazon for $35.57.
     
     
    COFFEE GRINDER HISTORY

    In Ethiopia, people have been consuming coffee since around 800 C.E.

    Today, almost half of Ethiopians the people work in the trade; most coffee grown by small farmers.

    The legend has that around 800 C.E., an Ethiopian goatherd, Kaldi, noticed his goats dancing with energy after nibbling the red fruit from plants they found on the slopes where he took them to graze.

  •   Bialetti Manual Coffee Grinder
    [1] The new manual Bialetti coffee grinder (photo Bialetti).

    Old Coffee Grinder

    [2] A Turkish coffee grinder (photo Turkish Coffee World).

    Old Coffee Grinder
    [3] An old wood and brass grinder (photo © Kean Eng Chan | Flickr).

     
    We don’t know if there was a Kaldi; but someone first gathered the beans and brought them back to his village, where the people were equally enthusiastic. A trade in coffee beans began and spread throughout Ethiopia.

    Eating The Coffee Beans

    The beans—actually they’re cherries with the beans inside—were first chewed for energy.

    Some time later, when monks got hold of beans, they began experimenting with them, first creating a coffee-derived wine.

    In fact, the word coffee derives from the Arabic qahwah, a type of wine, which became kahve in Turkish, then koffie in Dutch. “Coffee” entered the English language in 1582, via Dutch.

    Long before there was anything we’d recognize as a cup of hot coffee, Ethiopians would crush up the fresh berries and wrap them with fat, possibly as an energy food.

    The cherry fruit was eaten fresh or dried; but while looking for other uses, the seeds (what we know as the coffee beans) were pulverized in a mortar and pestle of stone or wood, then cooked or roasted.

    By the 14th century, coffee beans reached the city of Harrar, the center of trade for Ethiopia. From there it traveled to Mocca, the trading port of Yemen in the 14th century, then up through the Ottoman Empire and on to Europe.

    In the 17th an 18th centuries, Dutch, French and British traders introduced coffee throughout the world.

    The First Coffee Grinders

    The first grinding technique for coffee comprised pulverizing the beans with a mortar and pestle made of stone or wood.

    The mill itself is much older than the coffee trade. It was developed by the Greeks around 1350 B.C.E., to crush a substance (grains, e.g.) down into a fine powder.

    It took a while, but he first spice grinder was invented in the 15th century in Persia or Turkey. Like a tall, slender brass pepper mill, it also was used to grind coffee beans [source].
     
     
    ARE YOU A COFFEE LOVER?

    Take a look at our:

  • Coffee Glossary
  • Espresso Glossary
  • ________________

    *If coffee connoisseurs were lucky, they lived in a town with a specialty coffee shop, with loose beans and packaged coffee from around the world. We were lucky: We lived in New York City, which had McNulty’s Tea & Coffee, established in 1895. It’s still located at 109 Christopher Street in the West Village (and still not open on Sundays).


    Comments off


    © Copyright 2005-2026 Lifestyle Direct, Inc. All rights reserved. All images are copyrighted to their respective owners.