|
June is National Candy Month. How much does mankind like candy and its chief ingredient, sugar or honey?
Well…our species evolved with a built-in sweet tooth.
> The year’s 60+ candy holidays.
> The year’s 69 chocolate holidays.
> The history of chocolate.
IT STARTED WITH CAVEMEN
The history of candy dates back to cavemen. A cave picture from Spain, dated to about 6000 B.C.E., shows a man scooping honey from a beehive.
In addition to eating the honey, they took the next step to make candy from it, by drying it into a taffy-like substance.
Sweet substances (sugar, honey, agave, etc.) don’t become candy until they are transformed into something more. The basic definition of candy is a flavored sugar, honey or syrup. Flavored sugar water and other ingredients (cream of tartar, citric acid, food color, etc.) is heated and cooled in different ways to produce different types of candy.
In India and Papua New Guinea, where sugar cane originated, early man sucked the sweet juice from the cane. Evidence in New Guinea dates to 4000 B.C.E.
When Alexander the Great invaded India in 327 B.C.E., his troops saw “honey being produced without the intervention of bees” (i.e., sugar). But it took until around 250 C.E. for sugar candy to be invented in India, made in the shapes of animals and people.
In 642 C.E., the Arabs invaded India and returned with the recipe for candy and sugar cane to cultivate at home. Lozenges, marzipan and tree and animal sculptures made from sugar paste followed.
KHANDA: A PIECE OF SUGAR
The word “candy” derives from the Sanskrit khanda, “a piece of sugar,” and later, the Arabic qandi, candied.
What would become known as candy can be traced back as far as 2000 B.C.E. to the ancient Egyptians, who made candy by adding figs, nuts, dates and spices to honey. They also added honey to the sap of marshmallow roots, creating the first marshmallow candy (the history of marshmallows).
Around the same time, Greeks used honey to make candied fruits and flowers. They also made sweet syrup from dates and figs. The candy was set in ovens.
The Romans made different types of confectionery treats, all called dulcia, the Latin word for sweet. Dates stuffed with almonds and stewed in honey, were one of the items sold by Roman confectioners.
We’re a long way from chocolate. Around 1500 B.C.E., the Olmecs in what is now the south of Mexico began to cultivate cacao beans. But they turned them into an unsweetened drink. Hard chocolate did not emerge until 1847.
SUGAR SPREADS WORLDWIDE
As sugar spread around the world, it was used to make sweets (and of course, to sweeten foods).
The Chinese sweetened ginger, licorice root and nuts with sugar.
The earliest known recipes for white nougat, which probably came from Central Asia, appear in a 10th century book from Baghdad, in modern Iraq (the history of nougat).
During the Middle Ages, sugar candies became more available to Europeans, made with sugar brought back from the Holy Land by crusaders and traders. The sweets were only for the wealthy, as the sugar was very expensive.
In the 12th century, an early form of halva appears in Byzantium, the ancient Greek colony that later became Constantinople.
In the 14th century, Venetians began to import sugar to make candy.
The growing demand for sugar in the rest of Europe encouraged investment in sugarcane. In the the Canary Islands, Sicily and a some other warm climate locations were used to grow cane. In the 15th century, the New World presented a great opportunity: the Brazil and the West Indies.
|
|
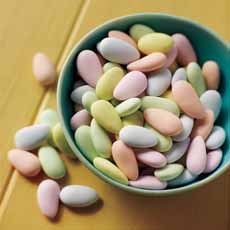
[1] The first candies were fruits and nuts coated in honey, and later in sugar, like these Jordan almonds (photo courtesy Williams-Sonoma).

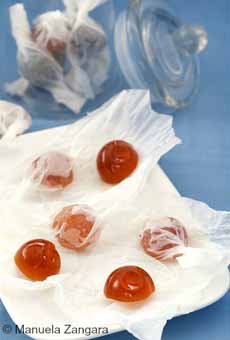
[2] Honey hard candy. Here’s the recipe from Manu’s Menu (photo © Manuela Zangara).
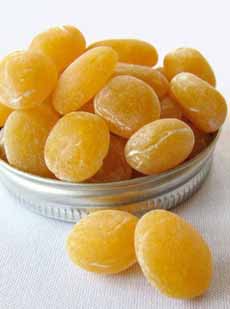
[3] Lemon drops. Here’s the recipe from Flavorite.
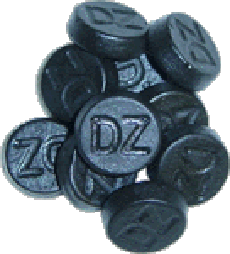
[4] The first licorice candy was made as honey-sweetened disks. Licorice had been used for thousands of years medicinally, and the honey was initially used to make it more palatable (photo courtesy Dutch Sweets).
|
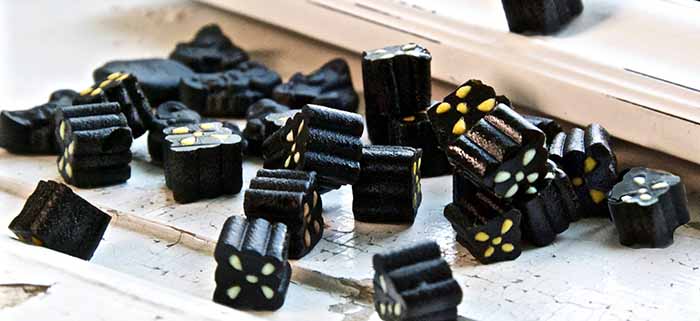
[5] Australian black licorice has a stronger flavor—and often a charming design (photo © Hanna Stolt | Unsplash).
In the early 16th century, Dominican friars introduced licorice to England (it was first used medicinally in Egypt 3000 years earlier). At some point, a manufacturer began to add honey to the licorice, turning it into a branded candy called Pontefract cakes (also Pomfret or Pomfrey cakes)(the history of licorice).
The 16th century saw the growth of candies at mom-and-pop confectionery shops: fruit drops, gum drops, etc. It was all hand-work until the Industrial Revolution engendered mass-made candy in the early 19th century.
In the 17th century, boiled sugar candies (hard candies) were being made in America and England. Some were made in molds to resemble fruits and flowers.
Also in the 17th century, North American colonists learned to tap maple trees for syrup from Native Americans. They boiled the sap to make maple syrup, and maple sugar and then, maple candy.
Candy canes were invented in 1670, by the choirmaster of the Cologne [Germany] Cathedral (the history of candy canes).
In the 1700s, a confection called griottes (gree-OAT) appeared in the Franche-Comté region of eastern France. Cherries were a local crop, and long-stemmed sour griotte cherries were enrobed in chocolate with some of the local kirsch (cherry brandy) (the history of chocolate-covered cherries).
Toffee was invented by the British in the early 1800s. By the 1880s, Americans had invented “soft toffee”: caramels (the history of caramel).
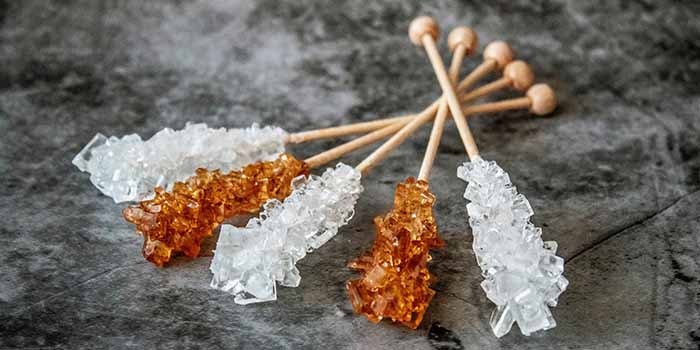
[6] Rock candy: a happy accident (photo © Tijana Drndarski | Unsplash).
MODERN CANDY: THE 19TH CENTURY
While boiled hard candy and lollipops first appeared in 17th century England, many of the candies familiar to us were invented a century later.
Many new types of candy were created in the 1800s. Rock candy was a happy accident from a Scottish hard candy maker (photo #6). A Dutch man invented the first hard chocolate candy in 1844.
According to CandyStore.com, “Candy factories began popping up everywhere and new flavors and textures of candy were being invented almost daily.”
The chocolate bar was born in 1847, and milk chocolate was invented in 1875 by Daniel Peter of Vevey, Switzerland. He used condensed milk, a product that had been perfected by his neighbor Henri Nestlé, a food scientist.
Here’s a timeline of modern favorites, thanks to Candy History:
1847: The first chocolate bar was made in 1847 by Joseph Fry & Co. in England. The founder’s grandson discovered a way to mix melted cacao butter, cocoa powder and sugar to create a paste that could be pressed into a mold. The resulting solid chocolate bar was later called Fry’s Chocolate Cream Bar. Here’s the history of chocolate.
1854: The first box of chocolate box appears (previously, they were wrapped in paper and string).
1861: Cadbury sells the first heart-shaped box of chocolates for Valentine’s Day, starting the tradition of gifting boxes of holiday chocolate.
Abut 1862: Jelly beans are invented in Boston.
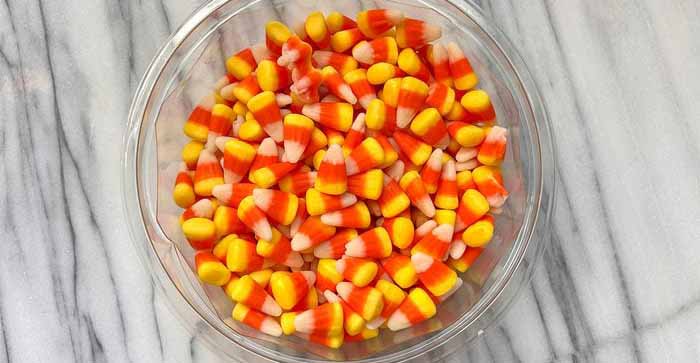
1880s: Wunderle Candy Company creates Halloween candy corn (the history of Halloween candy).
1886: Fudge is made by accident (the history of fudge).
1891: Doscher Brothers Confections of Chicago releases French Chews taffy.
1893: William Wrigley, Jr. creates Juicy Fruit Chewing Gum and Wrigley’s Spearmint Chewing Gum. (The Mayans had long chewed chicle from sapodilla trees to help with digestion.)
1893: Thomas Richardson introduces Pastel Mints in Philadelphia. In the same place and year, Quaker City Confectionery Company introduces Good & Plenty.
1894: Milton Hershey creates his iconic chocolate bar in Pennsylvania.
1896: Leo Hirshfield creates Tootsie Rolls in New York City.
1897: The first modern cotton candy machine is patented by John C. Wharton and William Morris of Nashville.
TBD: Gumdrops are believed to be an American invention, but the date and the inventor are lost to history (along with the origin of the phrase, “goody goody gumdrops*).
[7] Candy corn arrived in the 1880s (photo © Taste Of Home).
MODERN CANDY: THE 20TH CENTURY
The innovation continues:
Cotton candy is introduced at the 1904 Louisiana Purchase Exposition in St. Louis (the history of cotton candy).
Mid-1920s: The H.B. Reese Candy Company introduces peanut butter cups (the history of peanut butter cups).
1902: Necco makes first conversation hearts – popular Valentine Day candy with messages printed on them.
1905: The Squirrel Brand Company of Massachusetts introduces first peanut bar.
1907: The first foil-wrapped chocolate.
1908: The red candy apple was invented in 1908 by William W. Kolb, a Newark, New Jersey confectioner (the history of candy apples).
1912: Jean Neuhaus invents the chocolate shell that can be filled with soft centers and nut pastes, offering many different soft centers that could not be used in the the existing dipping and enrobing of chocolates.
1912: Life Savers introduced, shaped like life preservers. Initially made from peppermint, five fruit flavors followed.
1913: Goo Goo Clusters, the fist bar that combined milk, chocolate, caramel, marshmallow and peanuts.
1913: Sponge candy invented (the history of sponge candy).
1920: Jean Neuhaus’ daughter-in-law, Louise Agostini, invents the ballotin, the rectangular box with molded insets that protect the individual pieces of chocolate from rolling around.
1920: Baby Ruth candy bar. It was not named after the famous baseball player.
1921: Chuckles, colorful sugared rectangles that are the American version of pâte de fruits.
1922: According to legend, the chocolate truffle was created in the kitchen of French culinary giant Auguste Escoffier (the history of chocolate truffles).
1922: Hans Riegel created chewy candy called Dancing Beas, later known as Gummi Bears (gummy candy history).
1923: M&M/Mars Milk Way Bar – first candies from popular Mars family.
1927: Raisinets (the history of Raisinets).
1928: Heath Bars.
Late 1920s: Butterfingers become second top selling candy of that time, right below Babe Ruth bars.
1930: M&M/Mars introduced the Snickers Bar.
1932: Introduction of Three Musketeers.
1933: Kraft Caramels.
1938: Krackel Bars are launched, containing almond, which were soon removed.
1941: M&Ms launch in six colors.
1948: Nestlé’s Alpine White chocolate bar, the first mass-distributed white chocolate in the U.S. (the history of white chocolate).
1949: Junior Mints.
1949: Smarties.
1954: Peanut M&Ms.
1960: Starburst fruit chews.
1963: Sweet Tarts.
1976: Civil War-era jelly beans are marketed as Jelly Bellies.
1978: Reese’s Pieces.
And then…to infinity and beyond!
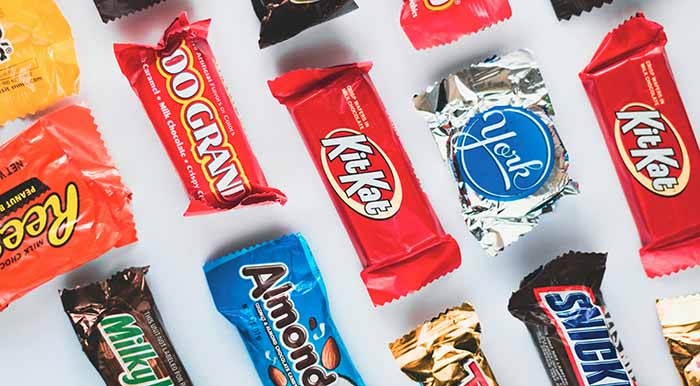
[8] What’s your favorite? (photo © Behnam Norouzi | Unsplash)
Thanks to CandyStore.com for some of this information.
|
|