|
We love paella and don’t make it often enough. So when Fagor wrote to us about their paella pan and included a recipe (below) to make paella on the grill, our ears perked up. Before we get to the recipe, here’s a bit about paella, past and present.
> National Spanish Paella Day is March 27th, and World Paella Day is September 20th.
> The grilled paella recipe is below.
> The year’s 11 Spanish food holidays celebrated in the U.S.
> We begin with the history of paella.
PAELLA HISTORY
Paella (pronounced pie-AY-ya) originated in Valencia, a region on the Mediterranean (east) coast of Spain. It was originally a peasant dish, made by agricultural laborers who cooked a mixture of rice, snails, and vegetables in the fields. Cooked in a pan over an open fire. it was a communal dish, eaten directly from the pan with wooden spoons.
Valencianos who lived closer to the coast added local eel plus butter beans (lima beans). Paella is the type of dish that lends itself to adding whatever you have on hand, so can change seasonally. Recipes thus evolved in many directions.
MODERN PAELLA
The paella we know today—saffron rice mixed with chorizo, chicken, and seafood—did not evolve until the late 18th century, when living standards rose affording the use of more expensive ingredients—especially saffron, the world’s costliest spice.
It’s easy to vary the ingredients to create any type of paella, including vegetarian and vegan recipes. But three main styles developed in the 19th century:
Paella Valenciana combines rice, green vegetables, meat (rabbit, chicken, duck), snails, beans and seasoning.
Paella de marisco, a seafood paella that replaces meat and snails with seafood, and omits the beans and green vegetables.
Paella mixta, a freestyle combination of meat, seafood and vegetables. Note that in the U.S., dishes called “Paella Valenciana” are actually paella mixta, the combination of ingredients preferred by most people.
By the mid-1800s, paella included short-grain white rice and a mix of proteins: chicken, duck, rabbit, and snails. Less affluent people often made do with snails alone. The dish was actually a “rice and beans” dish, with a mix of butter beans, Great Northern beans (white beans), and runner beans (green beans).
Artichokes and tomatoes replaced runner beans in the winter. Spices included garlic, pimentòn (sweet paprika), rosemary, saffron, and salt. The dish was cooked in olive oil.
The recipe continued to evolve as chorizo, green peas, olives, and roasted red pepper found their way into the dish.
We’ve seen recipes with chopped chard or escarole, eggplant, fennel, mushrooms, olives, onion, piquillo chiles, red or green bell pepper, snow peas, tomatoes (fresh diced or roasted), and seasonal (spring asparagus and winter squash, e.g.). Some cooks garnish the top of the paella with sliced hard-boiled eggs and lemon wheels.
The cook’s favorite ingredients were sure to be included. The chef at Soccarat, a group of tapas and paella restaurants in New York City, devised a paella menu that includes:
|
|
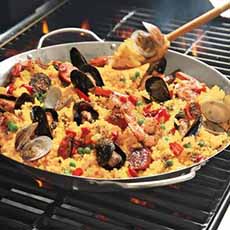
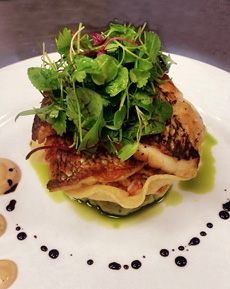
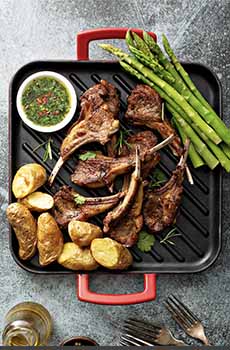
[1] Paella mixta on the grill. Mixta means both meat and seafood (photo © Sur La Table).
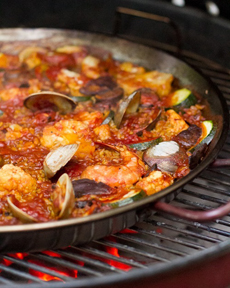
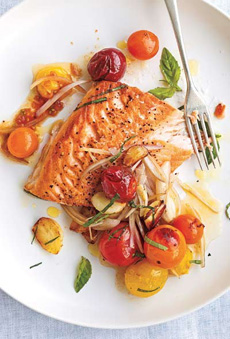
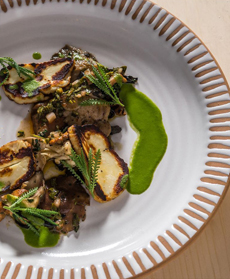
[2] Seafood paella on the grill (photo © A Couple Cooks.
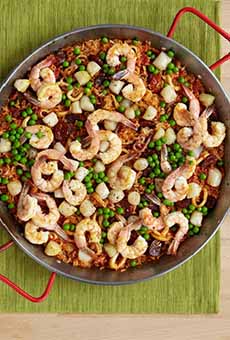
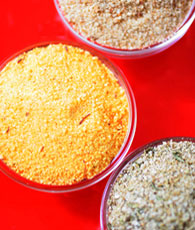
[3] Chorizo and seafood paella; pan from IMUSA (photo © IMUSA).
|
|
Arroz negro (black rice): calamari, fish, scallops, piquillo peppers and shrimp with squid ink rice.
Carne (meat): chicken, chorizo, mushroom sofrito, short ribs and snow peas.
De la huerta (from the orchard, i.e., vegetarian*): artichokes, cauliflower, eggplant, snow peas and tomatoes.
Fideuà† de mar y montana (ingredients from the sea and mountains): Brussels sprouts, chicken thighs, cuttlefish and shrimp, with noodles instead of rice
Langosta (crustacean): lobster, roasted peppers, scallops, shrimp and squid.
Pescados y mariscos (fish and seafood): cockles, English peas, mussels, scallops, shrimp, squid and white fish.
Socarrat‡ (house signature recipe): beef, chicken, cockles, cuttlefish, fava beans, mussels, shrimp and white fish.
Valenciana: asparagus, pork ribs, rabbit, scallions and snails.
|
|
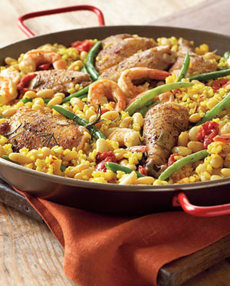
[4] Paella is a freestyle dish: Whatever you have on hand can go into the pan. Here, chicken legs and thighs, green beans and corn are included. Our personal favorite combination: a mixto with pimento (red bell pepper in a jar), black and green olives, artichoke hearts and green peas, plus fresh asparagus in the spring (photo © Williams-Sonoma.com).
|
|
RECIPE: PAELLA ON THE GRILL
This recipe, sent to us by Fagor, takes about 40 minutes. Created by A Couple Cooks, can easily be made as a vegan dish. You can also add the traditional mixto ingredients, chicken thighs and sliced chorizo.
Ingredients For 4 Servings
15-inch paella pan or any large, shallow, flameproof pan (stainless steel or aluminum preferable)
12 mussels or clams
12 high-quality de-veined shrimp (or substitute cooked chickpeas for a vegetarian version)
4 ounces shiitake mushrooms
1 zucchini
½ head cauliflower or any vegetables of your choice (we used a classic blend of roasted red peppers [pimento], peas and olives)
4 cloves garlic
3 tablespoons olive oil
½ cup tomato purée
5½ cups vegetable broth
2 cups arborio (short grain) rice
1 pinch saffron
2 tablespoons pimentón (Spanish smoked paprika)
1 teaspoon kosher salt
Fresh ground pepper
|
Preparation
1. HEAT the grill to medium-high heat. Prepare the ingredients: Scrub the mussels or clams; place them in a bowl with the shrimp. Slice the zucchini and mushrooms; chop the cauliflower into bite-sized pieces. Place the vegetables in a bowl.
2. MINCE 4 cloves of garlic and put them in a small bowl with 3 tablespoons olive oil. In a medium bowl, place ½ cup tomato purée and 5½ cups broth; mix to combine. In another bowl, add 2 cups arborio rice, 1 pinch saffron, 2 tablespoons pimentón, 1 teaspoon kosher salt, and a good amount of fresh ground pepper.
3. ASSEMBLE the paella: Bring the bowls of ingredients and the paella pan to the grill. Prior to cooking, add about 15 briquettes to the fire to keep the temperature up. Place the pan on the grill and add the olive oil and garlic; cook for about 30 seconds. Add the vegetables; cook for about 2 minutes, stirring occasionally. Add the seafood; cook for about 2 minutes, flipping the shrimp once. Pour in the rice and spices so that they cover the pan. Add the broth and purée mixture and stir to combine.
4. COOK the paella for 20 to 30 minutes, until most of the liquid has evaporated. Cook uncovered on a charcoal grill or with the cover down on a gas grill. Make sure not to stir, since this is when the soccorat develops. (Editor’s note: Soccorat is the rice crust on the bottom of the pan, which some people find very exciting. We personally don’t like hard, crunchy rice).
5. CHECK to see that the rice on the bottom does not burn; it cooks fairly quickly. Remove the pan from the heat and let sit for about 5 to 10 minutes to cool.
WHY BUY A PAELLA PAN?
Why not make paella in a roasting pan or other vessel you already have?
You can, of course; but a paella pan is specifically designed for seamless heat conduction and retention. Fagor’s, with a heavyweight and enamel-on-steel design, is a great heat conductor on the grill, oven, or stovetop.
You can buy it Fagor Paella Pan or at retailers like Bed, Bath & Beyond. Be sure to get the 15-inch size. With a dish like paella, you want to make as much as you can and enjoy the leftovers.
A paella pan is a versatile piece of cookware that can also be used to make:
Eggs and bacon
Pancakes
Roast chicken (the pan goes from oven to table)
Stir-frys (or anything you’d use a wok for)
Pizza: grease and flour the pan well or use nonstick spray
And the pan easily goes from stove to table (don’t forget a trivet).
____________
*The word vegetariano does exist in Spanish, but there is some poetic license involved with the orchard reference.
†Fideuà denotes the a type of cuisine from Catalonia, the northeastern part of Spain (north of Valencia). The style originated in the 1920s in the city of Gandia, when thin noodles like vermicelli (fideu in the Catalan language) were used instead of rice in the paella. The pasta is broken into short lengths and cooked in the paella pan. There are many variations of it, and it is optionally served with allioli sauce, the traditional Catalan garlic and olive oil sauce. Other examples of the cuisine: calçots—barbecued spring onions with romesco sauce—cured anchovies, embutidos y butifarras (cured meats and sausages), sparkling Cava wine and anything made with the local bolet mushrooms. Canelons, Spanish cannelloni, and Pa amb tomaquèt, bread rubbed with tomato (and sometimes with garlic and olive oil), and Escudella de carn d’olla, is a hearty Catalan stew, round out the list of “must trys” when you’re next in Barcelona.
‡Soccorat is the hard, crunchy rice crust that develops on the bottom of the pan from its proximity to the heat. Some people particularly enjoy it.
CHECK OUT WHAT’S HAPPENING ON OUR HOME PAGE, THENIBBLE.COM.
|
|