THE NIBBLE BLOG: Products, Recipes & Trends In Specialty Foods


Also visit our main website, TheNibble.com.

Strawberry Cheesecake Pops Recipe & 18 Cheesecake Recipes

strawberry-lime-cheesecake-pops-kraft-230
[1] Make frozen strawberry cheesecake pops to celebrate National Cheesecake Day (photos #1 and #3 © Philadelphia Cream Cheese).

Box Of Fresh Strawberries
[2] Have a frozen strawberry cheesecake experience without turning on the oven (photo © Good Eggs).

philadelphia_cream_cheese-box-ps-230
[3] Cream cheese is an American invention. Cream cheese-based cheesecake owes its popularity to Philadelphia Cream Cheese, which launched in 1872. The brand promoted the recipe on its packages.

Lime Halves For Cheesecake Pops
[4] Lime juice and zest add a second flavor note (photo © Lisa Fotios | Pexels).

  July 30th is National Cheesecake Day, and we’re baking our Cheesecake Recipe With Sour Cream Topping, which happens to be our mom’s recipe.

It’s a heavy cream cheesecake with a sour cream topping that isn’t found often these days—probably because most people don’t want to take the extra step.

If you don’t want to bake any type of cheesecake, how about these Strawberry-Lime Cheesecake Pops from Philadelphia Cream Cheese?

They give you a summery cheesecake experience without turning on the oven.

Not all cheesecakes are sweet, by the way.

We love savory cheesecakes—basil, blue cheese, corn and provolone, lobster Gruyère, salmon and tuna. Serve one with cocktails, as an appetizer, or as the cheese course with a salad. They’re memorable!

> There are more cheesecake recipes below.

> There’s also fun cheesecake trivia below.

> The history of cheesecake.
 
 
RECIPE: STRAWBERRY LIME CHEESECAKE POPS

Ingredients

  • 1-1/2 cups strawberries, divided
  • 1-1/2 packages (12 ounces) Philadelphia Cream Cheese, cubed, then softened
  • 1 tablespoons lime zest and 2 tablespoons juice from 2 limes
  • 1/4 cup sugar
  • 1/2 cup whipping cream (heavy cream)
  • 12 paper or plastic cups, 3 ounces each
  • 12-cup muffin tin
  •  
    Preparation

    1. PLACE a 3-ounce paper or plastic cup in each of the 12 muffin pan cups. Cut each of 3 strawberries into 4 slices; place them in the cups.

    2. PLACE the remaining strawberries in a food processor. Add the cream cheese, lime zest, juice, and sugar; process until smooth. Spoon into a medium bowl.

    3. BEAT the whipping cream in a medium bowl with a mixer on high speed until stiff peaks form. Gently stir into the cream cheese mixture. Spoon into the prepared cups. Tap the cups on the counter to remove any air bubbles.

    4. INSERT a wooden pop stick or a plastic spoon into the center of each cup. If they won’t stand up straight, freeze for an hour and try again.

    5. FREEZE for 4 hours or until firm. Remove the frozen pops from cups just before serving.
     
     
    CHEESECAKE TRIVIA

  • Cheesecake (savory) was popular in ancient Greece. Neufchatel, ricotta, and other soft, fresh cheesecake-friendly cheeses have existed in Europe for centuries, engendering a variety of savory and sweet cheesecake recipes.
  • Cream cheese was invented by accident in New York, in 1872, and was later given the Philadelphia brand name (learn more). In the early 20th century, the company promoted the first cream cheesecake recipe, and an icon was born.
  • Cheesecake is actually a cheese custard pie. There is no cake made with flour, but a bottom crust like an open-face pie.
  • Cheesecake is often served with fresh or cooked fruit. Blueberries, mango, raspberries, and strawberries are fan favorites.
  •  
     
    SCROLL DOWN FOR 18 DELICIOUS CHEESECAKE RECIPES!


    18 DELICIOUS CHEESECAKE RECIPES

    We love cheesecake, and have published quite a few recipes over the years. Here are some of our favorites:

  • Boston Cream Pie Cheesecake recipe
  • Burnt Caramel Cheesecake recipe
  • Chocolate Chunk Cheesecake recipe
  • Chocolate Peanut Butter Cheesecake (recipe) & The History Of Cheesecake
  • Cranberry Cheesecake recipe With Whiskey Buttercream Sauce
  • Easy Blueberry Cheesecake Topping recipe
  • Grand Marnier Mascarpone Cheesecake recipe
  • Individual Cheesecakes With Fresh Orange Or Grapefruit recipe
  • Individual Eggnog Cheesecakes recipe
  • Irish Coffee Cheesecake recipe
  • Irish Cream Liqueur Cheesecake recipe
  • Mango Cheesecake recipe
  • Michael Chiarello’s Mascarpone Cheesecake recipe
  • Milk Chocolate Cheesecake recipe
  • Mocha Pumpkin Cheesecake recipe
  • My Mom’s New York Cheesecake With Sour Cream Topping recipe
  • Pumpkin Mousse Cheesecake with gingersnap crust recipe
  • Red Velvet Cheesecake recipe
  •  
     

    CHECK OUT WHAT’S HAPPENING ON OUR HOME PAGE, THENIBBLE.COM.


    Comments off

    Chimichurri Sauce Recipe & Chimichurri Sauce History

    Each country in Latin America has a national salsa, or sauce. In Argentina, it’s chimichurri (chih-mee-CHOO-ree).

    Chimichurri sauce is made of finely chopped parsley, minced garlic, olive oil, white or red vinegar, and red pepper flakes. Oregano can be added. Cilantro can replace parsley in some regions; vegetable oil can replace the olive oil.

    The original sauce is green from the parsley; later red versions add tomatoes, red bell peppers and/or hot chiles.

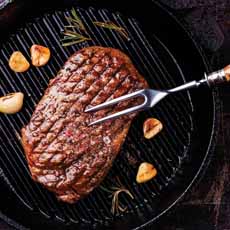
    In beef-endowed Argentina, chimichurri is the steak sauce of choice, also used with other beef-based dishes and any grilled meats.

    A recipe for chimichurri sauce follows and the recipe after that. Also see below:

    How to create your signature chimichurri sauce.

    The many ways to use chimichurri sauce.
     
     
    THE HISTORY OF CHIMICHURRI SAUCE

    As one story goes, the name evolved from “Jimmy McCurry,” an Irishman who developed the recipe in Argentina. However, there is no written documentation of this.

    Purportedly, McCurry was sympathetic to the cause of Argentine independence in the 19th century and served in a troop under the command of General Jasson Ospina. The sauce was popular but “Jimmy McCurry” was difficult for Argentineans to say, so it became “chimichurri” sauce (pronounced chimmy CHOO-ree).
     
    Another theory is that the name comes from the Basque settlers who arrived in Argentina in the 19th century. According to grilling expert Steve Raichlen, the name of the sauce comes from the Basque term tximitxurri, loosely translated as “a mixture of several things in no particular order.” (Source: Raichlen, Steven, “Planet Barbecue!,” Workman Publishing Company. p. 159)

    It’s easy to make chimichurri in a blender or food processor; but purists may want to make it the original way, with a mortar and pestle. We find that pesto made this way tastes better than food processor pesto, even when the exact same ingredients are used.

       
    /home/content/p3pnexwpnas01_data02/07/2891007/html/wp content/uploads/grilled rib eye steak with chimichurri sauce dartagnan 230r
    [1] Classic: grilled beef with chimichurri sauce (photo © D’Artagnan).

    Lamb Chops & Asparagus With Chimichurri Sauce
    [2] Enjoy chimichurri with any grilled meat, lamb (in photo), pork, poultry, or fish (photo © D’Artagnan).

     
    RECIPE: BASIC CHIMICHURRI SAUCE

    Ideally, make the chimichurri sauce a day in advance to allow the flavors to meld. The sauce will keep in the refrigerator for up to 1 week.

    Ingredients For 1-1/2 Cups

  • 2 cups fresh Italian parsley leaves, tightly packed
  • 4 medium garlic cloves, peeled and smashed
  • 1/4 cup packed fresh oregano leaves or 4 teaspoons dried oregano
  • 1/4 cup red wine vinegar
  • 1/2 teaspoon red pepper flakes
  • 1/2 teaspoon kosher salt
  • Freshly ground black pepper to taste
  • 1 cup extra-virgin olive oil
  •  
    Preparation

    1. PLACE the parsley, garlic, oregano, vinegar, red pepper flakes, salt, and pepper in the bowl of a food processor, fitted with a blade attachment. Process until finely chopped, stopping and scraping down the sides of the bowl with a rubber spatula as needed, about 1 minute in total.

    2. ADD the oil in a steady stream, with the motor running. Scrape down the sides of the bowl and pulse a few times to combine.

    3. TRANSFER the sauce to an airtight container and refrigerate for at least 2 hours or up to 1 day, allowing the flavors to meld. Stir, taste and adjust seasonings before serving.


    Grilled Halloumi With Chimichurri Sauce
    [3] This chimichurri sauce has been made elegant by puréeing. It’s served with a vegetarian dish, Grilled Halloumi And trumpet Mushrooms (photo © Gardenia Restaurant | NYC).

      CREATE YOUR SIGNATURE CHIMICHURRI SAUCE

    You can adding or substitute other ingredients to create a signature chimichurri:

  • Substitute lemon or lime juice for the vinegar.
  • Use fresh or roasted chiles instead of the red pepper flakes.
  • Add minced onion.
  • Try balsamic or flavored vinegar instead of wine vinegar
  • Give it an Asian spin with fresh ginger and mint, or an Indian influence of green curry and cilantro.
  • Turn it into mint sauce by substituting mint for the parsley; or make a parsley-mint blend.
  • Substitute basil for “Caprese sauce.”
  • Add a spoonful of Dijon mustard.
  • Make red chimichurri sauce by adding red bell peppers and/or raw or roasted tomatos (Red Chimichurri Rcipe).
  • For elegance, purée the naturally textured sauce into a smooth one (see photo at left).
  •  
     
    21+ WAYS TO USE CHIMICHURRI SAUCE

    Like Italy’s pesto, chimichurri is a bright green, herb-based, versatile sauce that you can use with:

  • Beans and legumes
  • Burgers
  • Caprese salad dressing
  • Crostini (serve the toasts with grilled meats)
  • Eggs, any style
  • Egg salad, chicken salad, potato salad, tuna salad, etc.
  • Fries and onion rings
  • Grilled fish or seafood (recipe: Mango Grilled Shrimp With Chimichurri Grilled Mango-Citrus Chimichurri Shrimp)
  • Grilled halloumi or other grilling cheese (see photo above)
  • Grilled or roasted beef, chicken, lamb, pork
  • Hot dogs, brats and other sausages
  • Marinades (add more oil, vinegar, citrus juice or and/or water to thin out)
  • Mashed potatoes
  • Pasta (toss pasta lightly with EVOO before adding the chimichurri)
  • Rice and other cooked grains
  • Soup and stew garnish
  • Tacos
  • Tofu
  • Sandwich spread (mix with mayo or mustard)
  • Vegetarian dishes, including veggie wraps
  • Vinaigrette
  • Yogurt sauce (blend into plain Greek yogurt)
  •  
    Other ideas? Post them here.
     
     
    > SEE THE DIFFERENT TYPES OF SALSA IN OUR SALSA GLOSSARY.


    CHECK OUT WHAT’S HAPPENING ON OUR HOME PAGE, THENIBBLE.COM.


    Comments off

    TIP OF THE DAY: Blend Your Own Seasoned Salt

    If you shake salt on your food, one of the easiest ways to add more flavor is to use a seasoned salt. Why not add other seasonings at the same time?

    Perhaps that’s why Lawry’s Seasoned Salt, created in 1938 to season the prime rib served at Lawry’s restaurant in Beverly Hills, has remained a prominent fixture on the spice rack in many households.

    The blend of salt, herbs and spices (garlic, onion, paprika and turmeric, plus sugar—here’s the copycat Lawry’s Seasoned Salt Recipe) adds more flavor than salt alone.

    Home cooks found that it worked on everything, from breakfast eggs to any grain, protein, starch or vegetable.
     
    BUYING FLAVORED SALTS

    Over the last decade, numerous specialty food artisans—Urban Accents, Saltworks and quite a few other—have created collections of seasoned salts, with a base of sea salt. Even McCormick has joined in, with 11 McCormick sea salt grinders from Chipotle to Sweet Onion.

       
    /home/content/p3pnexwpnas01_data02/07/2891007/html/wp content/uploads/salts ritrovo 230w

    Casina Rossa seasoned sea salts from
    Italy—Porcini, Saffron, Edible Flowers,
    and others, are available from Seasoned
    Sea Salts
    . Photo by Naheed Choudhry |
    THE NIBBLE.

     
    The Urban Accents blends tend to mirror popular cuisines: Caribbean, Indian (curry and mango), Mediterranean, Provençal (herbes de Provence), Spanish (smoked paprika).

    The Fusion line of sea salts from Saltworks goes farther, with gourmet salts such as Black Truffle, Espresso, Ginger, Lemon, Lime, Maple, Matcha, Merlot, Sriracha, Sundried Tomato, Vanilla and White Truffle.

    But at $15 or so per 3.5-ounce jar (more for pricier items like porcini and truffle), you might want to try blending your own with what you have on hand.

    We’re addicted to truffle salts, and to Casa Rossa’s saffron salt. A pinch of salt lets us enjoy these two favorite flavors in everything from scrambled eggs to mashed potatoes and vinaigrette.

    Unfortunately for us, it’s so costly to purchase dried saffron or truffles—two of the priciest ingredients in the world—that there’s no money to be saved by blending our own.

    But there’s much more to blend than saffron and truffles.


    /home/content/p3pnexwpnas01_data02/07/2891007/html/wp content/uploads/beauty 230
    Coarse sea salt as a base for your seasoned
    salts. Photo by Dhanraj Emanuel | THE NIBBLE.
      START BLENDING!

    It takes just five minutes to blend salt, herbs and spices in a spice grinder. You can make them on an ad hoc basis, or make larger batches to store and use as needed.

    Pick A Salt

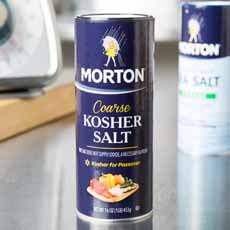
    If you don’t have sea salt on hand, start with kosher salt or table salt. After you get the hang of blending, you can try more exotic salts, such as:

  • Fleur de sel or sel gris from France
  • Black lava or red alaea salts from Hawaii
  • Pink Himalayan or kala namak salts from India
  • Smoked salt
  •  
    See our Salt Glossary for the different types of salts.
     
    Pick Your Seasonings

     
    Start with flavors you use in daily cooking: basil, chipotle, oregano, paprika, parsely, whatever. Pick as many as you like, although when starting out, limit your blends to salt plus four or five herbs/spices.
     
    You can also add ground pepper, although if you’re making enough to store, you may want to add it freshly ground. You can also add a pinch of white or brown sugar.
     
    Some basic blends to try:

  • Basic Seasoned Salt: salt plus garlic powder, onion powder and paprika
  • Lemon Pepper Salt: salt plus dried lemon peel and ground pepper
  • Rosemary Salt: salt plus garlic and rosemary
  • Celery Salt: salt plus dried celery leaves and celery Seeds (so much better than off-the-shelf celery salt!)
  • Hot & Smoky Salt: smoked sea salt plus ancho chiles and smoked paprika
  • Wild Mushroom Salt: salt plus dried chanterelles, dried porcinis, tarragon and white pepper
  •  
    Then, decide on ratios: which flavors do you want to be dominant, which flavors should be background hints.

    Start with twice as much salt as other flavors, and even less of hot flavors. You may find, after making different blends, that you’re using less salt and more herbs/spices.
     
    RECIPE: SAMPLE FLAVORED SALT BLEND

    Ingredients

  • ½ cup salt
  • ¼ cup each garlic and onion powders
  • ¼ cup ground black pepper
  • 2 tablespoons chili powder, chipotle, red pepper flakes, etc.
  • 3 tablespoons paprika
  • 2 tablespoons dried parsley
  •  
    Preparation

    1. COMBINE the ingredients in a mixing bowl and stir until well-combined. Working in batches, add the blend to a spice grinder and process into a fine powder. If you don’t have a spice blender, you can try a regular blender.

    2. STORE the salt in an airtight container. Store away from heat and light (as all herbs and spices should be stored!).
     
    If you want to make other blends but already have too much of homemade seasoned salt on hand, give it as gifts!
      

    Comments off

    FOOD FUN: Ice Cream Bar Trifle

    There are only a few days left of this year’s National Ice Cream Month. Here’s something a bit off the beaten track: an ice cream trifle. Is it a form of ice cream sundae or a variation of ice cream cake? Make it and take a vote.

    Trifle is an English dessert dish made from layers of custard, diced fruit, syrup or fruit juice and cubes of sponge cake, topped with whipped cream. It was traditionally served in a footed glass bowl.

    In QVC chef David Venable’s recipe, below, ice cream bars replace the custard and chocolate-covered pretzels replace the fruit and caramel takes over for the syrup.

    Adapt the recipe as you like, for example, trading the pretzels for sliced strawberries, and exchanging the chocolate cake for pound cake or ladyfingers. Instead of caramel, we tried a version with custard sauce (crème anglaise).

    David used Klondike bars in this recipe, easy to chop because there’s no stick. We prefer Magnum ice cream bars: better quality ice cream and chocolate coating, more flavor choices.

       
    /home/content/p3pnexwpnas01_data02/07/2891007/html/wp content/uploads/Klondike Bar Triffle qvc 230
    Ice cream bar trifle: Is it a jumbo ice cream
    sundae or a different approach to ice cream
    cake? Photo courtesy QVC.
     
    RECIPE: ICE CREAM BAR TRIFLE

    Ingredients

  • 3 packages frozen double-chocolate cake (10.8 ounces each) cut into 1″ pieces; we substituted fresh chocolate loaf cakes
  • 6 ice cream bars, each cut into 6 squares
  • 8 ounces dark chocolate-covered pretzels
  • 12 ounces caramel sauce
  • 16 ounces whipped cream or frozen topping
  •  

    /home/content/p3pnexwpnas01_data02/07/2891007/html/wp content/uploads/magnum almond icecreamBar 230
    Our favorite ice cream bar: Magnum. Photo courtesy Unilever.
      Preparation

    1. CUBE the cake first, then the ice cream bars. If using a fresh cake, freeze it first; it will be easier to cut. Freeze the cubes separately until ready to assemble.

    2. CRUSH the chocolate-covered pretzels gently into smaller pieces. Don’t over-crush—you want small pieces, not dust. Reserve 2 ounces to decorate the top of the trifle.

    3. PLACE 1/3 of the chocolate cake squares into a large trifle dish. Place 1/3 of the ice cream bar cubes on top, followed by 1/3 of the crushed chocolate-covered pretzels. Drizzle 1/4 of the caramel sauce over the pretzels and top with a 1/3 of the whipped cream. Repeat this order two more times, finishing with the whipped cream.

    4. ADD the rest of the caramel sauce and top with the reserved crushed chocolate-covered pretzels. Freeze immediately. David suggests that before serving, you should let the trifle sit at room temperature for 3–4 minutes so the cake can thaw slightly. We like eating frozen cake (especially in small cubes), and brought the trifle straight to the table.


    Comments off

    Mexican Street Food In Your Home: Elote & Esquites Grilled Corn Recipes

    Updated July 2026

    May 28th is National Something on a Stick Day, June 11th is National Elote Day, and July is National Corn Month.

    So today’s vote goes to elote (eh-LOW-tay), the Mexican version of corn on the cob, a popular Mexican street food, and equally popular made at home.

    Elote is the word for corn in the Nahuatl language of the Aztecs (the Spanish word for corn is maíz).

    The ears of corn are roasted or boiled in the husk, then husked and served on a stick with condiments.

    Instead of being slathered in butter only and served with corn holders American-style, elote condiments in addition to butter include chili powder, crumbled cotija cheese (and/or feta in the U.S.), lemon or lime juice, mayonnaise, sour cream (crema in Mexico), and salt.

    Chili powder and lime juice get the number one spot in Mexico, butter and cheese in the U.S.

    Elote is also made at home, where corn holders often replace the stick. (In our household, fingers replace the corn holders and the stick.)

    In some areas of Mexico, the cooked kernels are cut into a bowl, topped with the same condiments and eaten with a spoon. This dish is called esquites, and while some may find it less fun than food-on-a-stick, we’re on the Team Esquites.

    Not only is it neater to eat, but you can top your bowl with every condiment. Try to do that on a stick, and you may find yourself holding a condiment landslide.

    Below:

    > Is elote “corn porn?”

    > Recipe: elote or esquites with vegan cashew sauce.

    > Recipe: elote or esquites with conventional toppings.

    > Fusion recipe: Japanese elote.

    Elsewhere on The Nibble:

    > Host a DIY elote party bar.

    > The different Hispanic cheeses.

    > Fusion recipe: Italian elote.

    > The history of corn.

    > The history of elote.

    > The year’s 25+ Mexican and Tex-Mex food holidays.

    > The year’s 17 corn holidays.
     
     
    OPINION: IS ELOTE “CORN PORN?”

    Our colleague Hannah Kaminsky created what she calls “corn porn.”

    “The simplest elements of a meal,” says Hannah, “those unassuming side dishes that are all too often overshadowed by flashier, more expensive or more complex main dishes, serve up far more nuance than they’re given credit for. A perfect example of this is the humble ear of corn.

    “As summer marches on and those golden yellow kernels swell larger, juicier and sweeter underneath the hot sun, truly sumptuous fresh corn is a rare treat despite its ubiquity. A whole world of flavor can be found within those pale green husks, just beyond the tangled forest of corn silk, if only one knows how coax it out.

    “Finesse is the key to letting such a pared-down dish shine, accentuating the inherent flavor of is base ingredients without covering them up with a heavy-handed smattering of seasonings. Elote, served up either straight on the cob or sheared off and mixed up in the trolelotes presentation, is worth getting excited about.”
    ízquitl, toasted corn.)
     
    This variation is called esquites (or ezquites—photo #2) in southern and central Mexico, and troles or trolelotes in the north. The word esquites comes from the Nahuatl word ízquitl, which is pronounced iz-KEE-tay and means toasted corn.

    A vegan, Hannah eschews the butter, cheese, mayonnaise and sour cream used to bind the seasonings. Instead, she created the vegan sauce recipe below and serves the corn esquites-style, as kernels in a bowl.
     
     
    RECIPE #1: ELOTE OR ESQUITES WITH VEGAN CASHEW SAUCE

    Hannah created this variation with vegan cashew sauce.

    But you can serve the original condiments—butter, cotija cheese (substitute feta or use both), chili powder, lemon or lime juice, mayonnaise and sour cream—which are all available in conventional and vegan varieties. Just skip to Step 4.

    Ingredients For 6-8 Servings

  • 8 ears sweet corn, husked
  • 2 tablespoons olive oil
  • 1 cup raw cashews
  • 1 clove garlic, roughly chopped
  • 1/4 cup lime juice
  • 3 tablespoons nutritional yeast (vegan) or crumbled cotija or queso fresco cheese
  • 1 teaspoon light agave nectar
  • 1 teaspoon smoked paprika
  • 1/2 teaspoon cayenne pepper
  • 1/2 teaspoon salt
  • 1/2 cup water
  • 1/4 cup fresh cilantro, minced
  • Optional garnish: chili powder
  • Unconventional garnishes: diced jalapeños, pepitas
  •    
    Elote Grilled Corn

    [1] Make elote at home (photo © Good Eggs).

    Elote On A Stick

    [2] Elote is grab-and-go street food—on-a-stick. At home, you can use as many different garnishes as you like. Here’s the recipe (photo © Mexico In My Kitchen).

    Esquites Corn Salad

    [3] Esquites, a Mexican corn salad that is essentially, elotes off-the-cob (photo © Shop Cook Serve).


    [4] Esquites are a neater way to serve corn on the cob (photo © Goya).

    Cilantro & Lime Wedges
    [5] Cilantro and lime, accents that provide part of the signature flavor (photo © Lindsay Moe | Unsplash).

     
    Preparation

    1. SOAK the cashews for 3 hours and thoroughly drain them.

    2. MAKE the sauce. Place the cashews, garlic and lime juice in a food processor and pulse to combine. Pause to scrape down the sides of the bowl with a spatula so that the nuts are fairly well broken down. Add the nutritional yeast, agave, paprika, cayenne and salt, pulsing to incorporate.

    3. DRIZZLE in the water, allowing the motor to run slowly to blend thoroughly. The sauce should still be a bit coarse in texture, and the small pieces of cashew that remain will emulate the traditional curds of cotija cheese.

    4. COOK the corn on a hot grill, or indoors on a large griddle over high heat. Depending on the size of your cooking surface, you may need to work in batches since the corn must make full contact directly with the surface. Lightly brush the corn with oil and grill the corn until lightly charred, turning as needed. This process should take approximately 10 minutes, but let the color of the corn serve as your guide. Set aside to cool.

    5. CUT the kernels off the corn cobs and place them in a large bowl. Pour the cashew sauce on top and mix thoroughly. Add the fresh cilantro, tossing to combine. Divide the corn into 6 to 8 cups or bowls and top with a sprinkle of chili powder.
     
     
    RECIPE #2: TRADITIONAL ELOTE

    Ingredients

  • Base binder: mayonnaise or 50/50 mix of mayo and sour cream (Mexican crema)
  • Crumbled Cotija cheese (subsitute feta, grated Parmesan, or queso fresco)
  • Chili powder or Tajín seasoning,
  • Finished with a squeeze of fresh lime juice and a dash of hot sauce.The classic combination of toppings includes:The Creamy Base: Mayonnaise
  • Sticks, or good old corn holders
  •  
    Preparation

    1. BRUSH the base onto the grilled ears of corn and roll the in the crumbled cheese. Sprinkle with spices. Squeezed lime juice over the corn, and optional hot sauce.
     
    Esquites Corn Salad
    [6] Esquites are a tasty side dish. If you want a more substantial (but not traditional) variation, use them to top rice or other grains. Or make a more general corn salad by adding black beans, diced red onion, diced tomatoes, even olives (photo © Goya).
     
     
    RECIPE #3: FUSION FOOD, “JAPANESE ELOTE”

    Here’s a fusion food: Mexican elote made with Japanese condiments. For four ears of corn, mix:

  • 4 tablespoons unsalted butter, room temperature
  • 2 tablespoons white miso paste
  • Chopped chives (takes the place of traditional cilantro)
  • 1 teaspoon shichimi togarashi (substitute red pepper flakes)
  • Lime wedges for serving
  •  
    Preparation

    1. MIX the butter and miso paste and slather it on the hot corn. Sprinkle each ear with chives and shichimi togarashi. Serve with lime wedges.
     
    Italian Elote Corn On The Cob
    [7] Italian-style elote with basil pesto mayonnaise and Parmesan replacing cotija, and sweet golden balsamic vinegar. Here’s the recipe (photo © DeLallo).


    CHECK OUT WHAT’S HAPPENING ON OUR HOME PAGE, THENIBBLE.COM.


    Comments off

    The Nibble Webzine Of Food Adventures


    © Copyright 2005-2026 Lifestyle Direct, Inc. All rights reserved. All images are copyrighted to their respective owners.