|
Sun-dried tomatoes are delicious year-round; but according to the USDA, few if any store-bought sun-dried tomatoes are dried in the sun. The original technique, indeed, was to dry the tomatoes in the sun over the course of several days.
These days, most “sun-dried” tomatoes are oven-dried. However, they taste the same, or even better, when dried in an oven or food dehydrator.
The drying process gives the tomatoes a long shelf life, since most of the moisture, on which decay-inducing bacteria thrive, is removed (the same strategy as with jerky).
Sun dried vs. sun-dried vs. sundried? Any of the three spellings is correct.
OVEN DRYING
If you have a bumper crop of tomatoes, or there’s a big sale, you can use this technique to create homemade dried tomatoes. Freshly made, they’re still tender and succulent.
Instead of drying tomatoes in the sun, oven drying is a more efficient method. The task is complete in three hours at the lowest heat setting, instead of several days. You can also use a food dehydrator.
Of course, if you’d like the authentic experience, you can leave the tomatoes in the hot summer sun for two days or more, taking them in at night. (The oven is looking even better now, isn’t it?)
|
|
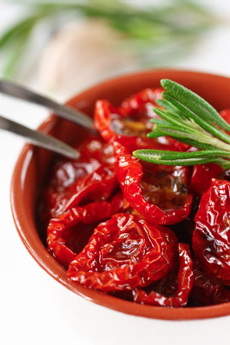
Sun-dried tomatoes. Photo courtesy Bella Sun Luci, producer of premium sun-dried tomatoes. |
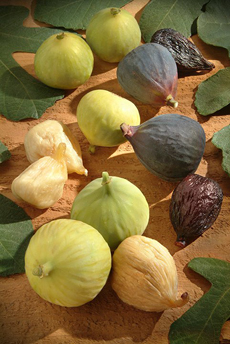
WHAT TOMATOES SHOULD YOU USE?
You can dry any tomato—beefsteak, cherry, grape, or other variety. But plum tomatoes, a type of roma tomato, are the most popular. The walls are thicker, meatier and have less water.
The tomatoes must be ripe but still firm (i.e., not overripe). While it’s not an exact science, five pounds of fresh tomatoes yield about two cups of dried tomatoes. The tomatoes will shrink to about a quarter of their original size.
|

Have extra sundried tomatoes? Bring them as gifts. Photo courtesy Bella Sun Luci. |
|
RECIPE: OVEN-DRIED TOMATOES
Ingredients
2 pounds ripe tomatoes
Kosher salt or coarse sea salt
6 cloves garlic, chopped finely
1 tablespoon dried basil, oregano or thyme
Freshly ground black pepper
Extra virgin olive oil
Preparation
1. SLICE the tomatoes. Cut them in half lengthwise and remove the tough part on the stem end. Also cut away any soft, bruised flesh. Cherry tomatoes need only be halved; but larger tomatoes should be halved again, into a total of four quarters.
2. SCOOP out most of the seeds, sprinkle with salt and let them sit skin side up for 15-20 minutes. The excess liquid will drain out, and the oven drying will go faster.
|
|
3. PREHEAT the oven to 200°F (some people use a lower temperature, e.g. 150°F, but this will take double the time).
4. PLACE the tomatoes, garlic, oregano, black pepper and olive oil in a large bowl and gently toss to combine. Place the tomatoes on a baking sheet or shallow roasting pan, lined with parchment. Sprinkle any garlic and oregano in the bowl on top of the tomatoes.
5. DRY for up to three hours. Flip the tomatoes halfway through. The amount of time will vary, depending on the water content of the tomatoes, the thickness of the slices, and air circulate (expert home cooks place the tomatoes on screens instead of in pans, to abet air circulation).
6. CHECK for doneness. The tomatoes should be flexible and tender, not dry and hard. Remove from the oven
7. COOL to room temperature, 20 to 30 minutes. Store in heavy-duty freezer bags, either vacuum-sealed or with the air pressed out. We discovered this technique from PickYourOwn.org:. Don’t overfill the bag, and press out the air pockets. Seal the top of the bag, leaving enough space to insert a soda straw. Suck the air out through the straw. When finished, press straw closed at the insertion point, and finish pressing the bag closed as you remove it.
8. STORE in a cool, dry place. Keeping them airtight is key; the dried tomatoes will quickly reabsorb moisture and go moldy. If you see any condensation in the bag or other container, remove the tomatoes immediately and put them put them back in the oven to dry.
The tomatoes will keep in the refrigerator for 3-4 weeks, and in the freezer for up to 12 months. To give them as a gift, place in a sterilized glass jar with regular or infused olive oil, and the instructions to use up within a week.
|
|