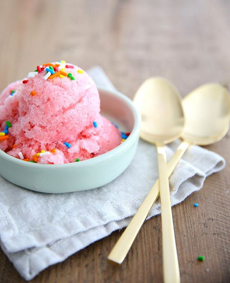
[1] The Piñata apple from Stemilt is a crisp, juicy eating apple (photo © Stemilt).
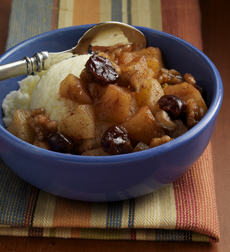
[2] Try it in a warm compote, plain or with ice cream (photo © Ziploc).

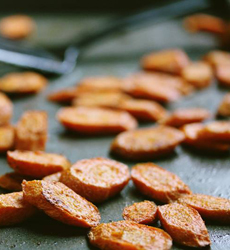
[3] It’s also a great cooking apple. We love sautéed apples with a pork roast or ham (photo © Williams Sonoma).
[4] Is there anything better than homemade applesauce (photo © U.S. Apples)?

[5] Perhaps everyone’s favorite way to eat apples: apple pie (photo © Wisconsin Milk Marketing Board).
|
|
It’s the last day of January. How are you doing on those new year’s resolutions? If you’re like most food lovers, you haven’t done as well as you’d like with regard to eating more of the better-for-you foods.
So here’s what may be the easiest resolution of all: an apple a day. Not because it keeps the doctor away, but because they’re yummy. And new varieties are always coming onto the market.
Take the Piñata apple. Named Apple of the Year in Germany in 2001, it caught the notice of U.S. growers and is now available nationwide. The name Piñata comes from combining syllables of the apple’s two European names, Pinova and Sonata. Pinova is the cultivar of apple trees that produce Piñata apples.
Why do we need a new apple? Don’t we have enough Delicious, Gala, Granny Smith, Honeycrisp, McIntosh, etc. etc. etc.?
The answer is marketing. Food-oriented folk are always looking for something new, and retailers want to give it to them. We remember rushing to try the first Gala apples* and the first Honeycrisps*.
HOW TO CREATE A NEW APPLE VARIETY
Apple varieties take decades to develop. They are typically developed at university agricultural schools, although independent companies and individual growers may also develop them.
First, existing varieties need to be cross-bred, or mutations need to be propagated. The Piñata originated way back in 1970, after researchers in Germany crossed three varieties: the Golden Delicious, Cox’s Orange Pippin and the Duchess of Oldenburg, an Orange Pippin variety from 18th century Russia. (The latter two provide the vibrant orange-ish hue to the peel). You want a new apple not only to taste special, but to look special, too.
The root stock is tested in different soils and climates to determine where the sweetest fruit will grow. Then, the saplings need to be planted.
In every phase of development, it takes 5 to 8 years for a tree to bear fruit. (One tree yields 4 to 5 bushels of apples per year.)
Development takes much longer than you’d think. From its start in 1970, the Piñata was first released in 1986 to European growers. Some varieties take even longer. Honeycrisps were first developed in 1960, but not released commercially until 1991.
Before it purchases the right to grow the apples from the developer, a grower needs to test the apple in its own orchards: another 5 to 8 years of growing, which may or may not produce the apple qualities the grower is hoping for.
Then, the apple variety must be licensed from the developers, and a name chosen and trademarked. Licensing is how the developer gets paid back for years of development.
In the U.S., Stemilt Growers in Washington holds the exclusive rights to grow and market Piñata apples. Why “Piñata?” In English, Piñata sounds more alluring than Pinova.
The grower plants the stock and waits, yes, 5 to 8 years for the first commercial crop.
Only then does a new variety make its way to your market. Hopefully, you’ll appreciate its long journey and enjoy each bite even more.
PIÑATA APPLE FACTS
The Piñata apple thrives in eastern Washington’s arid climate and is quickly becoming one of the most sought-after apples, thanks to its unique tropical flavor and culinary attributes.
The stripy red skin over an orange background has eye appeal. The flesh has a blend of high sugar and high acid levels, producing a welcome tangy taste.
The apple is super crispy and juicy. Its classic apple flavors are complemented by nuances of tropical fruits.
Piñata is one of the most versatile apples on the market. Its crisp bite and great flavor make it ideal for eating out-of-hand, while its thin skin and fine-grained flesh make it a delight in salads and baking.
Use Piñata apples any way you like: baking, cooking, juicing, salads and snacking (known as hand fruit in the industry). Here are recipes from the grower. You can also download their e-book of savory soups and sides recipes.
The season for Piñata apples is November through May. So what are you waiting for?
Here’s more about Piñata apples from the grower at Stemilt.com.
And if you want to know what an apple a day does for your health and well-being, here’s the scoop from the U.S. Apple Association.
|
THE TOP 10 APPLES IN THE U.S.
According to the U.S. Apple Association, the 10 most popular apples in the U.S. based on sales are, in order, Red Delicious, Gala, Golden Delicious, Granny Smith, Fuji, McIntosh, Honeycrisp, Rome, Empire and Cripps Pink (Pink Lady).
Of course, the popularity is retailer-driven. Retailers want to buy varieties that will sell, and customers can only buy what the retailer has. Personally, we’d like to see fewer Delicious apples (they haven’t been exciting in a long time) and more new varieties.
But keep those apples handy, whatever the variety, and you won’t even notice that they are helping you with your better-eating resolutions.
________________________________________
*Gala apples are a cross between Golden Delicious and Kidd’s Orange Red, first planted in New Zealand in the 1930s. In turn, it was bred into dozens of other varieties, including the Royal Gala and the Scarlett Apple. Honeycrisps are a hybrid of Macoun and Honeygold varieties, were developed at the University of Minnesota in 1960. They were patented in 1988 and released commercially in 1991.
|