[1] PB&J Oatmeal: a way to start the day. This recipe also sprinkles on some coconut (photo © Simply Quinoa).

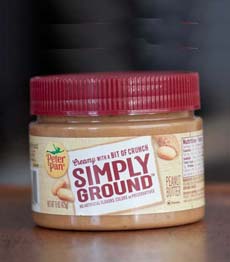
[2] Artisan peanut butter from PB & Co. (photo © PB & Co.).
|
|
April 2nd is National Peanut Butter & Jelly Day. If you haven’t tried it yet, a bowl of PB&J Oatmeal hits the spot and the oatmeal is good for you†. If you don’t like jelly, we have a PB-only recipe below.
Not to mention, more than 40 other toppings for your oatmeal, sweet as well as savory. You’ll find them below.
There’s also National Oatmeal Day on October 29th. Here are the different types of oats. Check out the health benefits of oatmeal. Oats are the only major grain proven to help blood cholesterol.
RECIPE #1: PEANUT BUTTER & JELLY OATMEAL
This recipe is adapted from SimplyQuinoa.com.
Ingredients
Rolled oats or steel-cut oats
1-3* tablespoons creamy peanut butter per serving
Optional: 2 tablespoons maple syrup
Optional: pinch cinnamon or nutmeg
Optional: pinch vanilla powder or 1 teaspoon vanilla extract
Jam or preserves of choice
Optional toppings (see list below)
________________________
*One tablespoon provides a lighter peanut butter flavor, three tablespoons is very peanutty. Try the smaller amount first; you can always stir in more or use add a PB topping when the oats are done cooking.
†Eating three grams of soluble fiber from oats each day, as part of a diet that’s low in fat and cholesterol, has been shown to lower blood cholesterol. This may reduce the risk of heart disease.
|
Preparation
1. PREPARE the oatmeal according to package directions. Stir in the peanut butter, maple syrup and spices when the oats have started to soften but are still runny. Cook until thick and creamy.
2. TRANSFER to bowls and top with jam and any optional toppings.
MORE FAVORITE OATMEAL TOPPINGS
Toppings can be savory or sweet. You can use one or several on your bowl of oatmeal.
Sweet Toppings
Apple, fig, kiwi, pear, stone fruits and other fresh fruits, diced or sliced
Agave, honey, jam, maple syrup, preserves
Banana
Berries, fresh or frozen
Brown sugar, cinnamon sugar, raw sugar
Cinnamon pecan topping (recipe)
Cooked fruit: apples, applesauce, compote
Dairy: butter, cream, mascarpone, milk, plain or flavored yogurt, sweetened condensed milk
Chutney, cranberry sauce, jam, preserves
Chocolate chips, chocolate syrup
Dried fruits: apricots, blueberries, cherries, coconut (plain or toasted, shredded or flaked), cranberries, dates, figs, raisins, strawberries
Granola
Fruit Salt
Mascarpone or ricotta
Nutella
Nuts, seeds (including pomegranate arils), trail mix
Sweet spices: allspice, anise cinnamon, nutmeg
|
|
Savory Toppings
Baked/sautéed garlic
Barbecue sauce, fish sauce, hot sauce, soy sauce, Worcestershire sauce
Bourbon
Butter: brown butter, compound (flavored) butter, salted butter
Chopped green onions (scallions)
Chopped beef jerky
Congee style, with cilantro, chopped green onions, chopped peanuts, ginger, pepper, pickled/preserved vegetables, radish, sliced chicken, pork or fish, soy sauce (Congee is made with rice porridge, like Cream Of Rice)
Crumbled bacon or diced ham
Egg: hard-boiled/sliced, fried, poached, soft-boiled
Flavored salt and artisan salt
Flavored oil droplets: basil, chili, rosemary, sesame, etc.
Fresh cheese: cotija, goat, ricotta, paneer, etc.
Grated/shredded/crumbled cheese: blue, Cheddar, Parmesan, other
Greek: Greek yogurt or labne, feta cheese, lemon zest, Greek olives, pine nuts
Grilled shishito peppers
Ground pepper, chili flakes or minced jalapeño
Herbs: basil, chives, oregano
Kimchi or chopped pickled vegetables
Leftover cooked vegetables (mustard greens, spinach, kale, mushrooms, squash, etc.)
Mexican style: chili powder, cilantro, corn kernels, cotija cheese or grated Cheddar, lime zest, minced/sliced jalapeño, salsa
|
|

[3] Peanut Butter Oatmeal (photo © HoneyWhatsCooking.com).

[4] How about Chocolate Peanut Butter Oatmeal? Here’s the recipe from AlidasKitchen.com (photo © Alida’s Kitchen).
|
|
Nuts and seeds: chia, flax, hemp, sesame, sunflower
Olives
Plain Greek yogurt
Spices: caraway seed, celery seed, chili, cumin, fennel seed, toasted sesame sees
Thai-inspired: cashews, chile, chopped peanuts, cooked in coconut milk infused with optional lemongrass and/or ginger
RECIPE #2: PEANUT BUTTER OATMEAL
Ingredients For 1 Serving
1/2 cup oats
1-3 tablespoons* peanut butter, equivalent PB powder or other nut butter
Optional: 2 tablespoons honey or maple syrup
Optional toppings (see list above)
Preparation
1. COOK the oatmeal according to package directions.
2. PLACE the peanut butter and optional honey/syrup in a cereal bowl. When the oatmeal is done, add to the bowl and stir to blend.
3. GARNISH as desired.
|
|