THE NIBBLE BLOG: Products, Recipes & Trends In Specialty Foods


Also visit our main website, TheNibble.com.

RECIPE: Make Cherry Ice Pops For National Cherry Popsicle Day

Artisan Cherry Ice Pops
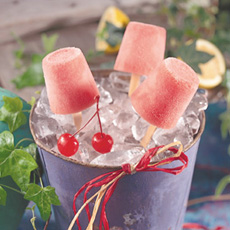
[1] This artisan adult ice pop is made with brandy-soaked cherries. Here’s the recipe (photo © Amarena Fabbri).

Cherry Juice Ice Pops
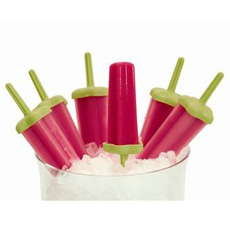
[2] Frozen cherry juice ice pops in Tovolo molds.

Cherry Ice Pops

[3] No ice pop molds? Use 3-ounce paper “bathroom” cups plus wood ice pop sticks or reusable plastic spoons (photo © Jolly Party Store).” target=”_blank”>Jolly Party Store | Amazon).

Cherry Yogurt Ice Pops
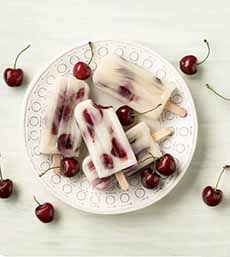
[4] Greek yogurt and cherry ice pops from ChooseCherries.com.

Cherry Ice Pops With Whole Cherries
[5] It’s not all frozen water! Plant milks add a layer of flavor, like this almond milk pop. Here’s the recipe (photo © Blue Diamond).

Container Of FAGE Greek Yogurt
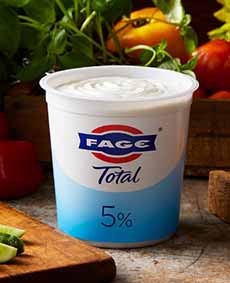
[6] For a nutritious cherry pop, use a base of Greek yogurt (photo © FAGE USA).

Mixed Fresh Cherries In A Bowl
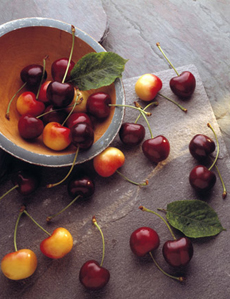
[7] If you use fresh cherries, be sure to pit them (photo © Washington State Fruit Commission).


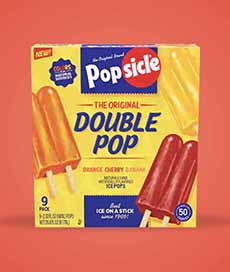
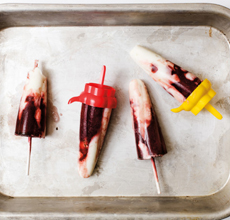
[8] The first Popsicle was a single: one pop, one stick. Then came the twin Popsicle to share with a friend (photos #3 and #4 © Popsicle).


[9] Today’s cherry Popsicle.


August 26th is National Cherry Popsicle Day. There are three easy recipes below. But first, a bit of law:

Popsicle® is a registered trademark of Unilever, which owns the brand. Any other frozen juice on a stick is a generic “ice pop.” It’s the same with Fudgsicle® and Creamsicle®.

> Three yummy recipes for making your own cherry ice pops are below.

> The year’s 15+ cherry holidays are below

> The year’s 50+ ice cream holidays.

> Thirty more delicious cherry recipes.

> The history of cherries.
 
Before we get to the recipes, let’s start with:
 
 
THE HISTORY OF THE POPSICLE

In 1905, 11-year-old Frank Epperson mixed together a fruit drink (believed to be orange-flavored) from powder and water and inadvertently left it on the porch.

It was an unseasonably cold night in the San Francisco suburbs, and when Frank found his drink the next morning, it was frozen.

He eased the frozen liquid out of the glass and, holding it by the stirrer, ate it. While Frank may have enjoyed his frozen fruit drink over the years, the public story doesn’t continue until 1923.

A 29-year-old husband and father working in the real estate industry, Frank made what he called Epsicles for a fireman’s ball, combining his surname and “icicle.”

They were a sensation, and Frank obtained a patent for “a handled, frozen confection or ice lollipop.” His kids called the treat a Popsicle, after their Pop.

So Frank created the Popsicle Corporation and collaborated with the Loew’s chain of motion picture theaters for the nationwide marketing and sales of the product in movie theaters.

By 1928, Epperson had earned royalties on more than 60 million Popsicles.
 
Popsicles Go Broke

The happy days ended with the Great Depression. In 1929, flat broke, Frank had to liquidate his assets and sold the patent to, and his rights in, the Popsicle Corporation.

Following three more corporate sales over the years, Popsicle® and the other “sicles” are now part of Unilever’s Good Humor Division.

While the record isn’t clear, Frank may also have invented the twin Popsicle, with two sticks. The concept was that it could be broken in half and shared by two children.

Over the years, the Popsicle Corporation continued to create frozen treats on a stick, including:

  • The Fudgsicle, a chocolate-flavored pop with a texture somewhat similar to ice cream.
  • The Creamsicle, vanilla ice cream and orange sherbet (National Creamsicle Day is August 14th).
  • The Dreamsicle, vanilla ice milk with orange sherbet (now discontinued).
  •  
     
    READY TO MAKE ICE POPS?

    We’ve got three different ways for you to make cherry ice pops. Pick a recipe and get out the ice pop molds.

    The first recipe couldn’t be easier: Just freeze cherry juice!
     
     
    RECIPE #1: THE EASIEST CHERRY ICE POPS: FROM CHERRY JUICE

    Ingredients

  • 1 32-ounce bottle Montmorency cherry juice (see note)
  • Optional inclusion: 1/8 to 1/4 cup fresh mint or basil, cacao nibs, lemon zest, pitted fresh or frozen cherries
  • Variation: Mix with lemonade or limeade to taste; for a diet pop, use 1/3 or more Crystal Light lemonade or cherry pomegranate
  •  
    Preparation

    1. POUR the cherry juice into ice pop molds and freeze for 6 hours. If using inclusions, add them when the juice turns to slush, stirring each mold with a chopstick or other tool to distribute the ingredients.

    NOTE: Ice pop molds vary in size, often from 2.5 to 4 ounces, and from 6 to 8 pops. A 32-ounce bottle of juice, or concentrate reconstituted to that amount, should cover all bases.
     
     
    RECIPE #2: CHERRY POPS FROM FROZEN CHERRIES

    Ingredients

  • 1 bag frozen tart cherries
  • Sugar to taste
  • Optional: fresh mint, chopped
  •  
    Preparation

    1. PURÉE the frozen cherries in a blender. Taste and add sugar as desired.

    2. ADD the optional mint, process, and pour into ice pop molds.
     
     
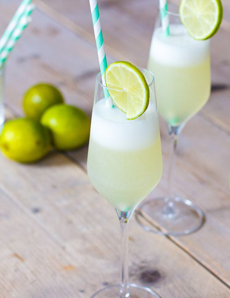
    RECIPE #3: GREEK YOGURT & CHERRY ICE POPS

    This recipe was published with permission from Rocket Fuel: Power-Packed Food for Sports and Adventure, by Matt Kadey, RD, via ChooseCherries.com.

    Ingredients

  • 1-1/4 cups plain Greek yogurt
  • 1 tablespoon honey (more to taste)
  • Zest of 1 lime
  • 1-1/4 cups Montmorency tart cherry juice
  • Juice of 1 lime (2 tablespoons)
  • 1/3 cup finely chopped fresh mint leaves
  • Variation: coconut milk instead of yogurt (see recipe)
  •  
    Preparation

    1. STIR together yogurt, honey, and lime zest. In a separate bowl, stir together the cherry juice, lime juice, and mint.

    2. SPOON two alternate layers of the yogurt and cherry mixtures into each popsicle mold. Insert the sticks into the molds and freeze until solid, about 6 hours. They will keep in the freezer for 2 months.

    3. UNMOLD: Run the mold under warm water for a few seconds, being careful not to thaw the pops.
     
     
    THE YEAR’S 15+ CHERRY HOLIDAYS

  • January 23: National Chocolate Covered Cherry Day
  • February: National Cherry Month
  • February 20: National Cherry Pie Day
  • April 23: National Cherry Cheesecake Day
  • May 17: National Cherry Cobbler Day
  • May 26: National Cherry Dessert Day
  • June 17: National Cherry Tart Day
  • July 11: National Rainier Cherry Day
  • July 16: National Cherry Day
  • August 26: National Cherry Popsicle Day
  • August 28: National Cherry Turnover Day
  • September 1: National Cherry Popover Day
  • September 24: National Cherries Jubilee Day
  •  
    Plus

  • March 28: National Black Forest Cake Day
  • Late March to Mid April*: National Cherry Blossom Festival
  • July, 1st Saturday: International Cherry Pit Spitting Day
  •  
    ________________

    *The National Cherry Blossom Festival in Washington, D.C. is a four-week celebration that has a varying date range each year. The date is tied to the blooming cycle of the cherry trees. The “peak bloom,” when 70% of the trees are flowering, typically occurs in late March to early April. The event commemorates the 1912 gift of cherry trees from Japan.


    CHECK OUT WHAT’S HAPPENING ON OUR HOME PAGE, THENIBBLE.COM.


    Comments off

    TIP OF THE DAY: Sgroppino, A Lemon Sorbet Cocktail Recipe

    Is it hot enough for you? Cool off with sgroppino, a refreshing sorbet cocktail.

    Below:

    > The recipe for sgroppino.

    > The history of sgroppino.

    > Links to frosé recipes, cousins of sgroppino.

    Elsewhere on The Nibble:

    > Alcoholic slushie recipes.

    > Pairing wine and sorbet for cocktails.

    > The year’s 49 cocktail and spirits holidays.

    > The year’s 8 ice cream drink holidays.
     
     
    THE HISTORY OF SGROPPINO

    Sgroppino (sgro-PEA-no), which originated in Venice, is a refreshing, frothy sorbet cocktail: a slushy combination of lemon sorbet, vodka, and prosecco.

    It’s served as a digestif (after-dinner drink) or liquid dessert. You don’t want very sweet drinks before a formal European-style dinner, but it works with hot and spicy cuisines. Sgroppino is no sweeter than a frozen Margarita.

    Sgroppino was created by an anonymous kitchen servant in 16th-century Venice. At that time, only wealthy households had the means to keep an ice house* and the staff to make sorbet (sorbetto in Italian) by hand.

    In the Venetian dialect, the drink is called sgropin from the verb sgropàre, which means to untie a small knot. The reference is to the knots in one’s stomach following the multi-course dinners of the wealthy. A sweet drink was believed to aid in digestion; hence the after-dinner liqueur.

    Sgroppino was also served as a palate cleanser† to refresh the taste buds between the fish and meat courses as well. This “intermezzo,” used to cleanse the palate of fish before moving on to meat, is still served at some fine restaurants today.

    The classic was made by whisking softened lemon sorbet with prosecco until frothy (it was described as “whipped snow,” although today we call it a slush).

    The recipe evolved to include limoncello, sambuca, or vodka. Today it can be both liqueur and vodka.

    More modern variations substitute grapefruit, orange, or strawberry sorbetto. If a larger percentage of sorbetto is added, you get a thicker drink.

    In its simplest form, it’s a scoop of sorbet topped with Prosecco, or vice versa.

    The drink separates if left to stand, so in Italy, the waiter will often prepare the drink at the tableside.
     
     
    RECIPE: SGROPPINO, AN ALCOHOLIC LEMON SLUSH

    You can serve sgroppino in a martini glass, coupe, flute, or wine glass…or those “sherbet Champagne” glasses‡, designed for Marie Antoinette but not actually good for serving a sparkling wine.

    Ingredients Per Drink

       
    Sgroppino
    [1] If only every bar and restaurant served these (photo © What’s Cooking America.

    Pomegranate Sgroppino

    [2] Chef Bikeski adds pomegranate arils for a bit of color.

    Lime Sgroppino
    [3] Some people prefer the cocktail to be separated. In this version, from Zoetrecepten, a scoop of lime sorbet is added to the top of the alcohol.

  • 1/3 cup lemon sorbet
  • 3 ounces prosecco
  • 1 ounce vodka
  • Optional: 1 teaspoon liqueur—Limoncello; orange liqueur; sambuca, pastas or other anise liqueur
  • Optional garnish: citrus curl or zest, fresh mint, pomegranate arils, micro-herbs
  •  
    Preparation

    1. WHISK together the sorbet and a splash of prosecco until fully blended, using a cocktail shaker or a stainless steel bowl. Continue whisking while slowly pouring in the vodka and prosecco.

    2. If using a liqueur, you can blend it with the vodka or drizzle it, Venice-style, into the center of the glass right before serving.

    3. SERVE immediately. The drink will separate as it stands, so provide iced tea spoons or straws so people can re-blend as desired. If you take the modern approach of adding sorbet on top of the alcohol, you save the trouble of whisking!

    Some mixologists don’t blend the drink in the first place. Instead, they place the scoop of sorbet on top of the alcohol (see photo #3). So separation is not a bad thing, but a choice.
     
    Tips

  • Do not use a blender, but hand-whisk this drink.
  • If you don’t have a whisk that’s small enough, get this graduated set. The smallest is handy for whisking instant cocoa that doesn’t dissolve. They’re inexpensive: Here’s a set on Amazon.
  • Don’t add extra alcohol or the drink will be too liquid.
  •  
     
    FROSÉ RECIPES

  • Blueberry Frosé
  • Classic Frosé
  • Drinkable Frosé Sundae
  • Frosé Granita
  • Peach Frosé Ice Pops
  • Raspberry Frosé Cocktail
  •  
    ___________________

    *Before refrigeration, only the wealthy could afford to have ice cut from lakes and rivers in the winter and stored in ice houses for summer use. The oldest known ice house, built by a king in Persia, dates from about 1700 B.C.E. Most other people dug ice pits, lined with straw and sawdust as insulation. While commercial refrigeration was available by the late 1800s, the home refrigerator didn’t arrive until 1930. Prior to then, the wealthy as well as the middle class used an insulated metal “ice box,” which held a large block of ice delivered from the “ice man” to keep perishables cold. When the ice melted, it was replaced.

    The tartness and citrus acid of lemon sorbet clear the taste buds. Citric acid elicits salivation, which aids in cleansing the palate. Lemons and limes have the highest level of citric acid, which can constitute as much as .3 mol/L, depending on the cultivar and growing conditions. By comparison, grapefruits and oranges have just .005 mol/L (source). Passionfruit also can work. It has 38.7 mg/100g compared to 30 mg/100g (source).

    ‡“Sherbet champagne” glasses were purportedly designed by Marie Antoinette, who had them molded after the shape of her breasts. Here’s a photo. They are rarely made anymore, as modern knowledge shows that a wide mouth-glass is not appropriate for sparkling wine: It lets the bubbles escape that much more quickly. But if you have these glasses, they’re just fine for serving sorbet, fruit cocktails, and other foods…or sgroppino.


    CHECK OUT WHAT’S HAPPENING ON OUR HOME PAGE, THENIBBLE.COM.


    Comments off

    TIP OF THE DAY: Create A Signature Niçoise Salad (Salade Niçoise)

    Niçoise (nee-SWAHZ) refers to something from the city of Nice, on the French Riviera in the region of Provence.

    You can find the following popular Niçoise dishes in restaurants around the U.S., and they’re easy to make at home (except for the truffle omelet, which is easy to make if you can afford the truffles):

  • Aïoli, a garlic mayonnaise used as a spread, dip, and condiment with potatoes, shellfish, and vegetables (aïoli recipe).
  • Alcohol: The local favorites are pastis, an anise liqueur and apéritif; and rosé wine.
  • Bouillabaisse, the signature dish of Marseille. It’s a fish stew with vegetables, garnished with croutons and rouille*).
  • Daube, beef stew braised in red wine and served with polenta or gnocchi (influences from neighbor Italy).
  • Fromage de chèvre, goat cheese, fresh and aged.
  • Nougat, the chewy white confection made from egg whites and almonds.
  • Omelette aux truffes, made with black truffles harvested in Provence from November through March.
  • Ratatouille, a casserole of tomatoes, onions, eggplant, zucchini, peppers, garlic, and herbs.
  • Tapenade, a spread made from anchovies, capers, and black olives.
  •  
    And then, there’s Salade Niçoise (Niçoise Salad in English).

    The classic Salade Niçoise recipe is a composed salad (i.e., not tossed, but placed) of tomatoes, tuna (cooked or canned), hard-boiled eggs, Niçoise olives and in season, young haricots verts (French green beans). It is served with a Dijon vinaigrette and can be served with or without a bed of salad greens. It is an entrée salad.

    Each cook can customize the salad to his or her taste. We’ve included optional extra ingredients below.
     
     
    RECIPE: SALADE NIÇOISE

    This take on the classic Niçoise salad from McCormick uses two twists: a poached egg and a zesty seasoning blend (the recipe is in the footnote below).
     
    Ingredients For 6 Servings

    For The Dijon Vinaigrette

  • 1/4 cup extra virgin olive oil
  • 1/4 cup white wine vinegar
  • 2 teaspoons Dijon mustard
  • 1/2 teaspoon sea salt
  • 1 tablespoon seasoning blend†
  •  
    For The Tuna

  • 1 rectangular piece (6 ounces) sashimi-grade ahi tuna loin
  • 1/2 teaspoon sea salt
  • 1/4 teaspoon black pepper, coarse grind
  • 4 teaspoons seasoning blend†
  • 2 tablespoons vegetable oil
  •  
    For The Tuna & Salad

  • 6 each baby yellow, red, and purple new potatoes
  • 1/2 pound fresh French green beans (haricot verts), trimmed
  • 1 tablespoon white wine vinegar
  • 6 large eggs
  • 1/2 cup assorted grape/teardrop tomatoes, halved
  • 1/2 cup thinly sliced baby cucumbers
  •  

    Salade Nicoise
    [1] A classic Salade Niçoise from French chef François Payard (photo © Payard).
     
    Nicoise Salad
    [2] McCormick’s version substitutes a poached egg for the traditional hard-boiled (photo © McCormick).

    Kale Nicoise Salad
    [3] Trending in America: Kale Niçoise (photo © Williams Sonoma).

    Deconstructed Nicoise Salad
    [4] Deconstructed Niçoise at the Seafire Grill (photo © Seafire Grill).

  • 1/4 cup pitted Niçoise olives, halved (substitute picholine, kalamata, or another flavorful black olive)
  •  
    Serve With…

  • Plain sliced baguette with olive oil for dipping (add herbs to the oil)
  • Garlic bread
  •  
    ________________

    *Rouille (roo-EE, the word for rust in French) is a sauce made from olive oil with breadcrumbs, garlic, saffron, and red chiles, which give it the rusty orange color. It is served as a garnish with fish and fish soup and is essential with bouillabaisse, the signature fish stew dish of Marseille.

    †McCormick’s spice blend recipe is 1 tablespoon chia seeds, 2 teaspoons grated lime peel, 2 teaspoons chili powder, 1 teaspoon garlic powder, 1/4 teaspoon ground chipotle powder. Blend and store tightly capped in the fridge. Makes 2-1/2 tablespoons. Substitute another spice blend or some lemon zest.


    l-isola-d-oro-jar-lisoladoro.it-230
    [5] Tonnatto brand tuna from L’isolo D’Oro, a fine Mediterranean tuna used in the best salads in Nice. Tonnatto refers to refined tuna fillets, whole, and, tender and selected for their quality (photo © L’isolo D’Oro).

    Anchovies
    [6] Anchovy lovers: layer them on (photo © Flavor Your Life).

      Preparation

    1. MAKE the vinaigrette. Place the oil, vinegar, mustard, and sea salt in a blender container; cover. Blend on high speed until smooth. Pour into a small bowl. Stir in the seasoning blend. Cover and refrigerate until ready to use.

    2. SEASON the tuna with salt and pepper. Coat with the seasoning blend, pressing firmly so the mixture adheres to the tuna. Grill or sear: Heat the oil in a large skillet on medium-high heat. Add the tuna and sear 1-1/2 to 2 minutes on all sides. Remove the tuna to a plate; set aside to cool slightly. Cover and refrigerate until ready to serve.

    3. COOK the potatoes. Add them to a large saucepan with simmering salted water to cover. Cook for 15 to 20 minutes or until fork tender. Drain and rinse with cold water; drain on paper towels to remove the water. Meanwhile…

    4. COOK the green beans in a large saucepan of simmering salted water to cover, 3 to 5 minutes or until tender-crisp (don’t overcook). Drain and rinse with cold water; drain well on paper towels. Place in a large bowl with green beans. Add 1/4 cup of the vinaigrette; toss to coat. Season with salt to taste. Set aside.

    5. CUT the potatoes in half or quarters, depending on size. Add to a bowl with the green beans.

    6. POACH the eggs. Fill a large, deep saucepan with 2 inches of water and 1 tablespoon vinegar. Bring to a boil and reduce the heat to medium. Break 1 egg into a small dish and carefully slide it into the simmering water (bubbles should begin to break the surface of the water). Repeat with the remaining eggs. Poach the eggs for 3 to 5 minutes or until the whites are completely set and the yolks begin to thicken. Carefully remove eggs with a slotted spoon. Drain on paper towels.

    7. SERVE: Slice the tuna into thin slices. Divide the potato mixture, tomatoes, cucumbers, and olives among 6 plates (aim for an attractive presentation). Top each with tuna slices and a poached egg. Drizzle the remaining vinaigrette over the tuna slices. Sprinkle the egg with some additional seasoning blend.


    OPTIONAL INGREDIENTS FOR A NIÇOISE SALAD

    Make it your own with added ingredients or substitutes. Just keep the five basics: tuna, tomato, egg, green beans, and olives, plus the vinaigrette.

  • Cooked vegetables: broccoli florets, broccolini or broccoli rabe.
  • Greens: arugula, bell pepper, carrots, celery, cress, cucumber, fennel, fresh herbs (basil, cilantro, dill, mint, parsley), frisée, kale, radicchio, radishes.
  • Tomatoes: Substitute halved cherry or quartered larger tomatoes (in the off-season, substitute sundried tomatoes in olive oil or roasted red pepper).
  • Onions: green (scallions), grilled onions, red, shallot, sweet onions.
  • Proteins: anchovies, bacon, beans or lentils, canned or grilled salmon or other grilled fish, sardines.
  •  
     

    CHECK OUT WHAT’S HAPPENING ON OUR HOME PAGE, THENIBBLE.COM.


    Comments off

    TIP OF THE DAY: Ratatouille Pizza

    Ratatouille (rah-tah-TWEE) is a vegetable side dish that originated in the Provence region of France. The classic recipe consists of sautéed eggplant, onions, tomatoes, yellow squash, zucchini plus garlic and herbs.

    It is traditionally summer dish, when tomatoes, zucchini and yellow squash are plentiful and at peak.

    Ratatouille is delightfully colorful when you use red, yellow and/or orange bell peppers and tomatoes/cherry tomatoes. To make ratatouille as a side dish, check out this recipe.
     
    RECIPE: RATATOUILLE PIZZA

    Ingredients For 1 Large Pizza

    You can save time by purchasing the dough or a prepared crust (we sure did—and saved half the steps in the preparation). But Lisa, of Flour De Lisa made hers from scratch, using a pizza dough recipe from Bobby Flay. She adapted the ratatouille from Smitten Kitchen; we further adapted it.

    This can be a vegan recipe; but we adapted it by adding both ricotta and mozzarella. We put the mozzarella under the vegetables to showcase the colors. We also created a breakfast pizza version by adding eggs, which bake on top of the pizza.

    Without the cheese, the recipe is dairy free and low fat. Use a whole wheat crust and skim-milk cheeses and you have a pizza that’s on the “better for you” list.
     
    Ingredients For The Dough

  • 1-3/4 to 2 cups flour (bread flour for a crisper* crust, all-purpose for chewier)
  • 1 tsp instant yeast
  • 1 teaspoon salt
  • 1/2 teaspoon sugar
  • 3/4 cup lukewarm water (around 100°F)
  • 1 tablespoon olive oil
  •  
    For The Ratatouille

    Slice the vegetables to a width of 1/8 to 1/16th inch.

  • 1 zucchini, sliced
  • 1 yellow squash
  • 1 Japanese eggplant
  • 1 long red bell pepper or 6 mini red bell peppers
  • 1 cup tomato paste
  • 1/2 yellow or red onion, sliced
  • 1 garlic clove, minced
  • 2 tablespoons olive oil, divided
  • Red pepper or chili flakes, salt and pepper to taste
  •  
    Optional Garnishes

  • Capers and/or olives
  • Small or medium eggs
  • Herbs: fresh basil*, rosemary, thyme, other
  •  
    For The Optional Cheese Layer

  • 2 cups whole or part skim ricotta
  • 2 cloves garlic, minced
  • 1 handful† flat-leaf parsley, finely chopped
  • 2 cups shredded mozzarella or provolone
  • 10 fresh basil leaves, 1/2 cup, shredded
  •  

    Ratatouille
    [1] Ratatouille pizza (photo courtesy FlourDeLisa.Wordpress.com).

    Fried Egg Ratatouille
    [2] Bake eggs on top of the pizza, or fry or poach them in a pan to turn a ratatouille side into a main (photo courtesy Elegant Affairs Caterers).

    ratatouille-theformerchef-230r

    [3] Ratatouille (photo © http://www.TheFormerChef.com).

    Tian Recipe
    [4] A tian, also from Provence, is another way to enjoy ratatouille ingredients (All-Clad gratin pan photo courtesy Williams-Sonoma).

     
    ________________

    *You can scatter 10 medium basil leaves or 1/2 cup shredded basil atop the pizza when it comes out of the oven.

    †A handful is one of those imprecise measures that says: Use how much you want. More or less of the ingredient is not critical to the recipe’s outcome.
    ________________
     
    Preparation

    1. MAKE the pizza dough: Combine 1-3/4 cup flour with the yeast, salt, and sugar. Add the oil and water, i.e. slightly warmer than your body temperature. Mix until the dough starts to form a ball. scraping down the bowl. If the dough is too wet, slowly add more flour. If the dough becomes too dry, slowly add more water.

    2. TURN out the dough onto a lightly floured or oiled surface. Knead for a few minutes until it is smooth and elastic. When you poke it, the dough should spring back readily; when you hold the ball of between your palms, it should hold its shape. Lightly oil a clean bowl, place the dough in the bowl and cover with plastic wrap or a damp towel. Set aside in a warm place to rise for about an hour, until the dough has doubled in size. While waiting for the dough to rise…

    3. MAKE the ratatouille. Preheat the oven to 350°F. Spread the tomato paste, 1 tablespoon of olive oil, minced garlic, sliced onion and a dash of red pepper flakes on the bottom of an 8- or 9-inch diameter springform pan. Alternatively, you can cook the ratatouille on top of the rolled-out pizza dough, but the vegetables won’t be as tender or flavorful due to the significantly less cooking time.

    Optional cooking method: We steamed the vegetables separately to al dente, and then were able to pick them up with fingers and layer them perfectly, as in the photo.

    4. LAYER on top of the tomato paste mixture the zucchini, yellow squash, eggplant and bell pepper, alternating the colors. Start with the inside perimeter and move inward. If you have extra vegetables, save them for a salad, omelet, etc. Drizzle the remaining tablespoon of olive oil over the assembled ratatouille. Season with a dash of salt and pepper and thyme or rosemary. Cover the pan with foil and bake for 45 minutes, increasing the temperature of the oven to as high as possible (450°F or 500°F on most ovens) within the last 5-10 minutes. While the ratatouille is baking…

    5. TURN back to the pizza dough. When the first rise is completed, turn out the dough onto a large sheet of lightly floured or oiled parchment paper. Punch out the air and form a disk. Roll out the dough into a circle about 10-12 inches in diameter. Cover with plastic wrap or a damp towel and let it rest for about 10 minutes.

    6. MIX the ricotta with the garlic, parsley, salt and pepper to taste.

    7. REMOVE the finished ratatouille from the oven, uncover the pizza dough and place it on a baking sheet. Par bake the pizza dough for a minute or two and remove it from the oven. If using ricotta, spread it over the crust, followed by the mozzarella. If you prefer, use the mozzarella to top the pizza.

    8. RELEASE the springform pan carefully—it can be hot! Use one or two spatulas two to gently slide the ratatouille onto the center of the pizza. If you can do it evenly, great. If not, it will still taste delicious. Lightly brush the exposed pizza crust with olive oil.

    9. BAKE the pizza for 8-12 minutes, until the pizza crust is a golden brown. Slice and serve.
     
    CRISPER VS. CRISPIER

    Many people use the adjective crispier when they mean crisp.

  • Crisper is the comparative of crisp, i.e., “The crust is crisp but I’ll make it crisper next time.
  • Crispier is the comparative of crispy, i.e., the crust was nice and crispy but could have been even crispier.
  •  
    It’s a small difference, but a difference nevertheless.


    Comments off

    Cuban Sandwich Recipe For National Cuban Sandwich Day

    Depending on where you reside, you may never have heard of a Cuban Sandwich, called a Cubano in Cuban restaurants. But August 23rd is National Cuban Sandwich Day, honoring a pressed hero-type sandwich that originated in Tampa and traveled to Miami and points beyond.

    In fact, there’s a rivalry between the two cities over small details (check out this article on NPR.org).

    Here’s a recipe. You can make it in a panini press, or with two skillets.

    National Cuban Sandwich Day even has its own Facebook page, with many more photos and videos.

    The annual Cuban Sandwich Festival in Ybor City attracts competitors from around the United States. This year’s winner is from London!

    In 2015, participating restaurants joined forces to make a 105-foot-long Cuban Sandwich, the world’s longest. Alas, we could find no photo.

    The history of the Cuban sandwich follows, along with the amusing tale of how it came to be.

    > The history of the sandwich.

    > The different types of sandwiches.

    > The year’s 27 sandwich holidays.

    > The year’s 20 bread holidays.
     
     
    WHAT’S A CUBAN SANDWICH?

    The original Cuban sandwich from the Ybor City district of Tampa, Florida is a type of hero sandwich made with glazed ham, shredded roast pork, Swiss cheese, Genoa salami, dill pickle chips and yellow mustard, on Cuban bread.

    Cuban bread itself originated in Ybor City, most likely at La Joven Francesca bakery, established by a Sicilian-born baker in 1896 (it closed in 1973 and is now part of a museum). It’s a long, baguette-shaped loaf made with a bit of added fat (photo below).
     
    The Beginning

  • The late 1800s. The Cuban sandwich we know today originated in Tampa, Florida in the late 1800s, in the now historic cigar-producing neighborhood of Ybor City. The neighborhood was populated by many Cuban immigrants, who came to work in the cigar industry, as well as German cigar workers and Italian laborers.
  • The early 1900s. The sandwich achieved popularity among workers in the district’s many cigar factories. One popular eatery, Columbia Restaurant in Ybor City, has been around since 1905. (It’s now an elegant restaurant, with a dolphin fountain in the courtyard.)
  •  
    Ingredients

  • While it’s called “Cuban,” the sandwich has influences from other immigrant groups, particularly the German cigar workers and Italian bricklayers in the area.
  • Genoa salami was added by Italians, who found that placing a hot brick on top of the sandwich for a few minutes pressed it flat and made it taste better—warm and crusty. This led to the use of a cast iron grill press, still used today. At home, you can use a George Foreman grill or panini press (both are electric grill presses, with flat and ridged plates).
  • Mustard was a condiment preferred by the Germans. It also didn’t spoil in the Florida heat as mayonnaise could. Refrigeration was scarce in the early 20th century.
  •  
     
    TAMPA VERSUS MIAMI

    Tampa and Miami have an ongoing rivalry over the correct ingredients for a Cuban sandwich.

    Miami avows that salami should never be used. Plus, Miami-style Cuban sandwiches can be spread with butter!

    But there’s no doubt about the original ingredients.

    In 2012, the Tampa City Council passed a resolution designating the “Historic Tampa Cuban Sandwich” as the “signature sandwich of the city of Tampa.”

    The Council proclaimed that a traditional Tampa Cuban is to include Cuban bread, ham, mojo-spiced pork, Genoa salami, mustard, Swiss cheese, and three pickle chips.
     
    Cuban Sandwich Ingredients Chart
    [8] Tampanians add Genoa salami to their Cubanos (A.I.-generated chart).
     
     
    The Holiday Is Invented

    National Cuban Sandwich Day was started by Christopher Spata, a Tampa Bay Times staff writer, as a hoax. On August 23, 2016 he declared “National Cuban Sandwich Day” as a tongue-in-cheek experiment to show how easily “national food days” can be fabricated.

    He wrote a piece for the paper explaining that he picked August 23rd because it was already National Sponge Cake Day, drafted a press release, launched social pages and a hashtag, and submitted the “holiday” to calendar sites.

    He proving that with “$12 and three hours” anyone could establish a holiday. (Editor’s Note: The holiday sites now charge significantly more.)


    Cuban Sandwich
    [1] The Cuban Sandwich: composed but not yet pressed (photo © National Cuban Sandwich Day | Facebook).

    Pressed Cuban Sandwich
    [2] The sandwiches are pressed under hot irons. You can use your George Foreman grill or a panini press (photo © Florida Girl Linda C | Flickr.

    Cuban Sandwich
    [3] The crust is now crunchy and the sandwich is ready to enjoy with a cold beer (photo courtesy Columbia Restaurant | Ybor City).


    [4] At home, it’s easy to use a panini press (photo © King Arthur Flour).

    cuban sandwich bread
    [5] Cuban bread is a long loaf like a baguette but is doughier and without the crustiness of a French or Italian loaf. Here’s the recipe to bake it at home, from The Stay At Home Chef (photo © The Stay At Home Chef).

    Cuban Sandwich
    [6] The best Cuban Sandwich in the world (2015 winner) is from London’s Jama Cubana restaurant.

    Medianoche Sandwich From Cuba
    [7] The medianoche (“midnight”) sandwich is a smaller variation of the Cubano, popular late-night club fare. Here’s the recipe (photo © Hostess At Heart).

    Worldwide Demand

  • By the 1970s, the Cuban Sandwich had spread to menus around the United States.
  • In 2015, the Cuban Sandwich Factory opened in Belfast, Ireland.
  • In 2016, the Tampa Cuban Sandwich Bar opened in Seoul, Korea.
  •  
    In fact, London’s Jama Cubana restaurant won first place in The World’s Best Cuban Sandwich category at the 2016 Annual Cuban Sandwich Festival (held in Tampa on March 5th). It too is a newcomer, opened in 2015.
     
     
    MEDIANOCHE, THE CUBAN SANDWICH SIBLING

    Very similar to the Cuban Sandwich is the Medianoche (“midnight”), which originated in Cuba.

    As the name suggests, this sandwich is popular late-night fare, served in Havana’s nightclubs. It contains the same ingredients as the Cuban Sandwich—ham, roast pork, Swiss cheese, mustard, and dill pickles.

    However, it is smaller and uses a different bread: slightly sweet rolls made from an egg dough with a bit of sugar (similar to challah but a different shape).

    Like the Cuban sandwich, the medianoche is typically warmed in a press.

    So warm up the press: Wherever you live, today’s the day to enjoy a Cuban Sandwich.

    And while you’re at it, there’s pan con lechón: Cuban roast pork with mojo*, pickles, and mustard, no ham or cheese.

    Outside of Cuba, its closest relative is the Italian muffuletta sandwich, pressed Italian cold cuts and cheese on a sesame loaf. Different flavors, similar stacked/pressed sandwich preparation.

    Both the Cubano and the muffuletta fall into that great category, the hero sandwich (also grinder, hoagie, submarine, etc.).

    ________________
     
    *Cuban mojo (mojo criollo) is a garlicky citrus-based marinade/sauce, great for marinating pork (lechón asado) and chicken. It’s also used as a hot garlic-oil pour-over for vegetables or yuca con mojo (boiled cassava, often with sautéed onions)l. You’ll also see yuca frita (boiled then fried cassava sticks) and yuca con mojo served alongside lechón asado.

    The marinade is made with sour orange juice (naranja agria), garlic, oregano, ground cumin, salt and pepper, and oil. Onion and bay leaf are options. Some cooks add a splash of vinegar.

    Mojo recipe: If you want to make it but can’t access sour orange juice, add 1 part lime juice (e.g. 1/4 cup) to 2 parts orange juice (e.g. 1/2 cup). Then, warm 1/4 cup oil with 6 cloves minced garlic until just fragrant. Remove from the heat and add 1/2 sour orange juice or equivalent plus 1 teaspoon oregano, ½ teaspoon cumin, 1 teaspoon salt, and ½ teaspoon pepper.

    Marinate pork, chicken for 2–4 hours, fish for 20–30 minutes. As a dressing, just heat and pour over hot vegetables or yuca with sautéed onions.


    CHECK OUT WHAT’S HAPPENING ON OUR HOME PAGE, THENIBBLE.COM.


    Comments off

    The Nibble Webzine Of Food Adventures
    RSS
    Follow by Email


    © Copyright 2005-2026 Lifestyle Direct, Inc. All rights reserved. All images are copyrighted to their respective owners.