|
If friends and neighbors are dropping by for some holiday cheer, here’s a very quick recipe for a delicious snack. It works well as a quick dessert, too.
Keep biscotti around—they have a long shelf life—or ladyfingers, which freeze well and can be revived in a minute in the microwave. Then, in less than five minutes, make this chocolate dipping sauce.
The combination goes with brandy, coffee, cola, fruity red wine, liqueurs, tea, and of course, a glass of milk.
Cubed pound cake, amaretto cookies and/or sliced fruit are also delicious with the chocolate sauce. Chocoholics may prefer brownie cubes or fingers.
The recipe makes enough for eight two-cookie servings. We turned to one of our favorite holiday snacks, Nonni’s Biscotti.
As a bonus, Nonni’s isn’t rock-hard like conventional biscotti made for dipping in coffee or a dessert wine like vin santo. You don’t have to dip it…although don’t hesitate to follow the tradition.
The recipe follows, but first:
> The history of biscotti.
> The history of cookies.
> The different types of cookies: a photo glossary.
> The 10 basic styles of cookies.
> The year’s 44 cookie holidays.
RECIPE: CHOCOLATE DIPPING SAUCE FOR BISCOTTI & LADYFINGERS
This festive but easy recipe, which we adapted from Nescafé, is presented as individual servings.
But if you have a fondue pot, chafing dish, brazier, or other way to keep the chocolate sauce warm, you can set it on a table with a platter of biscotti, ladyfingers and other cookies.
Apple wedges and orange segments also works.
Ingredients
6 ounces chopped dark chocolate or chocolate chips
2 tablespoons coffee or orange liqueur (e.g. Kahlúa, Grand Marnier
1/4 teaspoon instant coffee granules
16 to 24 biscotti or ladyfingers
1/4 cup heavy cream
Optional: cayenne for a bit of heat
Preparation
1. MELT. Place chocolate and cream in a medium, microwave-safe dish. Microwave on HIGH (100%) power for 60 seconds. Stir with whisk until smooth.
2. COMBINE. Whisk in liqueur and coffee granules until coffee is dissolved.
3. ASSEMBLE. Divide the chocolate sauce among 8 small dessert dishes or whatever you have: brandy snifters, ramekins, rocks glasses, small wine glasses, tea cups, etc). Place 2 to 3 ladyfingers to each glass. Serve immediately.
Alternative: Use a plate under the dish and put the biscotti on the plate.
Tip: Serve with espresso spoons so everyone can scoop up the remaining chocolate sauce.
ABOUT NONNI’S BISCOTTI
Nonni’s Biscotti is the number one-selling biscotti brand in the U.S.
|
|

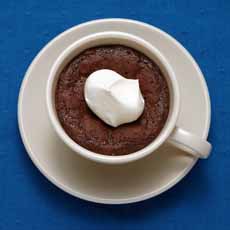
[1] Warm chocolate dipping sauce with biscotti or ladyfingers: a quick and easy snack or dessert (photo and recipe © Nescafé).
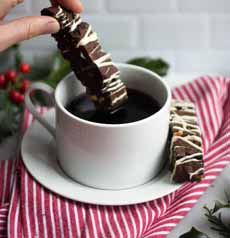
[2] Dip from a tea cup or whatever you have (photo © Feast And Fable Blog.
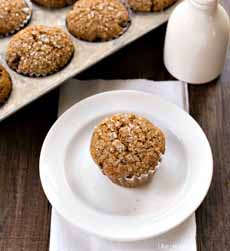
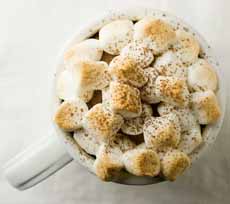
[3] Instead of gingerbread men, serve hot chocolate with Nonni’s holiday biscotti. Don’t want hot chocolate? The biscotti are great with coffee, brandy and liqueurs (photo © Nonni’s).

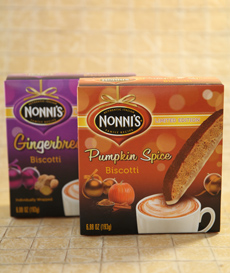
[4] Pick up a few boxes and treat family and friends (photo | THE NIBBLE).
|
Whether for a coffee break, snack or part of dessert, we’ve been enjoying Nonni’s since they came onto the market in 2012. There are flavors for everyone, plus special holiday editions.
Nonni means “grandmother” in certain Italian dialects (nonna is mainstream Italian). As you might guess, the founder’s nonni came from Italy (almost a century ago), bringing the family recipe with her.
Nonni never envisioned or Salted Caramel (our personal favorite) or Turtle Pecan biscotti; but thankfully, her grandson did. There are eight flavors, plus seasonal specialties like Gingerbread and Pumpkin Spice.
There are also five flavors (including cranberry) of Nonni’s ThinAddictives, a lower-calorie option.
CHECK OUT WHAT’S HAPPENING ON OUR HOME PAGE, THENIBBLE.COM.
|