|
We have advocated olive oil cake before. But this is a variation with polenta (cornmeal) instead of white flour.
Olive oil cake is a standard in some parts of Italy, substituting olive oil for butter as the fat. So is polenta cake, with a hearty crumb.
Both are rustic, uniced cakes. When we first tried an olive oil cake, moist and springy, we had no idea it lacked butter. When we first tried polenta cake, we fell in love with the irony:
We’ve often called muffins “uniced mini cakes,” because many are so sweet. With polenta cake, it’s the opposite: a sweet corn muffin in the guise of cake.
In Italy, an olive oil cake is usually made with all-purpose flour and often has citrus accents, which complement the olive oil. But any flavor can be used, including chocolate; as can a liqueur. Some recipes include pieces of fruit in the batter as well as zest and juice.
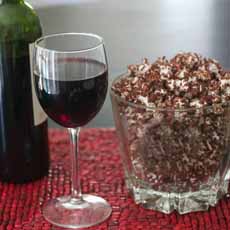
For a wine pairing, serve it with an Italian dessert wine wine like Vin Santo. There’s more about wine pairing below.
The following recipe, adapted from one in the cookbook Cake Keeper Cakes, is fragrant from olive oil and juicy with roasted grapes. Use any seasonal fruit, from berries to lychees to peaches.
In addition to adding fresh basil, we made basil whipped cream. If you like basil as much as we do, try it! As with all homemade whipped cream, it must be whipped right before serving. However…
If you want to use it but need to prepare it in advance, make stabilized whipped cream.
RECIPE: OLIVE OIL CORNMEAL CAKE
We adapted this recipe from Lauren Chattman’s book, Cake Keeper Cakes, adding fresh basil. It may sound unusual, but it’s terrific, as is rosemary. Made with cornmeal instead of wheat flour, it’s also gluten-free (corn in all ground forms is gluten-free: corn flour, corn meal, grits, etc.).
Thanks to cake mixes, we’re all familiar with oil-based cakes. But why aren’t there more rustic cornmeal cakes with herbs?
We have no idea—especially since some recipes are very similar corn muffins. Our guess is a cake with herbs sounds strange to American bakers. Don’t let that stand in your way: Allow yourself to be delightfully surprised.
Ingredients For 8-10 Servings
1 cup unbleached all-purpose flour
1/2 cup yellow cornmeal
1-1/2 teaspoons baking powder
1/4 teaspoon table salt
2 large eggs
2/3 cup granulated sugar
1/2 cup extra-virgin olive oil
1/3 cup milk
1 teaspoon pure vanilla extract
1 teaspoon grated lemon zest
1/3 cup fresh basil, finely chopped
1-3/4 cups (10 ounces) red seedless grapes, washed and dried
Optional: 1/4 cup Limoncello*
1-3/4 cups (10 ounces) red seedless grape
1-3/4 cups (10 ounces) red seedless grape
Confectioners’ sugar for dusting -or- crème fraîche -or- mascarpone -or- lightly sweetened whipped cream
For The Basil Whipped Cream
1 bunch fresh basil
3 tablespoons confectioners’ sugar
1 cup whipping cream or heavy cream†
Preparation
If you add all the grapes at once, they’ll sink to the bottom. So reserve half and scatter them on top of the cake after it’s been in the oven for 10 minutes. They’ll sink slightly, but will still be visible.
As for the garnish, we’ve never been fond of confectioners’ sugar. Pretty as it looks, it too easily falls onto one’s clothing. Instead, we prefer a dairy topping: crème fraîche, mascarpone or lightly sweetened whipped cream. This toothsome, rustic cake is better with a modestly sweet or tangy garnish.
If you don’t have a spring form, you can make this cake in a bundt.
1. PREHEAT the oven to 350°F and grease a 9-inch round springform pan.
2. WHISK together the flour, cornmeal, baking powder and salt in a medium bowl.
3. COMBINE the eggs and sugar in a large mixing bowl. Beat on medium-high speed until the mixture is light in color and has increased in volume, about 5 minutes. With the mixer on low speed, add the oil in a slow, steady stream. Turn the mixer to medium speed and beat for 1 minute. Turn the mixer to low speed and stir in the milk, vanilla, and lemon zest.
4. KEEPING the mixer on low speed, add the flour mixture, 1/2 cup at a time, until just incorporated. Stir in half of the grapes. Scrape the batter into the prepared pan and bake for 10 minutes.
5. SCATTER the remaining grapes over the top of the partially baked cake and continue to bake until the cake is golden, and a toothpick inserted in the center of the cake comes out clean, about 40 minutes longer.
6. TRANSFER the pan to a wire rack and let the cake cool for 5 minutes. Release the sides of the pan and let the cake cool completely before dusting with confectioners’ sugar. Cut into wedges and serve. When ready to serve…
|
|
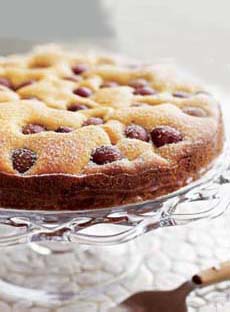
[1] So delicious: Grape Polenta Olive Oil Cake (recipe a left, photo © Cake Keeper Cakes)
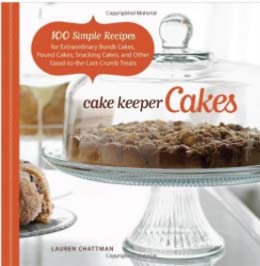
[2] Cake Keeper Cakes photo © Taunton Press.

[3] Olive oil cake with an orange top (here’s the recipe (photo © The Newlywed Cookbook).
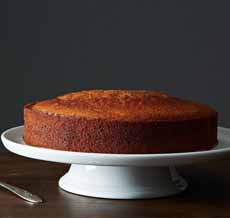
[4] Olive oil cake made with Grand Marnier and white flour Here’s the recipe (photo © Food 52).

[5] Polenta olive oil cake with fresh citrus garnish. Here’s the recipe (photo © Frog Hollow Farm).
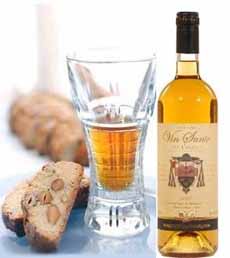
[6] Vin santo, a wine served with biscotti, is a good pairing for the cake—as well as the options below (photo © Blog Siena).
|