[1] Black Garlic, one of 11 delicious flavors of Hope Hummus (photos #1 and #3 © Hope Foods).
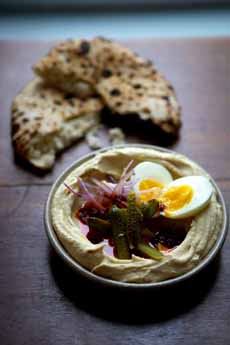
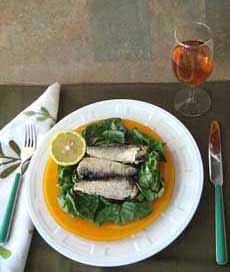
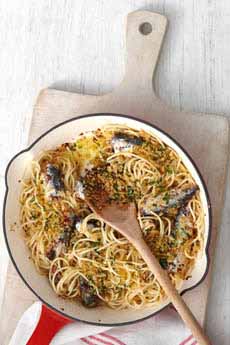
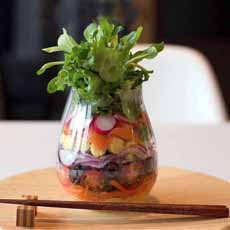
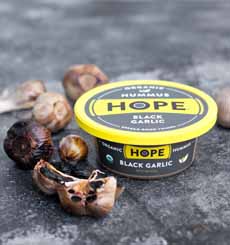
[2] One of our favorite ways to serve hummus: topped with salad ingredients and, as a lunch dish, with a hard-boied egg (photo © Shaya Restaurant | NOLA).
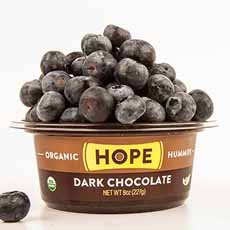
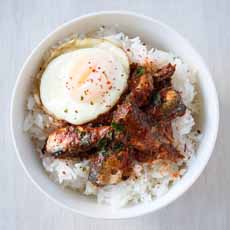
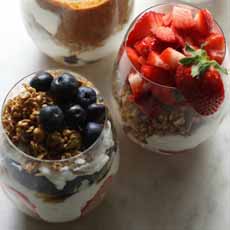
[3] Woo hoo, Hope Foods’ chocolate hummus, shown here topped with blueberries.
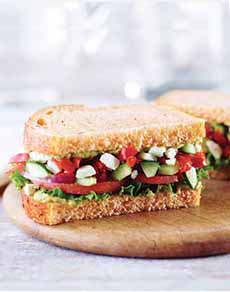
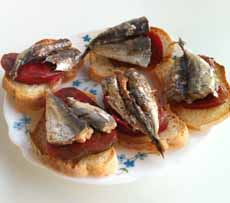
[4] A hummus sandwich with Israeli salad. Check out these 20 ways to garnish a hummus sandwich (photo © Panera).
|
|
May 13th is International Hummus Day.
Over the last two decades, hummus has evolved from a mezze at Mediterranean restaurants to the hottest, most nutritious dip and spread at supermarkets nationwide. It’s the darling of nutritionists, nutritious and versatile, and a better-for-you snack.
Hummus is Arabic for chickpeas. The more long-form name for what we refer to as hummus is hummus bi tahina, chickpeas with tahini. Tahini is a paste made of toasted, hulled sesame seeds, which can be joyed as a dip on its own.
The recipe for hummus is simple: chickpeas, tahini, and seasonings (including garlic), mashed and puréed*.
> International Hummus Day is May 13.
> National Taco Day is the first Tuesday in October.
Below:
> The history of hummus.
> 18 delicious hummus recipes.
> The different types of mezze.
Elsewhere on The Nibble:
recipe is easy, once you found a store with tahini).
But since the hummus renaissance, stores have been sagging under the weight of so many brands and so many flavors. We’ve counted more than two dozen flavors among different brands. Our two personal favorites are horseradish and black olive, which we found at Trader Joe’s.
But, we like everything. So we were very pleased to receive samples of a new brand from Hope Foods. If you head to the website now, you can enter to win a year’s supply of hummus.
HOPE FOODS ORGANIC HUMMUS
There are 11 flavors of hummus. We tried three of them, all especially delicious.
First, the consistency is wonderful, like well-mashed homemade hummus.
While we enjoy the ultra-smooth texture of big brands like Tribe, we welcome the return of toothsome texture, like Grandma used to make (if your grandma’s ancestry was in the eastern Mediterranean).
Second, the flavor selection is a bit more interesting, with black garlic, Thai coconut curry, and spicy avocado hummus (the most popular flavor).
The line is preservative-free, certified Gluten-Free, Non-GMO Certified, OU kosher, and USDA Organic. There’s a store locator on the website.
HOPE HUMMUS FLAVORS
Currently, the line of hummus includes:
Black Garlic Hummus
Jalapeño Cilantro Hummus
Kale Pesto Hummus
Lemon Peppercorn Hummus
Original Recipe Hummus (nice and peppery)
Red Pepper Hummus
Spicy Avocado Hummus
Sriracha Hummus
Thai Coconut Curry Hummus
Plus Dessert Hummus
Dark Chocolate Hummus
Dark Chocolate Coconut Hummus
While we haven’t had Hope’s chocolate hummus, we have had other brands: Thumbs up!
The company also makes guacamole, which we look forward to trying.
“Spread” the word!
|
|
|
|
THE HISTORY OF HUMMUS
Chickpeas, sesame, lemon, and garlic have been eaten in the Levant† for millennia. Though widely consumed, chickpeas were cooked in stews and other hot dishes. Puréed chickpeas eaten cold with tahini do not appear before the Abbasid period (750 to 1517 C.E.) in Egypt and the Levant.
The earliest known recipes for a dish similar to hummus bi tahina appear in 13th-century cookbooks from Cairo.
Some food historians believe the dish appeared a century earlier, prepared by Saladin, the first sultan of the Ayyubid dynasty (1174–1193). (If so, it was more likely created by a cook in Saladin’s kitchen, the idea of the warlord Saladin-as-cook being tough to swallow.)
Recipes for cold purée of chickpeas without tahini, but with vinegar, oil, pickled lemons, herbs, and spices (but no garlic), appear in medieval cookbooks; as do recipes with nuts vinegar (though not lemon), with many spices and herbs. [source]
Whomever and however, we’re grateful that it came to be part of our [almost] daily diet,
WHAT ARE MEZZE: THE DIFFERENT TYPES
Mezze (MEH-zay) or meze is the singular form for a number of small dishes served in the Middle East to accompany drinks (add an “s” for the plural form in English).
In some countries, an assorted mezze plate is served as an appetizer. In Greece, this appetizer platter is also called a pikilia.
Each country has its favorites. The ones most often found in the U.S. are:
Babaganoush, mashed eggplant mixed with seasonings (also spelled baba ganoush and babaghanoush).
Dolmades can take many forms. In the U.S., they’re usually Greek-style: grape leaves stuffed with rice, chopped mint, and lemon juice (these are also called sarma). In some countries, eggplants, peppers, and zucchini are stuffed, often with the same ingredients plus minced lamb.
Falafel, a deep-fried ball or patty made from ground chickpeas, fava beans, or both.
Fattoush, a salad made from several garden vegetables and toasted or fried pieces of pita bread.
Feta cheese or other local cheese.
|
|
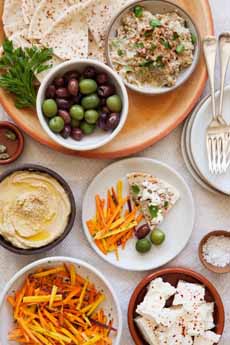
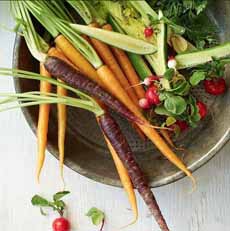
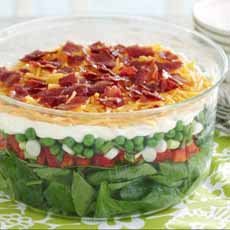
[5] A delicious mezze plate: babaganoush, feta, hummus, olives, pita and a local touch, pickled carrots—all of which you can purchase ready-made (photo © Good Eggs).
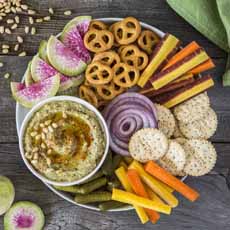
[6] Hummus itself is gluten-free, but not the pita. This gluten-free hummus plate created by Glutino Foods has gluten-free pretzels and crackers instead. You can find gluten-free pita and recipes to bake your own online (photo © Glutino Foods).
|
|
Halloumi cheese, sliced and grilled.
Hummus, a dip or spread made from cooked, mashed chickpeas.
Kibbeh, a mixture of bulghur, minced onions, finely chopped meat, and spices. Depending on the region, it is shaped into balls or patties and fried, baked, cooked in broth, or served raw (tartare).
Souvlaki, bite-sized lamb cubes, grilled on a skewer.
Labneh, strained yogurt that is more tart, like sour cream.
Tabbouleh, bulgur wheat, finely chopped parsley, mint, tomato, green onion; with lemon juice, olive oil and seasonings.
Taramasalata, a carp roe dip based whipped with lemon juice and olive oil. Sometimes, mashed potatoes or bread are added to stretch the recipe. We buy the Krinos brand, which does not add fillers.
Tyrokafteri, a spicy feta dip.
Tzatziki, a dip made from plain yogurt, chopped cucumber with finely chopped garlic and mint leaf.
Yogurt.
They are typically served along with Greek-style olives and pita, or other flatbread.
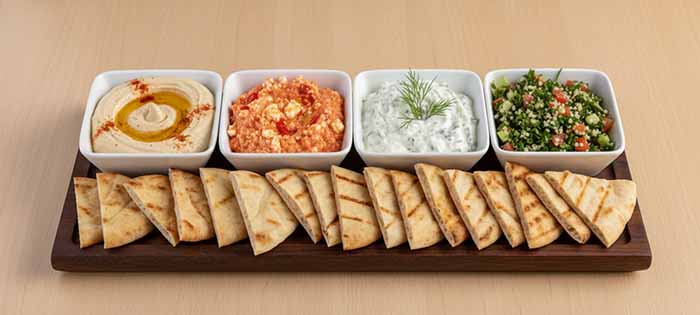
[5] A mezze platter, or pikidilia in Greek: hummus, tyrokafteri, tzatziki, and tabbouleh (Abacus Photo).
MORE HUMMUS RECIPES
Almond Hummus Recipe
Asparagus Hummus
Beyond Dipping: More Ways To enjoy Hummus
Black Garlic Hummus Recipe
Carrot Hummus Recipe
Carrot Hummus Recipe #2
Carrot Top Hummus
Dessert Hummus
Easy Hummus Recipe
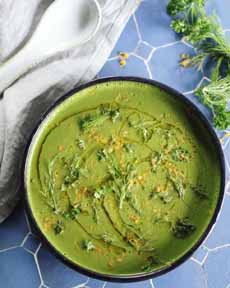
Green Hummus Recipe
Hummiki: Combine Hummus & Tzatziki
Hummus Salad
Hummus Sushi
Make Your Signature Hummus
Nacho Hummus & Hummus Tacos
Rancho Gordo Hummus Recipe
Turn Plain Hummus Into Flavored Hummus
20 Ways To Make A Hummus Sandwich
________________
*Some brands also add olive oil.
†The Levant is an English term that first appeared in 1497. It originally referred to the “Mediterranean lands east of Italy.” The historical area comprises modern-day Iraq, Israel, Jordan, Lebanon, Palestine, and Syria. Among other popular foods, Levantine cuisine gave birth to baklava, falafel, kebabs, mezze (including tabbouleh, hummus, and baba ghanoush), pita and za’atar, among other dishes that are enjoyed in the U.S. and around the world.
CHECK OUT WHAT’S HAPPENING ON OUR HOME PAGE, THENIBBLE.COM.
|
|