THE NIBBLE BLOG: Products, Recipes & Trends In Specialty Foods


Also visit our main website, TheNibble.com.

RECIPE: Peanut Butter & Jelly Pizza

April 2nd is National Peanut Butter & Jelly Day.

Sure, you could have a sandwich; but how about a PB & J pizza?

Peanut butter was considered a delicacy in the early 1900s. It was only served in New York City’s finest tea room, to an elite clientele.

  • A recipe in the May 1896 issue of Good Housekeeping magazine “urged homemakers to use a meat grinder to make peanut butter and spread the result on bread.”
  • That same year, in June, the culinary magazine Table Talk published a “peanut butter sandwich recipe.”
  • The earliest-known mention of peanut butter and jelly on bread seems to be by Julia Davis Chandler in 1901, in the Boston Cooking School Magazine of Culinary Science and Domestic Economics.
  • In the late 1920s, the price of peanut butter declined, and the sandwich became a popular choice for children.
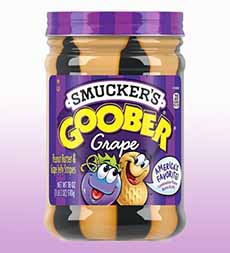
  • In 1968, The J.M. Smucker Co. introduced Goober, a jar that combined alternating vertical stripes of peanut butter and jelly. You can still find it on Amazon and elsewhere [source].
  •  
     
    HOW TO MAKE A PEANUT BUTTER & JELLY PIZZA

    Substitute the sandwich bread for a pizza crust, and you’re halfway there. A 12″ crust provides 4-6 servings.

    You may have seen PB&J dessert pizzas on a pizza crust. If you want one here’s a recipe, but we’re sticking with the PB & J.

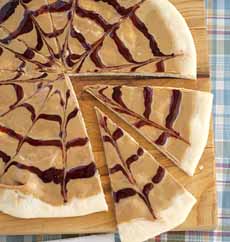
    In order to have the most artistic presentation, use jelly instead of jam or preserves, and pipe it on. Before adding it to the piping bag (or plastic food storage bag), warm the jar slightly to make the jelly easier to pipe.

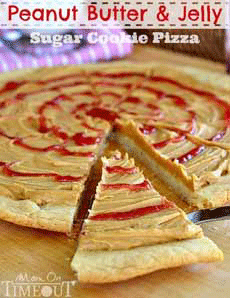
    You can pipe it however you want. Not having the skill to make these concentric circles, we did a Jackson Pollack design, Zigzags or stripes also work.
     
    Ingredients

  • 1 plain prepared pizza crust
  • 1 cup smooth peanut butter
  • 1 cup jelly (grape, raspberry, strawberry)
  • Optional garnish: banana, sliced (the “pepperoni”)
  • Optional garnish: vanilla yogurt (the “mozzarella”)
  •  
    Preparation

    1. PREHEAT the oven to 375°F. Place the pizza dough on a cookie sheet or in a pizza pan. Pierce the dough in 10 places with a fork.

    2. MICROWAVE the jar of peanut butter with the lid off for 30-45 seconds, or until the peanut butter has runny consistency.

    3. POUR a small amount of peanut butter over the crust. Spread it with a knife until the dough is lightly coated.

    4. WARM the preserves for for 30-45 seconds,, also with the top off, and place it the runny jelly in a piping bag or a food storage bag with a small snip off one of the bottom corners. Pipe the jelly on top of the peanut butter.

    5. TOP with the banana “pepperoni” and drizzle lightly with the yogurt “mozzarella.”

    6. BAKE the pizza for 8-10 minutes, keeping an eye on it. When the crust is golden brown and the jelly is bubbling, the pizza is done.

    7. LET COOL until it’s easy to cut. Serve while it’s still warm.


    PB&J Pizza
    [1] This variation is from Nicole at Heat Oven To 350. See her recipe, which is slightly different, to learn the easy way to make the jelly design (photo © Heat Oven To 350).


    [2] Trish at Mom On Timeout makes her pizza with a sugar dough crust. She also piped the jelly in concentric circles. Here’s her recipe (photo © Mom On Timeout).


    [3] Goober Peanut Butter & Jelly, available with grape jelly or strawberry jam (photo © Smucker’s).


    Comments off

    RECIPE: Chocolate Mousse With Blue Cheese & Mango

    Chocolate Mousse With Mango
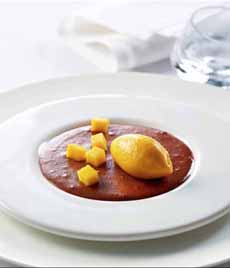
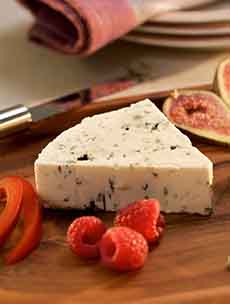
    [1] Chocolate mousse with a secret: blue cheese blended into it (both photos © Castello Cheese USA).


    [2] Castello blue cheese.


    [3] Häagen-Dazs Mango Sorbet (photo © Häagen-Dazs).


    The name of this dish may sound like an April Fool’s Day joke: A mousse of chocolate and blue cheese.

    We first had the chocolate-blue cheese combination 13 years ago.

    It was a great moment in modern truffles when Lillie Belle Farms blended Rogue Creamery’s Smokey Blue blue cheese into its excellent chocolate (here’s our review).

    They remain a personal favorite of ours, and you can buy them from Lillie Belle.

    You can also purchase a wedge or wheel of Smokey Blue Cheese from Rogue Creamery.

    Now onto the recipe: a sophisticated, delicious riff on chocolate mousse.

    Thanks to Castello Cheese for the recipe.

    If you want to make the sorbet quenelle shown in photo #1, here’s how.

    Otherwise, a mini scoop will do.
     
     
    RECIPE: CHOCOLATE MOUSSE WITH BLUE CHEESE AND MANGO

    Ingredients For 8 Servings

  • 5 squares (about 5 ounces) semi-sweet dark chocolate
  • 1/3 cup Castello® Crumbled Blue Cheese, or substitute
  • 6 large egg yolks
  • 1/3 cup cane sugar
  • 3 large egg whites
  • 3/4 cup whipping cream
  • Garnish: 2 mangoes, skin removed and cut into 1/4 inch cubes
  • Garnish: 1 pint mango sorbet (we like Häagen-Dazs)
  •  
    Preparation

    1. GENTLY MELT the chocolate and crumbled blue cheese in a bowl atop a double boiler.

    2. BEAT the egg yolks and sugar in a medium bowl, to a light airy consistency, approximately 5 minutes.

    3. BEAT the egg whites to a soft peak in a separate medium bowl.

    4. BEAT the whipping cream to a soft peak in another separate bowl.

    5. FOLD the blue cheese mixture into the egg yolk mixture, then gently fold in the whipped cream mixture, then fold in the egg whites.

    6. POUR into 8 individual dessert dishes; top with the diced mango and serve with a scoop of mango sorbet if desired.
     
     
    > THE HISTORY OF CHOCOLATE MOUSSE <
     
     
    APRIL 3rd IS NATIONAL MOUSSE DAY


    Comments off

    TIP OF THE DAY: Dried Mushrooms Add Flavor To Your Cooking

    We usually have a well-stocked fridge and pantry.

    When we’re out of something, that something is likely to be fresh mushrooms.

    Fortunately, there’s a solution for that: dried mushrooms.

    While nothing beats the flavor and texture of a fresh raw mushroom in a salad, side of marinated mushrooms or sauté, dried mushrooms work very well in certain recipes.

    All they need is water to reconstitute into their former selves.

    Voilà: You have excellent additions to eggs, gravies, quiche, risotto, soups, sauces and more. (They work less well in a dish where the mushroom is the main focus, like salads and sautés).

    To cook with dried mushrooms, first cover them with warm water and soak for 10 minutes. Drain them, change the water, and soak for another 10 to 15 minutes. Then cook per the recipe’s directions.


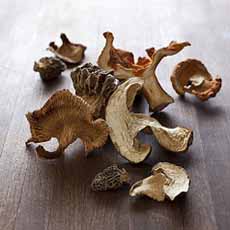
    [1] This lovely dried mushroom mix is from Northwest Wild Foods (photo © Northwest Wild Foods).

     
    If you can take advantage of the opportunity, save the soaking water for another purpose—cooking pasta or poaching chicken, for example. You can use it as is or reduce it for a sauce or gravy requiring just a few tablespoons of water.

    If you can’t use it this week, stick it in the freezer.
     

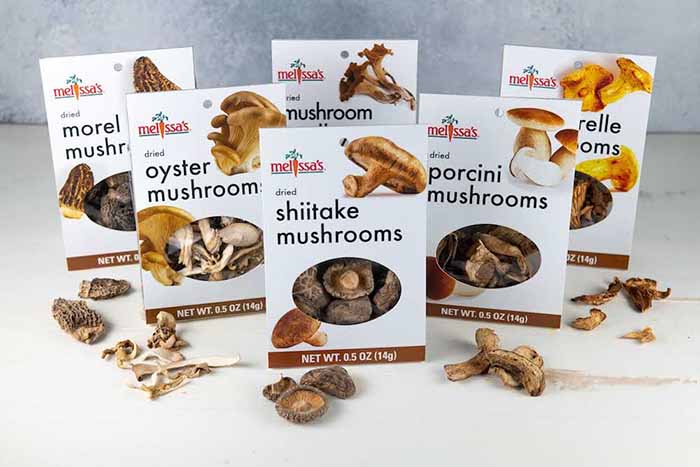
    [2] Top-quality dried mushrooms from Melissa’s. A box of each would make a great gift for a cook; one box is a party favor or stocking stuffer (photo © Melissa’s).
      

    Comments off


    © Copyright 2005-2026 Lifestyle Direct, Inc. All rights reserved. All images are copyrighted to their respective owners.