[1] Bake these graham crackers with an easy recipe from Go Bold With Butter.
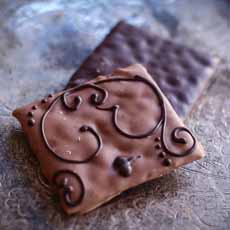
[2] If you don’t like to dip, you can buy these pretty grahams from Chocolat in Savannah.
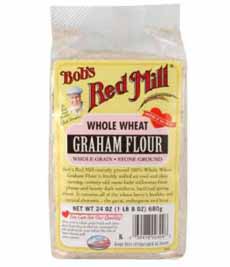
[3] You can also use graham flour for breads and pie crusts (photo courtesy Bob’s Red Mill).
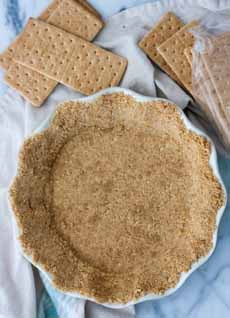
[4] If you don’t want to smash graham crackers for a pie crust, use graham flour; here’s a recipe. Here’s the recipe for the lovely pie crust in the photo, from Boston Girl Bakes.
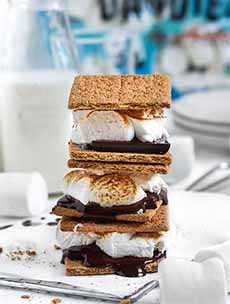
[5] Are s’mores the greatest thing to happen to graham crackers? Check out these s’mores recipes (photo © Dandies).
|
|
July 5th is National Graham Cracker Day.
The history of graham crackers is ironic. They started out as a savory cracker to curb lust. They turned into a food we lust after, whether plain, dipped in chocolate, or made into S’mores and pie crusts.
The recipe for the sweet graham cracker was edited by Marion Cunningham, who updated the classic Fannie Farmer cookbooks starting in the 1980s.
These crackers are snappy and so much more flavorful than the perfectly-shaped factory graham crackers. The thinner you roll the dough, the crisper they will be.
> The history of the graham cracker is below.
> National S’mores Day is August 10th.
> The year’s 44 cookie holidays.
RECIPE: CINNAMON GRAHAM CRACKERS
Ingredients For About 2 Dozen Crackers
4 tablespoons butter, room temperature
¼ cup granulated sugar
¼ cup brown sugar
1 egg
1 teaspoon cinnamon
¾ teaspoon salt
1 cup whole wheat flour, preferably stone-ground
¾ cup all-purpose flour
½ teaspoon baking soda
2 tablespoons milk
2 teaspoons granulated sugar
Preparation
1. PREHEAT the oven to 350°F. Lightly butter a large rimmed baking sheet.
2. BEAT the butter and sugars in the bowl of an electric mixer until creamy; beat in the egg, cinnamon and salt. In a separate bowl, whisk together the flours and baking soda. Lower the mixer speed and add half the flour mixture. Pour in the milk and stir for a few seconds to incorporate before adding the rest of the flour on slow speed, mixing until the dough just comes together.
3. GENEROUSLY FLOUR a large piece of parchment paper or plastic wrap on a work surface. Scrape the dough onto the paper and sprinkle the top with a little more flour. Cover the dough with a second piece of parchment or plastic and roll the dough into a rectangle about 1/8-inch thick. Check if you need to sprinkle the dough with a bit more flour while rolling (you should be able to peel back the paper without any sticking).
4. REMOVE the top sheet of parchment and transfer the dough by gently peeling it off the bottom piece of parchment, wrapping it around a rolling pin and unrolling it onto the baking sheet. Trim off the edges of the dough with a sharp knife to make a neat rectangle, and without cutting all the way through, lightly score the dough into approximately 2½-inch squares.
5. PRICK each square with the tines of a fork to make a pattern of holes. Sprinkle the top of the dough with sugar. Bake 15 minutes, or until the dough is slightly firm to the touch and the edges are beginning to turn golden. Cool the pan on a rack until completely cool, then break or cut the crackers on the scored lines.
THE HISTORY OF GRAHAM CRACKERS
Graham crackers were actually invented to control lust. The creation of the flour was inspired by The Reverend Sylvester Graham (1794-1851), who focused his ministry on health.
One of 17 children, this eccentric Presbyterian minister from Connecticut (we would replace that adjective with “repressed”), Graham believed that physical lust was the cause of maladies, from major illnesses like consumption, spinal disease, epilepsy and insanity, to everyday indispositions such as headaches and indigestion.
His “cure” was to suppress carnal urges, for which he prescribed a strict vegetarian diet and the avoidance of alcohol, tobacco and refined white flour. Toward this latter end, a miller created the eponymous graham flour, from which came graham bread and the graham cracker.
Graham flour is a special type of whole wheat flour in which finely milled white flour is mixed with coarsely milled bran and wheat germ, reuniting the three parts of the wheat kernel (the parts of a kernel).
The result was a coarse, brown flour with a nutty and slightly sweet flavor that baked and kept well (Grape Nuts cereal is made from graham flour).
|
The original graham crackers were not like contemporary ones. They were made without sugar or spice (ingredients prohibited by Graham’s diet), dry with a coarse texture.
But over time, someone added sugar and cinnamon and created a tasty cookie that appeared in Fannie Farmer’s Boston Cooking School Cookbook, first published in 1896.
Unfortunately, today’s large commercial graham cracker brands are a bland derivative, with little graham flavor. A good comparison is Wonder Bread and the best artisan loaf you can find.
Seek artisan brands from bakers and confectioners, or make your own.
|