|
Dukkah is a versatile Egyptian dry seasoning mixture of chopped nuts or chickpeas, plus a variety of flavorful seeds, spices and herbs.
In the old days, the ingredients were ground together in a pestle; today, they can be tossed into a food processor.
Dukkah is an extremely popular snack in the culinary melting pots of New Zealand and Australia, where it’s a perfect pairing with the local wines.
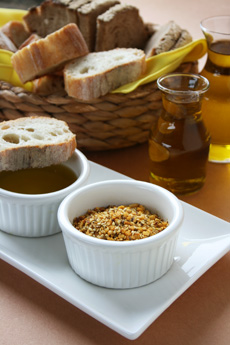
Pour a glass, cut up some pita or other bread, put some olive oil in a dish next to a dish of dukkah ground nut and seed mix, dip the bread into both, and that’s your snack along with the wine.
It hasn’t yet hit home (the U.S.A.) as a condiment, but that doesn’t mean you can’t be the leader in your crowd to discover it.
THE HISTORY OF DUKKAH
Thousands of years ago in ancient Egypt, somebody concocted a mixture of nuts, seeds and spices to consume with pita bread, aash baladi (also spelled eesh balady) dipped in olive oil.
The bread was first dipped into olive oil and then into the nut mixture. That mixture came to be known as “dukkah” (pronounced DOO-ka, from the Arabic dokka, meaning “coarsely ground”). It is still eaten today in this same traditional manner.
Beyond bread, dukkah’s greatest merit lies in its versatility. Its strong flavors and easy application can lend Middle Eastern pizzazz to meat, seafood and salads (more in the section below).
Yet dukkah remains largely absent from the average American home cook’s repertoire and even awareness. Have you heard of it?
Australians and New Zealanders have pull this ancient dish out of the days of yore and into their home kitchens. Now it’s your turn.
Below are a recipe template, plus a source to buy dukkah ready-made.
DUKKAH IS VERSATILE
Yet, you can cook with it, adding it to seafood, meat, salads and even a sweet version for desserts like French toast and caramelized bananas.
Savory Uses
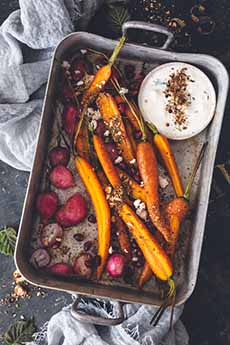
Sprinkle on salads and vegetables (photos #4 and #6; try it on potatoes and rice)
Use as a breading for chicken, fish and other seafood, lamb and tofu
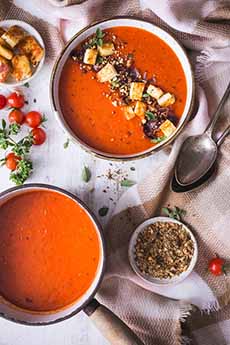
Sprinkle as a garnish for soups (photo #7).
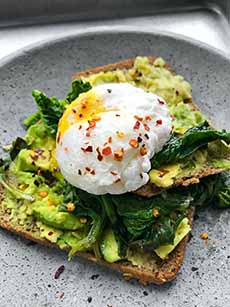
Mix into, or sprinkle atop, eggs (photo #8)).
Sprinkle on toast with olive oil or butter.
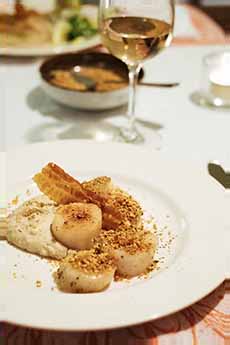
Sprinkle as a plate garnish for anything from artichokes to steak (photo #5).
Roll a goat cheese log in it.
Mix it into plain yogurt.
Season grains and grain salads.
Mix it into olive oil, yogurt, mayo or sour cream (or combination) for crudités.
Top off homemade soft pretzels.
Serve with a Mediterranean appetizer plate (mezze) with an assortment of babaganoush, grape leaves, hummus, labneh, tabbouleh and tzatziki plus pita.
Keep a small jar on the table with the salt and pepper.
Sweet Uses
Add coconut, a touch of sugar, and maybe some chopped dried blueberries, cranberries or raisins for use on your favorite sweet recipes. See the examples in Oregon Dukkah, below.
DUKKAH IS HEALTHY
Looking for healthy flavor?
Hazelnuts are a good source of Vitamin E and have one of the highest Oxygen Radical Absorbance Capacity (ORAC) values among nuts. ORAC measures the antioxidant power in foods.
Another major ingredient in dukkah, sesame seeds, are a good source of calcium, manganese, copper, iron and fiber, among other nutrients.
And that’s not even mentioning all the nutrients and healthy properties of the herbs and spices found in dukkah.
The olive oil that’s part of the dip is already renowned for its heart-healthy properties.
All this, plus great flavor!
OREGON DUKKAH: BUY IT READY-MADE
Instead of chickpeas, Oregon Dukkah takes advantage of Oregon’s native hazelnut crop—with delicious results. Buy it and get ready to “dip like an Egyptian”—with bread dipped in oil (make it EVOO), the classic Egyptian way.
The varieties include:
Coconut Dukkah: Toasted coconut combined with roasted hazelnuts, sesame seeds, peanuts and spices makes Coconut Dukkah a perfect match for fish, fruits, rice, yogurt—even ice cream.
Smoky Hot Dukkah: The addition of chipotle chiles and smoked paprika gives this blend an extra kick. Use it to coat soft cheese like a log of goat cheese; spread onto crackers for a tasty snack.
Sweet Dukkah: Use this blend of hazelnuts, sesame seeds, peanuts, warm spices like cinnamon and a touch of turbinado sugar to enhance baked apples, crêpes, ice cream, oatmeal, an omelet, or yogurt. Try it on walnut bread or toast with melted butter.
Traditional Dukkah: This flavor stays true to its Egyptian roots. A savory blend of roasted hazelnuts, sesame seeds, peanuts and Middle Eastern spices works as a dry rub, a topping, a dip mix-in, or with the classic bread and olive oil.
Zesty Dukkah: Tangy spices enhance roasted hazelnuts and sesame seeds and peanuts. Serve it as in a dip; an enhancement to Dukkah to liven up yogurt, meats, fish and chicken or mix with honey for a unique glaze.
You can purchase individual flavors at Vibrant Flavors.com.
MAKE YOUR OWN DUKKAH
It’s easy to make dukkah from scratch. Just combine and pulse your favorite ingredients: chickpeas, nuts, seeds, spices, dried herbs, and for those who like it hot, red chile flakes.
Don’t want chickpeas or hazelnuts? Experiment with other favorite nuts (almonds, macadamia nuts, peanuts, pine nuts, pistachios) and seeds in addition to, or instead of, sesame (flax, pumpkin, sunflower, favorite).
Many seasonings work (curry, crushed red pepper flakes, smoked paprika, turmeric, za’atar). And how about some shredded coconut?
While dukkah does not necessarily have to feature hazelnuts (although classic recipes do)
Ingredients
1/2 cup nuts of choice (substitute roasted chickpeas)
3 tablespoons sesame seeds
1/4 cup coriander seeds
2 tablespoons cumin seeds
1 tablespoon black peppercorns
1 teaspoon fennel seeds
1 teaspoon dried thyme or mint
1 teaspoon sea salt
Preparation
1. PREHEAT the oven to 350°F and roast the hazelnuts in a pan, in one layer, for 10 to 15 minutes, until the skins blister.
2. REMOVE the nuts from the oven, wrap them in a kitchen towel and let the nuts steam for 1 minute. To remove the skins, rub the nuts vigorously in a kitchen towel. It’s O.K. if some of the skins won’t detach. Cool completely.
2. HEAT a skillet and dry-roast the sesame seeds until they are light golden brown and fragrant (be careful not to burn them). Remove them from the skillet and let cool.
3. ROAST the remaining seeds and spices until they darken (chickpeas that are already roasted do not require further roasting). When the ingredients have cooled…
4. COMBINE with the seeds and nuts and process pulse in a food processor into a coarse consistency (you can use a mortar and pestle instead).
If you overprocess and your blend ends up as a paste, use it up quickly in a dip, as a spread on chicken or fish, or any of the uses above.
5. STORE in an airtight jar in a cool, dark place for up to three months. The dukkah will keep longer than that, but will begin to lose its flavor.
6. MAKE extra dukkah to package in a small jar and give as gifts.
|
|

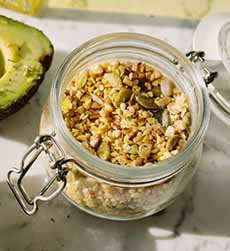
[1] Homemade dukkah in an airtight job. Just blend your favorite ingredients (photo © Pexels).
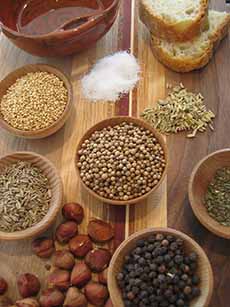
[2] Dukkah ingredients. In the original Egyptian recipe, chickpeas were used instead of hazelnuts (photo © Sheri W. licensed under CC BY 2.0CC BY 2.0).
[3] The classic: dukkah with bread and olive oil (photo by Hannah Kaminsky | The Nibble.
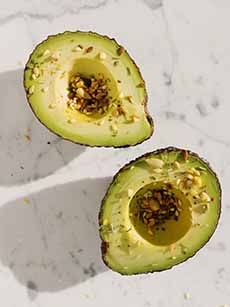
[4] Avocado halves with dukkah (photo © Ready Made | Pexels).
[5] Scallops and bacon with dukkah (photo © Stijn | Licensed By CC 2.0).
[6] Roasted carrots with yogurt sauce and dukkah (photo © Asab974 | iStock).
[7] Dukkah as a soup garnish with fried halloumi cubes; you can substitute croutons (photo © Asab974 | iStock).
[8] Poached egg with dukkah (photo © Daria Shevtsova | Pexels.
|