|
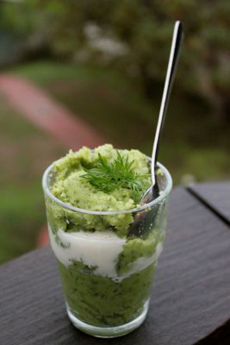
[1] Mashed potato parfait, layered with cheese sauce (photo © Erika Penzer Kerekes | In Erika’s Kitchen).

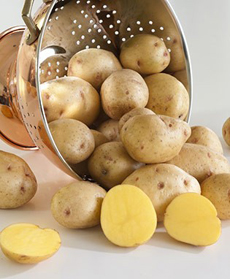
[2] The Yukon Gold potato: creamy yellow flesh, thin skin, and a favorite of chefs since it was introduced in 1980 (photo © Bonnie Plants).
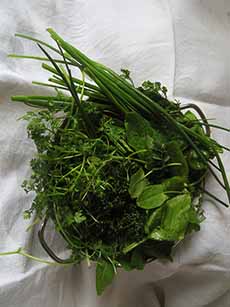
[3] Add your favorite herbs for color, flavor, and antioxidants (photo © Dirk Ingo Franke | Wikipedia).
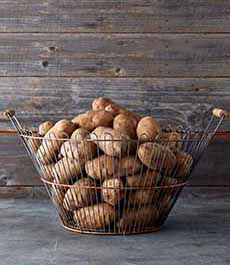
[4] The Russet Burbank potato, the variety used to make the ever-popular baked potato (photo © Williams-Sonoma).
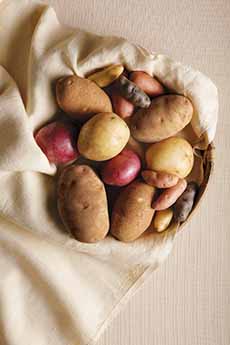
[5] A beautiful medley of potatoes grown for fine restaurants (photo © The Chef’s Garden).
[6] Some of the thousands of different heirloom potatoes from Peru (photo © Costanera Cocina Peruana).
[7] Head to specialty markets to find varieties your supermarket may not carry (photo © Idaho Potato Commission).
|
|
August 19th is National Potato Day.
The Idaho Potato Commission estimates that Americans annually consume 117 pounds per capita. That’s a lot of spuds!
Today’s recipe will add to the count. It’s for one of America’s favorite comfort foods, mashed potatoes.
The recipe was created by food blogger Erika Penzer Kerekes of In Erika’s Kitchen and sent to us by the Idaho Potato Commission—a wealth of delicious potato recipes.
Erika chose the Yukon Gold potato, a creamy, yellow flesh potato (photo #2).
To illustrate how long it takes to develop a new potato variety:
In 1959 a Canadian researcher became aware of a yellow flesh, thin skinned potato.
In 1966 he began to develop it for commercial production.
Finally, in 1980, it was ready for market and was named Yukon Gold, and quickly became popular with leading chefs.
Here’s more about the Yukon Gold potato.
RECIPE: HERBED MASHED POTATO PARFAITS
Ingredients For 8 Servings
2 pounds Yukon Gold potatoes, peeled and cut into large chunks
1 teaspoon salt, plus more to taste
½ cup half-and-half
8 tablespoons butter, divided
Freshly ground pepper to taste
4 cups fresh soft green herbs, e.g. basil, parsley, dill, chives, garlic chives, cilantro
4 tablespoons all-purpose flour
2 cups milk
2 cups sharp white cheddar cheese, shredded (we used gruyère)
¼ cup white wine
Garnish: cooked crumbled bacon or cubed pancetta, crushed potato chips, dill pickle chips (or other pickled vegetables), frizzled onions, etc.
Preparation
1. PLACE the potatoes and 1 teaspoon salt in a pot with water to cover. Bring to a boil, turn down the heat, and simmer uncovered until the potatoes are very tender, about 20 minutes. Drain the potatoes, then return them to the hot pot for a few minutes so some of the excess moisture evaporates.
2. CHOP the herbs finely (this is easiest in a food processor).
3. ADD the half-and-half and 4 tablespoons of the butter to the hot potatoes. Mash with a potato masher until smooth.
4. STIR in the chopped herbs; the potatoes should be very green. Taste and add more salt if necessary. Cover the herbed mashed potatoes and keep warm over a very low flame.
5. MAKE the cheese sauce: Melt the remaining 4 tablespoons butter in a saucepan over medium heat. Add the flour and cook, stirring constantly, about 2 minutes. Whisk in the milk, making sure you whisk away any flour lumps. Cook about 5 minutes, until the sauce starts to thicken.
6. TURN down the heat and add the cheese. Continue to whisk until the cheese melts and the sauce is very smooth. Add the white wine and cook another 1 minute.
7. ASSEMBLE the parfaits: In a clear tumbler or juice glass, place a layer of herbed mashed potatoes, a few spoonfuls of cheese sauce, another layer of mashed potatoes, and a final drizzle of cheese sauce. Top with the bacon and/or potato chips. Serve immediately.
POTATO HISTORY
Wild potatoes are indigenous to the Andes Mountains in Peru. Thousands of varieties still grow there and are the main food crop (photo #6).
Potatoes were domesticated more than 6,000 years ago. The Incas cultivated many varieties of potato.
The name is said to originate from the Spanish patata, a combination of batata (sweet potato) and papa (a word for potato from the Inca Quechua language).
The Spanish conquered Peru around 1530 and brought potatoes back home to Spain—along with tomatoes, also native to Peru.
News traveled fast (or what passed as “fast” in the centuries prior to the telegraph), and potatoes quickly reached the rest of Western Europe.
However, not everyone was enamored of the potato and the tomato. The vegetables were feared at first, accused of causing leprosy and being poisonous.
They were classified as a relative of deadly Nightshade* family (Solanaceae), because both contain toxic compounds known as glycoalkaloids (though the levels in domestic potatoes and tomatoes fall far short of being harmful to people).
Slowly, more countries realized the power of the potato. It could grow in any climate.
In Ireland it became the main staple in the diet of the poor, so much so that when hit by a potato blight Phytophthora infestans three years in a row beginning in 1845, more than a million people died of starvation and disease.
The Peruvian-born potatoes, Solanum tuberosum L., were introduced to North America in the 18th century.
They were first planted in Idaho in 1836; the state now grows 25% of the nation’s potatoes.
Idahoan Luther Burbank developed the Russet Burbank potato in 1872 (photo #4), a more disease-resistant version of the Irish russet potato (there have been additional russet developments since).
An update:
In 2013 a botanist discovered a wild Solanum jamesii potato plant in Utah, a cousin to the Solanum tuberosum of the Andes.
The jamesii species is native to North America and abundantly found in Arizona and New Mexico. Its existence in Utah was previously unknown to researchers.
The important news is that its domestication in Utah is believed to predate potato domestication in the Andes: 7,000 to 10,000 years ago. Here’s more about it.
> Here’s more about potato consumption in the U.S.
> Check out the different types of potatoes in our Potato Glossary.
________________________
*Nightshades are members of the Solanaceae family of flowering plants, many of which are edible, while others are poisonous (some have both edible and toxic parts). The name of the family comes from the Latin Solanum, “the nightshade plant.”
Other edible members include capsicum (the chiles), Chinese lanterns, eggplants, garden huckleberry, ground cherry, naranjilla, pepinos, peppers, potatoes and the tree tomato. One thing that sets these nightshades apart is their alkaloid content.
Alkaloids are harmful nitrogen compounds which, in high quantities, are toxic, causing nausea, diarrhea with vomiting and headaches. In extreme cases they lead to unconsciousness and convulsions to the point of respiratory paralysis.
That’s why the tomato was considered poisonous by Europeans and not eaten for 200 years following its discovery.
Alkaloids exist in tiny, non-harmful quantities in the nightshade foods we eat. Tobacco and the petunia are also members of the family, as well as the Datura or Jimson weed, the mandrake and the deadly nightshade or belladonna.
|