|
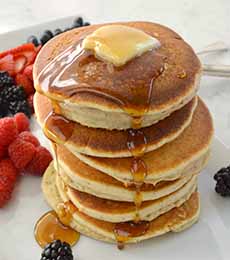
[1] Make gluten-free pancakes with Pamela’s Baking & Pancake Mix (photos #1, #2, #3 and #4 © Pamela’s Products).
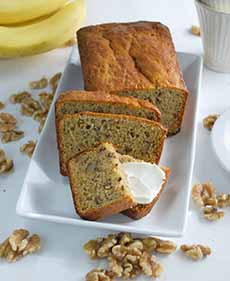
[2] Ready for some homemade banana bread?
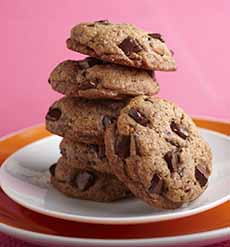
[3] America’s favorite cookie, gluten-free.
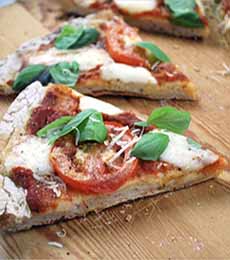
[4] What are your favorite pizza toppings? For a switch, switch the basil with baby arugula—or use both.
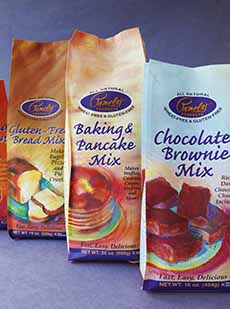
[5] Whatever you want to bake, it’s likely that Pamela’s has a gluten-free mix (photo © The Nibble | Katharine Pollak).
|
|
Editor’s Note: We have long found Pamela’s Products to be a delicious gluten-free alternative for pancakes, cookies, cakes and other baked goods. Here, an endorsement from our gluten-free specialist, Georgi Page-Smith.
Even if you don’t avoid gluten, if you have friends who do, buy a box of mix. Then, when you’re planning a visit, you can present them with a plate of just-baked chocolate chip cookies, or other treat.
GLUTEN-FREE GLORY
My first experiment in gluten-free flour involved a well-known purveyor of grains, whose flour was overwhelmingly bean-y in taste and texture—due, I believe, to the use of garbanzo and fava flour*.
But I prefer my cookies and my falafel to stay in their own appointed lanes, thank you very much. So when I went looking a second time there was a lot more at stake. I was on a quest.
Of course I went to the Internet. I Googled, I read product reviews, and by far the products that were most recommended were Pamela’s.
I started with the All-Purpose Flour, baking a banana bread that was moist and springy and delivered an un-tainted, unmediated flavor.
Next I tried the Baking Mix, with my grandmother’s special pancake recipe. It yielded a light, fluffy cake that was the perfect vehicle for butter and maple syrup.
I moved on to the Artisanal Bread Flour. Pamela’s. Always. Delivered.
The Pizza Dough was amazing with my roasted potato blue cheese toppings. I grew up eating homemade Sicilian-style pies, and these made me feel like home.
I also had a chance to try Pamela’s Chocolate Chip Cookie Mix. Again, Pamela delivered.
The cookies were as good as the best chocolate chip cookies I’ve had. They had a crispy edge and a soft center. The flavor was a perfect balance of nutty, buttery, sweet and salty.
And the chips were divine; though I sifted some out, so that I can enjoy the cookie with walnuts and not overwhelm the palate.
They actually inspired me to challenge my sister—a woman who has a multiple stage, 2-day chocolate chip cookie process—to a bake off! They were that delicious, and that easy.
I have also used various combinations of the Bread Flour and the Baking Mix for pie crust, with good results.
Some gluten-free flour brands produce a crust that will not hold together, or is amazingly tough. With Pamela’s, I have achieved mini apple hand pies whose crust had a delightful crumb-y texture, just verging on flaky.
Pamela’s became my new best friend in the kitchen, enabling me to live the gluten-free lifestyle which I was becoming accustomed to.
EASY TO USE
Substitutions are painless, and they are aided and abetted by the extensive collection of recipes on the Pamela’s site, as well as by the fact that many gluten-free bloggers use Pamela’s in their own experiments.
The prices are a bit high*, but as competition increases we hope that will change. Pamela’s products are also very available: I have seen them in more stores than almost any other brand. And of course…
You can buy them online at PamelasProducts.com, with a smaller selection available on Amazon.
TRIED & RECOMMENDED
Pamela’s Baking Mix
Pamela’s Chocolate Chunk Cookie Mix
Pamela’s Gluten-free Bread Mix
Pamela’s Pizza Crust Mix
MORE PAMELA’S PRODUCTS
Baking Mixes: Biscuit & Scone Mix, Bread Mix, Chocolate Brownie Mix, Chocolate Cake Mix, Chocolate Chunk Cookie Mix, Cornbread & Muffin Mix, Vanilla Cake Mix
Meals: Pasta Meals, Ramen
Ready To Eat Cookies: Buttery, Chunky Chocolate Chip, Dark Chocolate Chunk, Figgies & Jammies, Lemon Shortbread, Macaroons, Nutty Chocolate Chip, Nutty Ginger Spice, Pecan Shortbread, Pepperminty Chocolate
Check out our reviews of:
> Pamela’s Figgies & Jammies Fig Bars
> Pamela’s Sprouted Grain Pancake Mixes
|