|
WHAT IS AMARO?
Amaro (ah-MAH-row; plural amari, ah-MAH-ree) is a category of liqueur, made by distilling a base alcohol (grape brandy, neutral spirits or wine) with herbs, spices or other botanicals.
Amari are digestifs (dee-jes-TEEFS, digestivi in Italian), a type of drink that is consumed after dinner to help with digestion.
The digestive aids in amari are the blend of herbs, roots, flowers, and spices in the drink.
Botanicals have long been used as digestive aids in homeopathic medicine.
Each producer has a proprietary blend which can include, among others: anise, cardamom, cinnamon, eucalyptus, fennel, ginger, juniper berries, licorice, menthol, orange, pine and thyme.
Amaro means bitter in Italian.
It’s important to note, though, that although amari can be ingredients in cocktails, they are not to be confused with aromatic bitters like Angostura, Peychaud’s and other brands that are shaken into cocktails for a punch of botanical flavor.
Amari get their bitterness from the maceration and/or distillation of these botanicals.
The spirit is aged for a period that varies by producer, and the finished liqueur can be range from 15% to 45% A.B.V. (30% to 90% proof).
Each brand has a style, from dry to sweet, less bitter to more bitter, medium to intense.
Here’s an article on the different styles of amaro.
The best way to try an amaro is at a restaurant with a good bar. Plan to try one at the conclusion of the meal.
If you’re into sharing, let each person order a different brand, so you can share and get an idea of the differences.
Here’s a list of amaros with different characteristics. The waiter or bartender can also make recommendations.
Although amari can be made anywhere, they began in Italy in 1815, with the house of Ramazzotti (more about that below).
They are now produced by distillers worldwide.
THE HISTORY OF AMARO
The origins of digestifs can be traced back to ancient Rome, where the wealthy would drink herb-infused wines after their famously huge meals.
The herbs delivered the much-needed restorative properties.
In the Middle Ages, monks developed alcohol-based medicinals. All spirits of the time were made by monks, with different recipes for different cures.
As the centuries labored on, amaro-type digestifs were also made by pharmacists: sold in pharmacies and hawked by peddlers as health tonics [source].
Some Italian families distilled their own, with recipes passed down through the generations (source).
AMARO AS A DIGESTIF
Many aged liquors are now used as digestifs, to stimulate digestion after lunch or dinner.
In much of Europe, brandies are the most traditional—a large category that includes Cognac and Armagnac as well as calvados, eau de vie, and grappa.
Whiskeys, particularly Scotch, and añejo tequilas also fall into the category.
And then there are amari, the botanicals of which help to settle the stomach after a big meal.
Vermouth is also an amaro; although unlike the others, which are typically made from grain-based alcohol, vermouth amaro is wine-based.
It’s a lighter amaro, and usually drunk as an apéritif rather than a digestif.
Amaro is served in liqueur-size portions: neat, on the rocks, and perhaps with a garnish of citrus, even with tonic water.
Sip it slowly.
By the way, if you don’t want alcohol, herbal teas like chamomile, ginger and peppermint work.
AMARO AS A COCKTAIL
You can find many amaro cocktail recipes online.
Amari pair well with everything from the most popular liquors—bourbon, gin, tequila, whiskey—to sherry and fortified wines.
They add complexity and flavor to a cocktail, and have a place in any well-stocked bar.
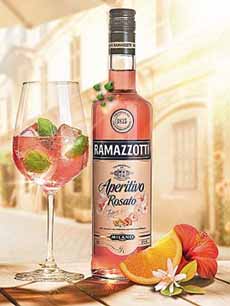
RAMAZZOTTI AMARO
In terms of modern amari, Ramazzotti is the oldest producer. It was founded in Milan in 1815 by Ausano Ramazzotti, a licensed pharmacist from Bologna. The brand is now owned by Pernod Ricard Italia.
It’s the best-selling liqueur in Europe [source].
That may be because its flavor is more on the sweet side than on the vegetal side; and its alcohol content is moderate.
That makes it an easy-to-drink amaro, while its chief competitor (also from Milan), Fernet Branca, is more medicinally bitter, more alcoholic, and thus not as easy to sip.
Ramazzotti amaro is a blend of 33 herbs and roots, sourced from around the world.
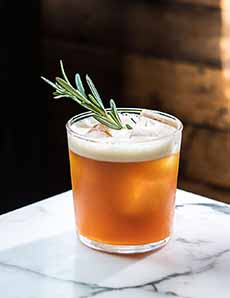
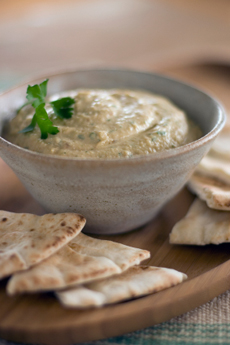
Dry and intense, it is clear, with a deep brown hue (photo #1):
Its intense nose has notes of orange peel and aromatic herbs.
The palate is full-bodied.
There’s a pleasantly bitter aftertaste and long finish.
Some of the 33 ingredients include cardamom, clove, galangal (Thai ginger), gentian (the root of an herb), orange peel, resin, rosemary and turmeric [source].
While the company does not reveal all ingredients, some tasters have identified cinchona (the same bark used to make tonic water), eucalyptus and star anise [source].
Whatever the formula, the drink met with immediate success and turned the Ramazzotti pharmacy into a distilling industry.
In addition to amaro, the distiller makes different types of digestifs, aperitifs and sweet liqueurs.
|