|

[1] A brioche bun is a breakfast delight. This variation, called brioche à tête, has a small ball of dough (the tête, French for head_ crowning the top (photo © Elena Moiseeva | iStock Photo).
[2] Brioche is made in the classic bread shapes: loaves, rolls, and buns. Here’s the difference between rolls and buns (photo © Elena Moiseeva | iStock Photo).
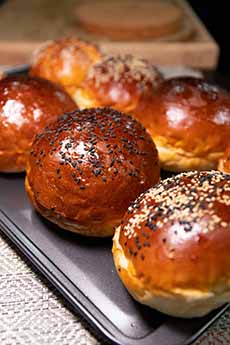
[3] Brioche rolls, here topped with an egg wash and black and white sesame seeds (photo © Amanda Lim | Unsplash).

[4] Almond brioche (photo © King Arthur Baking).
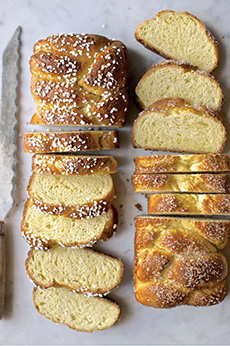
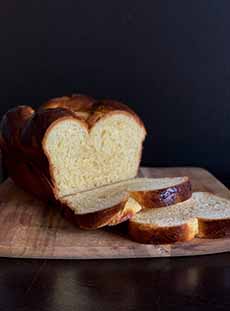
[5] A classic brioche loaf. This one is topped with pearl sugar to become an even sweeter breakfast bread. Here’s the recipe (photos #5 and #6 © Liz Neily | King Arthur Baking).
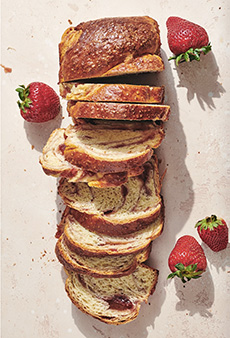
[6] Another enhancement of brioche for breakfast: a strawberry swirl. Here’s the recipe.
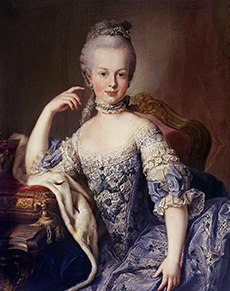
[7] Archduchess Maria Antonia of Austria, the later Queen Marie Antoinette of France, at the age of 12, in 1767. At that age, she was chosen to marry Louis XVI of France. When she arrived in France in May 1770, she was 14 years old (portrait attributed to Martin van Meytens [1695–1770], Public Domain).
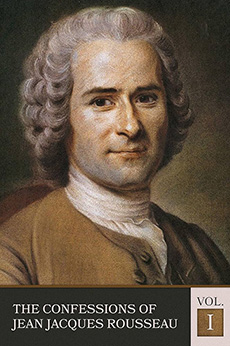
[8] Jean-Jacques Rousseau, who first wrote the expression, “Let them eat brioche,” at age 41 (portrait by Maurice Quentin de La Tour, 1753, public domain).
|
|
This is the story of brioche, but first, an introduction:
Almost 200 years ago, Brie was crowned the Queen of Cheeses. Following the Battle of Waterloo (June 18, 1815), representatives of 30 nations convened in Vienna to reconstruct the map of Europe. It wasn’t all work: During a lively discussion on the merits of different cheeses, Brie was unanimously proclaimed “Queen of Cheeses.”
But what about a Queen of Breads to go with the cheese? None has been proclaimed in the history books, so we’re doing the enthroning here.
The luscious butteriness and elegant crumb* that makes Brie the queen maker brioche (pronounced bree-OASH), our nominee for Queen of Breads. In fact, it already has a crown (see photo #1).
WHAT IS BRIOCHE?
Brioche is a light, slightly sweet bread made with eggs, yeast and butter, and glazed with an egg wash. The butter and eggs make it very rich. It’s the most buttery bread.
Brioche is served as a breakfast bread, used to make French toast (better than challah!—see the difference in the footnote††) and with luxury ingredients such as foie gras and smoked salmon. (Perhaps our favorite luxury food is pâté de foie gras on toasted brioche.)
> National Brioche Day is May 14th.
Below:
> The different types of brioche.
> The history of brioche.
> The origin of “Let them eat cake,” i.e., brioche.
Elsewhere on The Nibble:
> The history of brioche.
> The different types of bread: a photo glossary.
> The history of bread.
> The year’s 20+ bread holidays.
> Recipe: Brioche French Toast Recipe With Dulce De Leche.
LET THEM EAT BRIOCHE!
The word “brioche” derives from Old French, broyer, to knead. The famous phrase Americans know as “Let them eat cake” actually refers to brioche. It was mis-translated as cake.
The expression is, “S’ils n’ont plus de pain, qu’ils mangent de la brioche.”
That is to say, let them eat brioche.
But Marie-Antoinette never said it. See why she has taken the rap for centuries, below.
THE TYPES & SHAPES OF BRIOCHE
Brioche is made in different shapes:
Classic brioche (photo #1) is baked in a fluted tin with a ball of dough crowning the top (called brioche à tête, brioche with a head—see photo at top).
Round rolls are baked without the flutes and the crown; we love them with burgers. We’ve bought mini versions for sliders.
A standard loaf of brioche (photo #3) is called brioche Nanterre, after a town in the western suburbs of Paris.
Almond brioche is sliced from a loaf of brioche, cooked so it looks like French toast, and topped with frangipane (crème pâtissière flavored with ground almonds), sliced almonds and powdered sugar. It is also made the shape of a round roll (photo #4) topped with sliced almonds.
Orange brioche is a roll filled with orange cream and topped with sugar. Chocolate brioche is filled with chocolate, the brioche version of pain au chocolat.
Gingerbread man brioche is made for Christmas: not with ginger, but shaped like gingerbread men and topped with sugar.
Beyond French toast, leftover brioche makes heavenly bread pudding, bread salad, croutons, eggs in a basket,* fondue dippers and grilled cheese sandwiches.
REGIONAL VARIETIES OF BRIOCHE
Different regions in France developed their own styles. Some examples (the regions are in parentheses):
Brioche Bordelaise or Tourtière (Bordeaux): a ring-shaped brioche often flavored with orange zest and rum, sometimes including raisins or other dried fruit.
Brioche Colossale (Normandy): a very large, festive brioche, sometimes weighing several kilograms. It’s often made for celebrations and fairs.
Brioche de Metz (Lorraine): features a tighter crumb than other brioches. It’s sometimes sprinkled with sugar or flavored with local spirits.
Brioche Nanterre (Île-de-France): a rectangular loaf made from several small dough balls baked together in a rectangular pan to form a loaf (today the dough is kneaded as a whole—photo #5). Enabled by the mechanization of the Industrial Revolution, a loaf was not only easier to bake in bulk but also much more practical for slicing and serving. It’s often used for sandwiches and toast.
Brioche de Saint-Genix (Savoy): enriched with red pralines (sugar-coated almonds) that give it a distinctive nutty sweetness and red speckled appearance. It originated in the town of Saint-Genix-sur-Guiers.
Brioche à Tête (Paris): the classic brioche shape is this individual round loaf with a small ball (tête, meaning “head”) on top (photo #1). The texture is light and airy texture with a rich buttery flavor. It’s often baked in fluted molds, giving it an elegant appearance.
Brioche Vendéenne (Vendée): a braided brioche flavored with vanilla, orange blossom water, or rum and traditionally decorated with pearl sugar. It’s often served during holidays, weddings, and festivals.
Gâche Vendéenne (Vendée): similar to Brioche Vendéenne, it’s more dense and slightly less sweet. It’s sometimes enriched with crème fraîche for an even richer texture.
Pogne de Romans (Drôme): a traditional brioche from southeastern France, often flavored with orange blossom water. It was historically baked during Easter but now enjoyed year-round.
BRIOCHE HISTORY
Brioche has been made in France to at least the 15th century. The word brioche first appeared in print in 1404, although it could have existed hundreds of years before then.
The name likely derives from the Old French word brier, meaning “to knead,” or from broyer, “to grind,” which could reference the kneading or grinding of flour.
While it is believed to have sprung from a traditional Norman recipe, some culinary historians have argued that brioche is probably of Roman origin.
By the 17th century, brioche was a well-established delicacy in France, but quite pricey due to its high butter and egg content and thus particularly enjoyed by the upper class.
Why Was (And Is) Brioche So Expensive?
The ingredients are expensive. Unlike standard white bread, which is made primarily from flour, water, salt, and yeast, brioche contains additional costly ingredients: butter, eggs, and sugar, plus milk.
Not to mention white bread in general. From Roman times, removing the bran from wheat was a labor-intensive, costly process. White bread was a luxury; poorer people ate coarse, whole grain bread. (Little did they know the benefits of whole grains.)
Brioche, being even richer and more refined than regular white bread, was an indulgence of the aristocracy.
The process is labor-intensive. Brioche requires multiple kneading and resting periods, and sometimes overnight fermentation. It was more difficult to produce in large quantities.
Due to these factors, brioche was mostly made in wealthy households and royal courts. It certainly was not available in bakeries that supplied the masses.
Why Is “Let Them Eat Cake” Attributed to Marie Antoinette?
Poor Marie Antoinette (image #7) couldn’t get a break. Like all royal women, she had an arranged marriage to a stranger to secure political alliances. She arrived with daggers pointed at her by the lords and ladies. After she failed to conceive, the king’s ministers sought to find a new queen and send her to a convent. She finally bore four children, including the heir and a spare, only to have the French Revolution cost her her head at age 34.
During the French Revolution, revolutionaries used the phrase as anti-monarchist propaganda, portraying Marie Antoinette as insensitive to the suffering of the poor. Over time, the myth stuck, despite no historical record of her ever saying it.
So who did say it?
The phrase appeared in the autobiography of philosopher Jean-Jacques Rousseau (photo #8), “Les Confessions,” written in 1765 and published in 1782‡. The original French quote is:
Enfin je me rappelai le pis-aller d’une grande princesse à qui l’on disait que les paysans manquaient de pain, et qui répondit: Qu’ils mangent de la brioche.
|
The English translation:
Finally I remembered the last resort [i.e., course of action] of a great princess who, when told that the peasants had no bread, replied: “Let them eat brioche.”
Rousseau did not name the person who supposedly said “Qu’ils mangent de la brioche.” In “Confessions,” he attributes the phrase to “a great princess” (une grande princesse), but he does not specify who she was.
Who Might Rousseau Have Meant?
Since Rousseau wrote this before Marie Antoinette even arrived in France (in fact, she was between 10 and 14 years old when he wrote the book), historians believe he may have been referring to an earlier royal figure, possibly:
Maria Theresa of Spain (1638–1683), wife of Louis XIV, who was known for her lack of concern over the stuggles of the common people.
Madame Victoire (1733–1799), one of Louis XV’s daughters and sister to the executed Louis XVI, although there’s no evidence she said it.
An anonymous noblewoman—Rousseau may have simply been referencing a generic example of aristocratic indifference.
And who knows…Rousseau could have simply made the phrase up.
___________________
*Eggs In A Basket Recipe: Cut a round hole in the center of two slices of brioche. Melt a tablespoon or two of butter in a nonstick skillet over medium heat. Add the brioche slices and brown on one side; flip over. Crack two eggs and add one to each hole. Cook until the eggs reach desired degree of doneness.
†The word “crumb” refers to the soft, inner part of a bread loaf—the soft portion inside the crust. Depending on the air pockets within the dough, the crumb can be denser or more airy, coarse or delicate. As bread baking terminology developed in the 18th century, bakers needed a way to distinguish between the soft, airy interior and the crispy crust.
The word “crust” had existed since Roman times, deriving from the Latin crusta, meaning shell or hard outer layer. It entered Old English to describe the hardened outer layer of bread, as well as natural properties that formed a solid surface, like ice or the Earth. At that time, crumb (from Old English cruma) entered from a Germanic word meaning “small piece” that originally referred to broken bits of food, particularly bread.
Essentially, the term split into two meanings: one referring to the texture of the bread (crumb), and the other to the little pieces that result from breaking or cutting it (crumbs).
††The difference between brioche and challah: Both are enriched breads, meaning they contain eggs, fat, and sometimes a bit of sugar. But they differ in ingredients, origin, flavor, and texture:
Brioche originated in France and uses butter as its fat. It can be used in pastry (challah is not). It is often sweeter than challah, softer, more tender, and richer with a fine crumb. It has both sweet and savory uses, from pastries to the uses detailed below. Brioche contains dairy, so is not kosher for eating with meat.
Challah is an Ashkenazi Jewish bread, originating in Central and Eastern Europe, originally to be eaten on the Sabbath and holidays. It is mildly sweet, light, fluffy, and slightly chewy. The fat is oil which is pareve (neither meat nor dairy), so the bread can be eaten with meat per kosher dietary laws). Braiding is a hallmark of traditional Ashkenazi challah, but it is not a requirement.
Both typically use an egg wash, for a shiny, golden crust.
Both can be used for burger buns/sliders/rolls, bread pudding, croutons/breadcrumbs, sandwiches/toast/rolls.
‡Rousseau’s “Confessions,” published posthumously in 1782 but written between 1765 when Marie Antoinette was either a 10 year-old-in Austria or a 15-year-old princess in France (neither a “great princess” nor known to Rousseau—they never met, and the quote was never published elsewhere). The book was released in two volumes, with Volume 1 coming out in 1782 and Volume 2 following in 1789—the year that the French Revolution began. The work was groundbreaking for its time as one of the earliest autobiographies, where Rousseau openly explored his personal life, emotions, and flaws, creating a new genre of self-reflection in literature.
CHECK OUT WHAT’S HAPPENING ON OUR HOME PAGE, THENIBBLE.COM.
|


