|
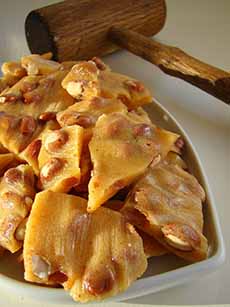
You’ve never made peanut brittle before? It’s time: March is National Peanut Month.
We’re presenting a recipe from chef Mark Dowling of LearnToCook.com, a website dedicated to getting the whole family in the kitchen with easy video recipes showcasing the basics of cooking.
His easy recipe for peanut brittle is below. Chef Dowling was kind enough to take the time to create our special request: a variation for St. Patrick’s Day that adds a touch of Irish whiskey.
For other occasions, you can substitute the spirit of your choice; and use whatever nuts you like. (We love pistachio brittle.)
You can keep the recipe kid-friendly by enhancing it with seeds (flax, pepita/pumpkin, and/or sesame seeds), mini chocolate chips, crumbled bacon, or chile heat.
The recipe follows, but first:
> National Popcorn Day is January 19th.
> National Peanut Brittle Day is January 26th.
> National Candy Day is November 4th.
> A recipe for popcorn peanut brittle (it rocks!).
> The history of peanut brittle.
> The history of popcorn.
> The history of peanuts.
> The history of candy.
EASY PEANUT BRITTLE RECIPE
Ingredients For 5 Pounds Of Brittle
4 cups granulated sugar
16 ounces light corn syrup
8 ounces water OR replace with 8 ounces Irish whiskey or other spirit
4 ounces butter
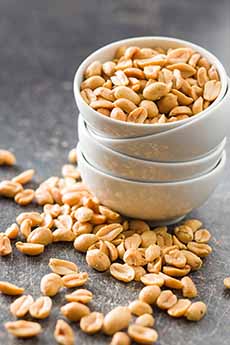
5 cups raw peanuts
1 tablespoon baking soda
Candy thermometer, preferably a clip-on
Preparation
1. COARSELY CHOP the nuts. Sift baking soda to eliminate any lumps.
2. BUTTER two cookie sheet trays/half sheet pans and set aside.
3. PLACE sugar, corn syrup, water, OR optional whiskey and butter in a saucepan. Bring to a boil over medium-high heat, stirring regularly to avoid scorching. Clip a candy thermometer to the side of the pot.
4. REDUCE heat to medium and continue boiling steadily until the mixture reaches 275°F. This might take about 35 minutes. Stir frequently. When you reach 275°F…
5. SIR in the nuts. Then continue to cook over low heat. Keep stirring regularly. At this stage, you want the mixture to reach 295°F, the “hard crack stage.” It might take another 15 minutes to get there, but keep a close eye on the thermometer so it doesn’t overcook!
6. REMOVE the pan from the heat and remove the thermometer.
7. SPRINKLE in baking soda; stir thoroughly to combine. POUR immediately onto the buttered sheet pans. Use two forks to lift up and separate the mixture as it cools.
8. COOL thoroughly overnight. Then break up as desired and store in an airtight container.
Adults only: Sip some Irish whiskey as you enjoy your whiskey brittle.
|