|

[1] Tofu salsa verde makes a delicious salad dressing and all-around condiment (photo © House Foods).
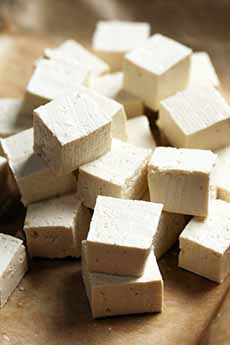
[2] Cubes of fresh tofu (photo © Kamala Bright | Unsplash).
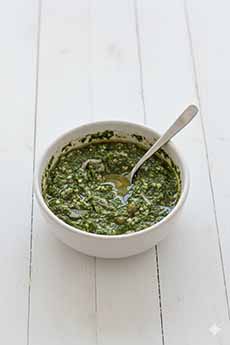
[3] Salsa verde (Gemini Photo).

[4] Parsley is the base for Old World, or European, salsa verde. Mexican salsa verde, made with tomatillos and chiles, is a culinary cousin.
|
|
We’re in an Asian state of mind today; in addition to this homemade ramen soup recipe, we whipped up a green salad with a salsa verde tofu dressing.
Tofu is a wonderful ingredient for salad dressing, adding protein and fiber to a condiment that typically has neither.
This recipe was created by Debi Mazar and Gabriele Corcos, stars of Cooking Channel’s show Extra Virgin. They used House Foods Organic Soft Tofu, but you can use any soft/silken tofu.
Below:
> Recipe: romaine hearts salad with tofu salsa verde.
> What is salsa verde?
Elsewhere on The Nibble:
> What is tofu?
> Tofu health benefits.
> More tofu recipes.
> The history of tofu.
> The year’s 6 soy food holidays.
> The year’s 11 Japanese food holidays.
> The different types of salsa.
ABOUT SALSA VERDE
First, there are two different basic salsas verde. Both are green sauces. The one used in this recipe is the European herbed-based sauce; we’ll designate it Old World or herb-based salsa verde. The other is the New World, tomatillo-based salsa verde, using the small green fruit that’s native to the Aztec Empire. See the comparison chart below.
Old World Salsa Verde
Old World salsa verde is a cold, rustic sauce/dressing with a base of parsley plus anchovies, capers, garlic, olive oil, onion, parsley, vinegar, and sometimes, mustard. The parsley gives the sauce its green tint.
The concept for the family of herb-based cold sauces common in Italy (salsa verde), France (sauce verte), and Germany (Grüne Sosse [Soße]) likely originated in the Near East more than 2,000 years old.
Historical evidence suggests that the basic formula—pounding fresh herbs with oil and vinegar—originated in ancient-day Levant and Mesopotamia*.
The Roman Legions encountered these aromatic herb pastes during their Eastern campaigns and brought the concept home, where it became a staple for preserving and flavoring meats. From there it traveled to other parts of what is now Europe.
Today salsa verde is used as a condiment or dipping sauce for meats, fish, poultry, or vegetables. It’s a great accent to many dishes; and because it’s so flavorful, you can cut back on added salt.
In some regions, cubed bread is soaked in vinegar and then blended with the other ingredients, creating an emulsion somewhat similar to a vinaigrette.
Another variation, gremolata, is the traditional accompaniment to osso bucco, the popular braised veal shank dish.
Our favorite uses: a condiment with meat (from lamb, pork or rib roast to veal and venison), poultry, pasta, potatoes and other vegetables (we love it with sautéed string beans) or salad.
The recipe follows.
New World Salsa Verde
Another salsa verde was developed halfway around the world, also around 2,000 years ago, in the Aztec Empire (modern Mexico). The base ingredient is the tomatillo, a green berry that is not related to the red tomato but is sometimes called field tomato or husk tomato.
The Aztecs called the sauce miltomatl (Nahuatl [Aztec language] for the husked berry (“tomatillo” and “salsa verde” were bestowed much later by the Spanish).
Tomatillos, green chiles, and squash seeds were ground into a sauce that was served as a sophisticated condiment with seafood, turkey, and venison.
|
This and other sauces were documented by Spanish physician Francisco Hernández and missionary Bernardino de Sahagún in the 1500s, noting how essential they were to the local diet.
In 1571, the Spanish priest Alonso de Molina officially applied the word salsa (Spanish for sauce) to these condiments. The Spanish also:
Introduced European herbs like cilantro and onions to the recipe.
Exported the tomatillo to Europe and Asia (although it never gained the same foothold there as the red tomato).
Types Of Mexican Salsa Verde
As Mexican cuisine evolved, salsa verde was created in different styles based on how the tomatillos were prepared:
Cruda (raw): The tomatillos are ground fresh, resulting in a bright, sharp, and acidic flavor.
Cocida (boiled): The tomatillos are boiled to mellow their tartness and create a smoother, sweeter sauce.
Asada (roasted): The tomatillos and other ingredients are charred on a comal (griddle), adding a smoky depth. This version is a staple of Central and Southern Mexican street food.
Salsa verde didn’t become common in the U.S. until the mid-20th century, as Tex-Mex cuisine spread nationwide.
In 1941, the La Victoria company in Los Angeles introduced the first commercially bottled green taco and enchilada sauces to the American market.
The New Mexico style of salsa verde originated in New Mexico, where salsa verde often refers to a sauce made with the local Hatch green chiles (roasted) rather than with tomatillos.
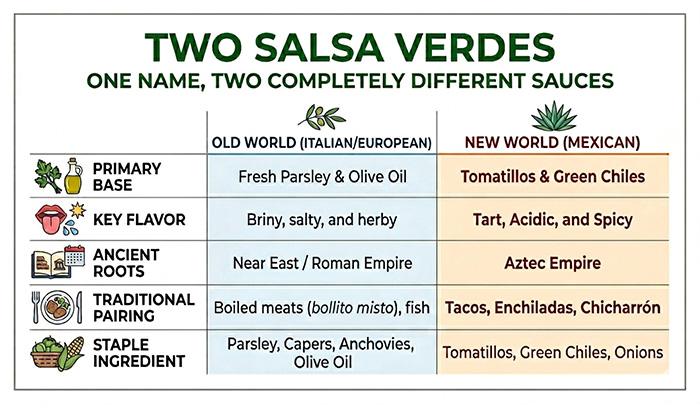
Gemini Chart.
HEARTS OF ROMAINE SALAD WITH TOFU SALSA VERDE (SALAD DRESSING)
In this recipe, Debi and Gabriele substitute tofu for the olive oil.
Dressing Ingredients
1/2 package (14 ounces) soft (silken) tofu
1/3 cup parsley leaves, roughly chopped
2 tablespoons capers (packed in vinegar)
2 oil-packed anchovies
1 clove garlic, peeled
Juice of 1/2 lemon
Kosher salt and freshly ground black pepper
3 hearts of romaine, chopped, and any other desired salad ingredients
Preparation
1. COMBINE tofu, parsley, capers, anchovies, garlic, and lemon juice in a food processor and blend until smooth.
2. PLACE romaine and other salad ingredients in a large bowl and toss with salsa verde. Leftover dressing can be kept refrigerated in a covered container for 2 days.
VARIATION: To make this recipe vegetarian/vegan, replace the anchovies with 2 more teaspoons of capers.
Find more delicious recipes with tofu at House-Foods.com.
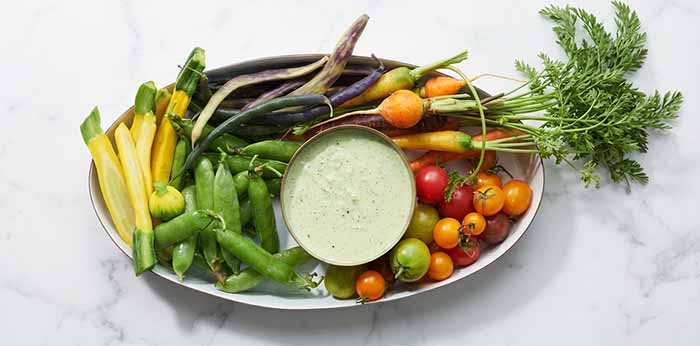
[5] Salsa verde can also be a dip for crudités (Abacus Photo).
________________
*The Levant is an English term that first appeared in 1497. It originally referred to the “Mediterranean lands east of Italy.” The historical area comprises modern-day Iraq, Israel, Jordan, Lebanon, Palestine and Syria. Among other popular foods, Levantine cuisine gave birth to baklava, balafel, kebabs, mezze (including tabbouleh, hummus and baba ghanoush), pita and za’atar, among other dishes that are enjoyed in the U.S. and around the world.
Mesopotamia was located further east, centered between the Tigris and Euphrates rivers. Together, the Levant and Mesopotamia formed the two main parts of the Fertile Crescent.
Mesopotamia primarily comprised modern-day Iraq and parts of eastern Syria and southeastern Turkey. The two regions were separated by the Syrian Desert. A historical note: The Assyrians, from northern Mesopotamia, eventually conquered and controlled the Levant.
CHECK OUT WHAT’S HAPPENING ON OUR HOME PAGE, THENIBBLE.COM.
|


